Posts in Food
Japanese Breakfast
Japanese Breakfast


Goodbye pancakes and bacon: move aside and make room for a tastier and healthier alternative: Traditional Japanese Breakfast! I recently visited a brunch spot in San Francisco called Bon, Nene that served this kind of breakfast set, and felt myself feeling quite salty at the end after spending $18 + tax and not feeling very full. So a few weeks ago I headed over to Nijiya market in Japantown to pick up some ingredients to make my own Japanese Breakfast for two (definitely under $18). Shout out to my teammate Emma for eating my creations :)


Japanese Breakfast


Otherwise known as 朝食 —choushoku—or 朝ご飯 —asagohan—a traditional Japanese breakfast consists of a variety of fresh ingredients that contribute to a colorful spread (looks like I still remember a bit of Kanji from HS Japanese!). A set will usually contain Miso soup, steamed rice, some kind of grilled fish (yakizakana), rolled egg omelette (tamagoyaki), and more adventurous items like natto (fermented soybeans) and umeboshi (a kind of pickled plum).

Despite the health benefits of natto, I'm not a big fan and so I left it out of the meal. I also replaced the rather sour umeboshi with some sautéed zucchini and enoki mushrooms to fulfill vegetable portion of meal.


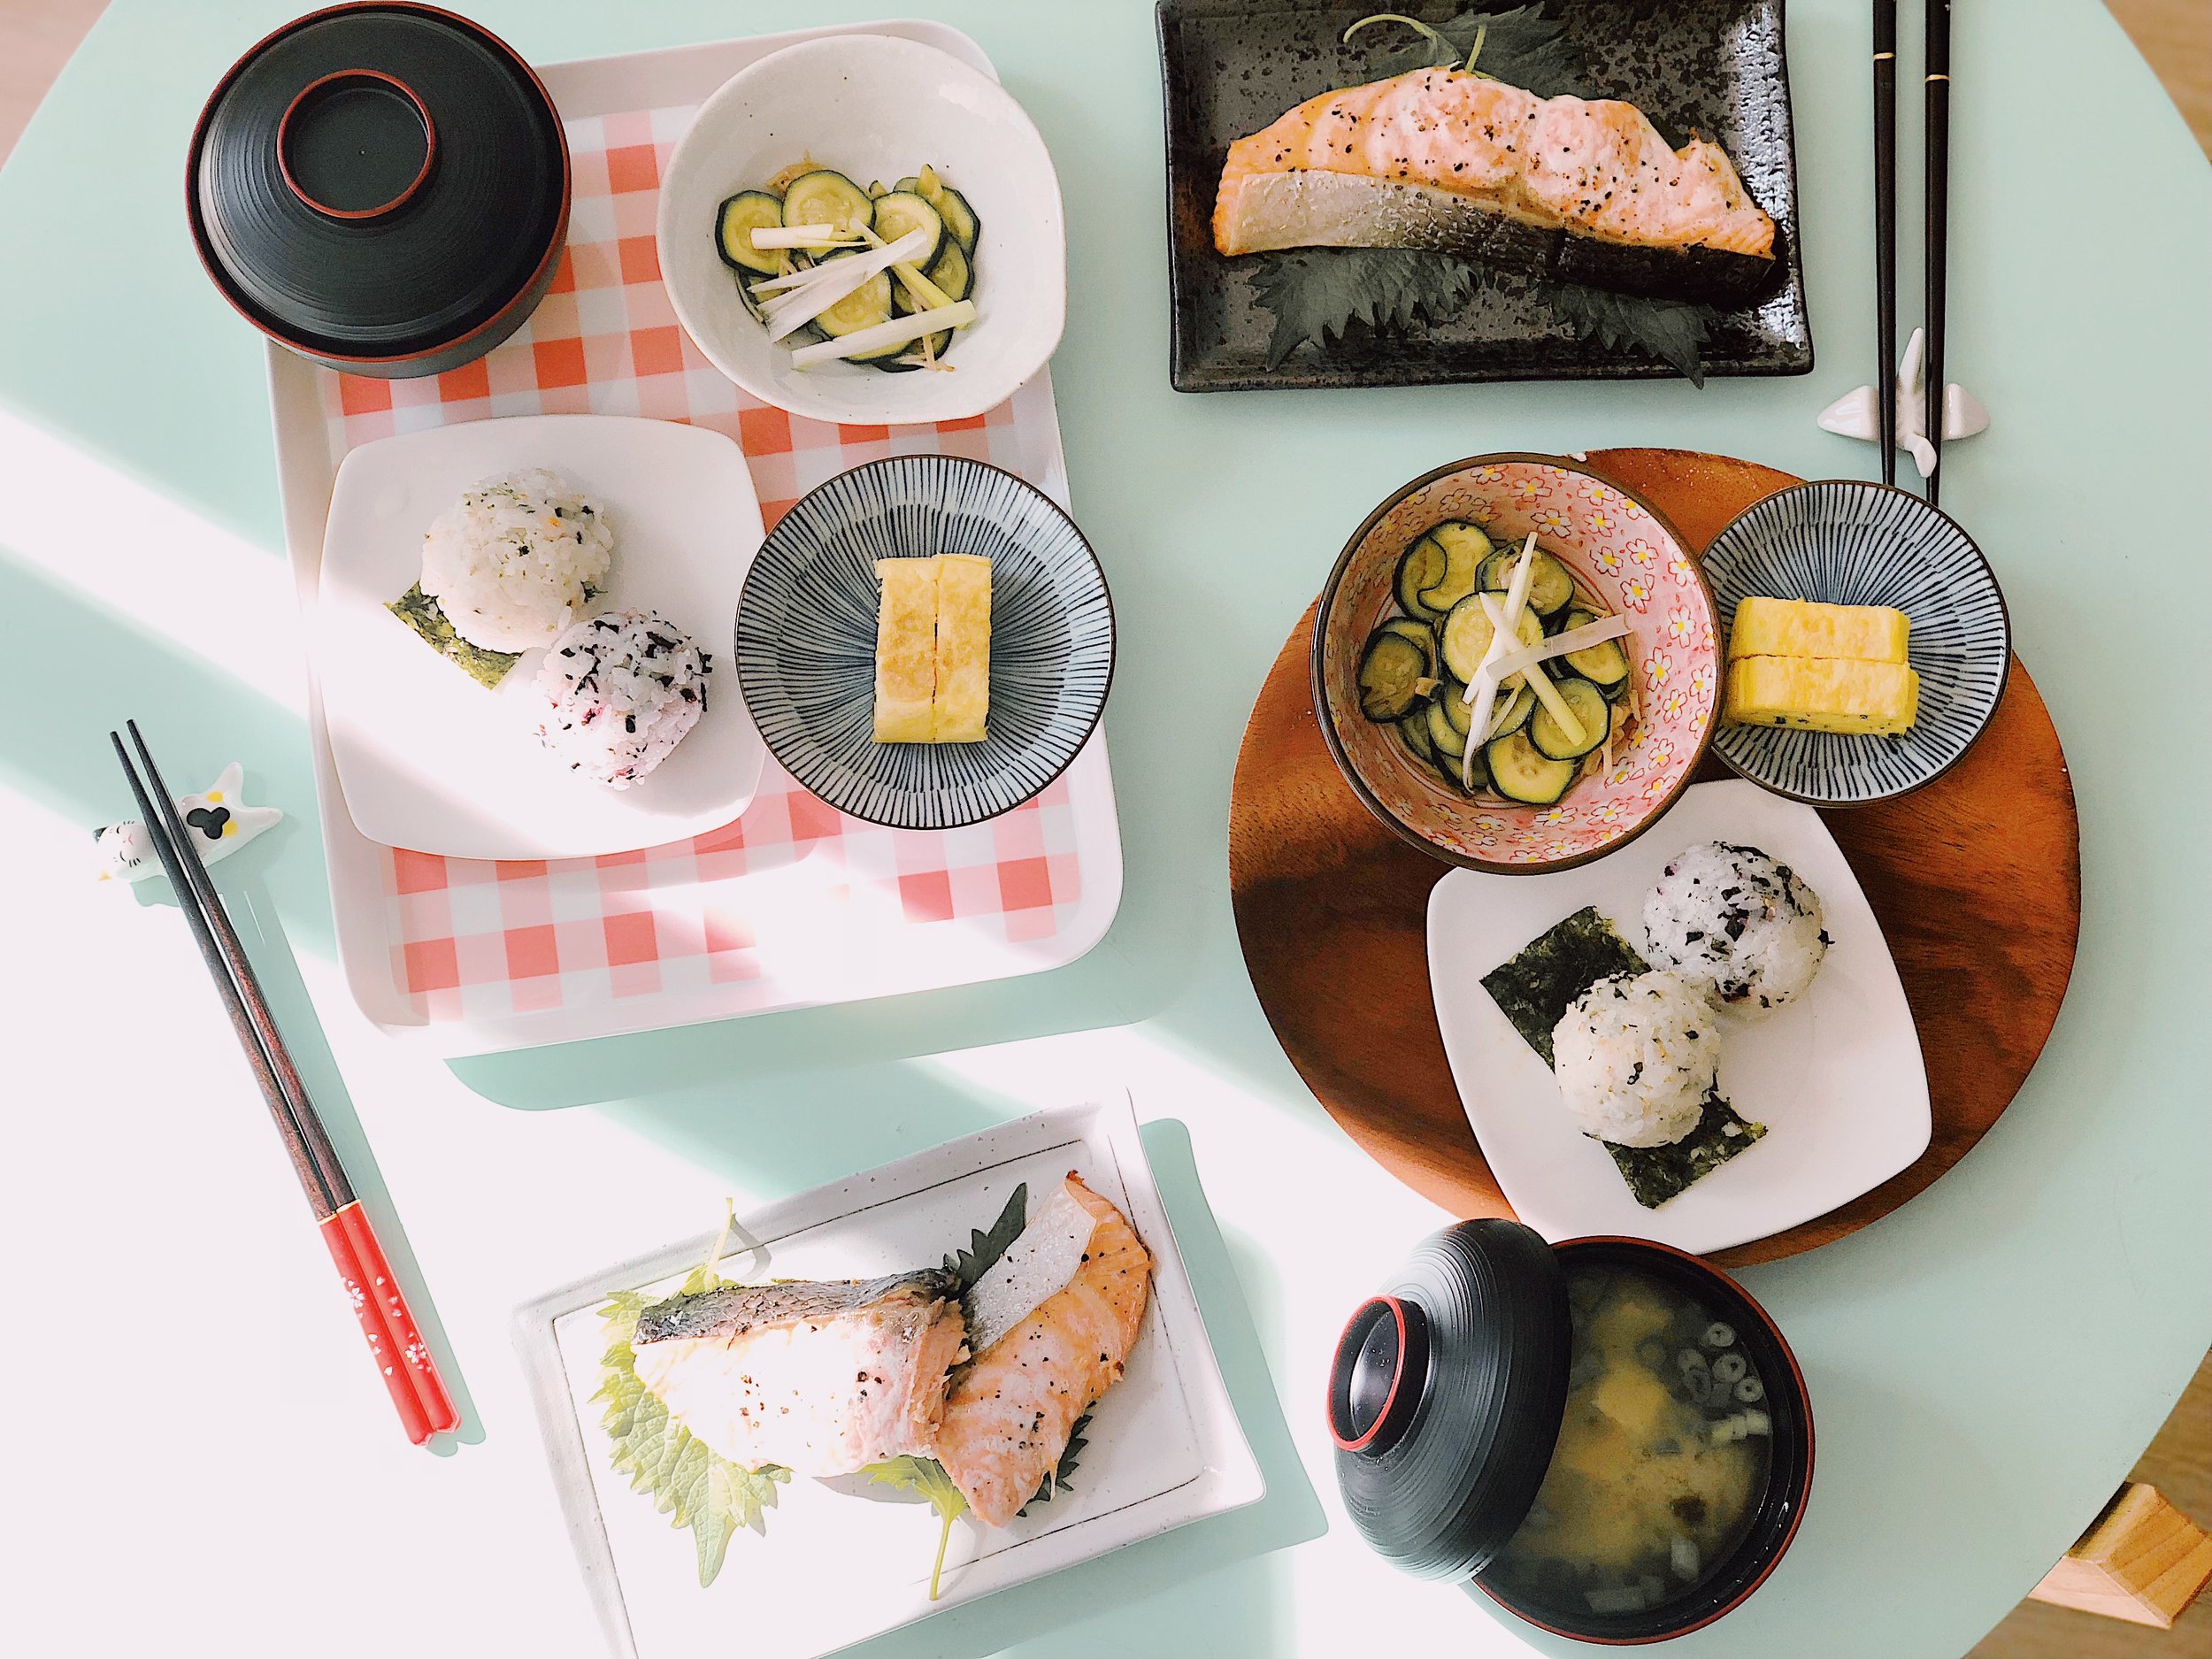
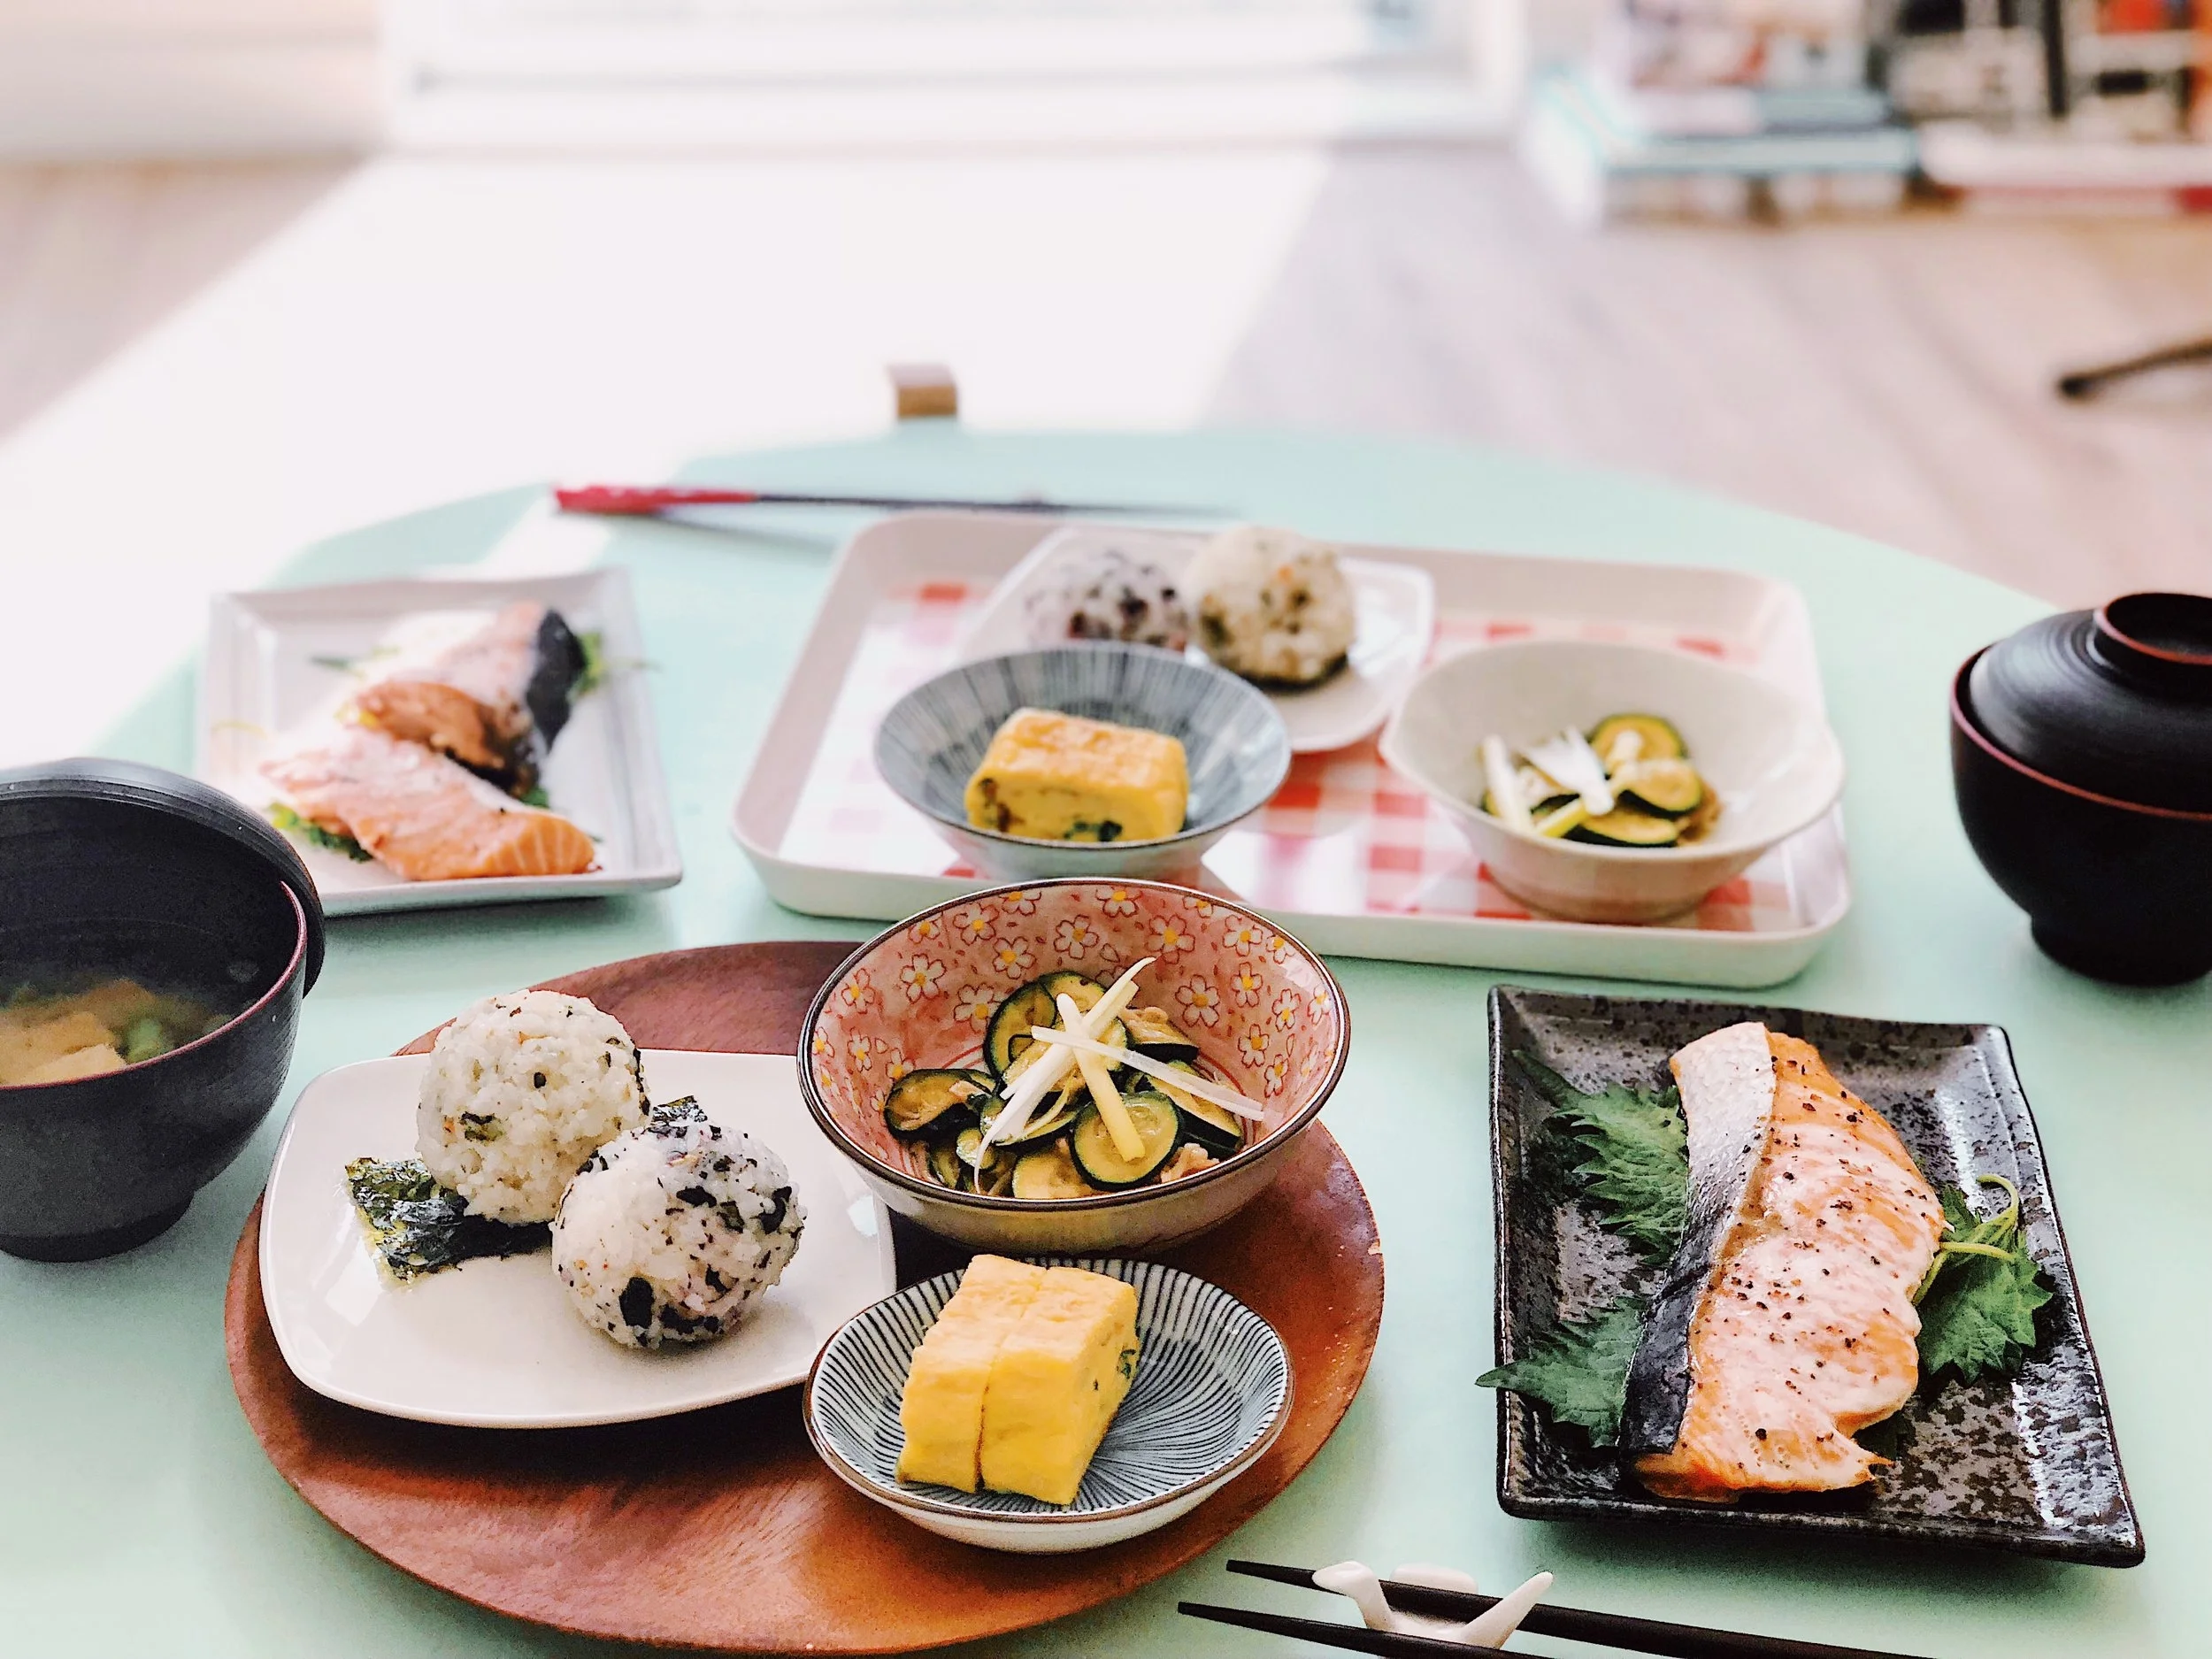
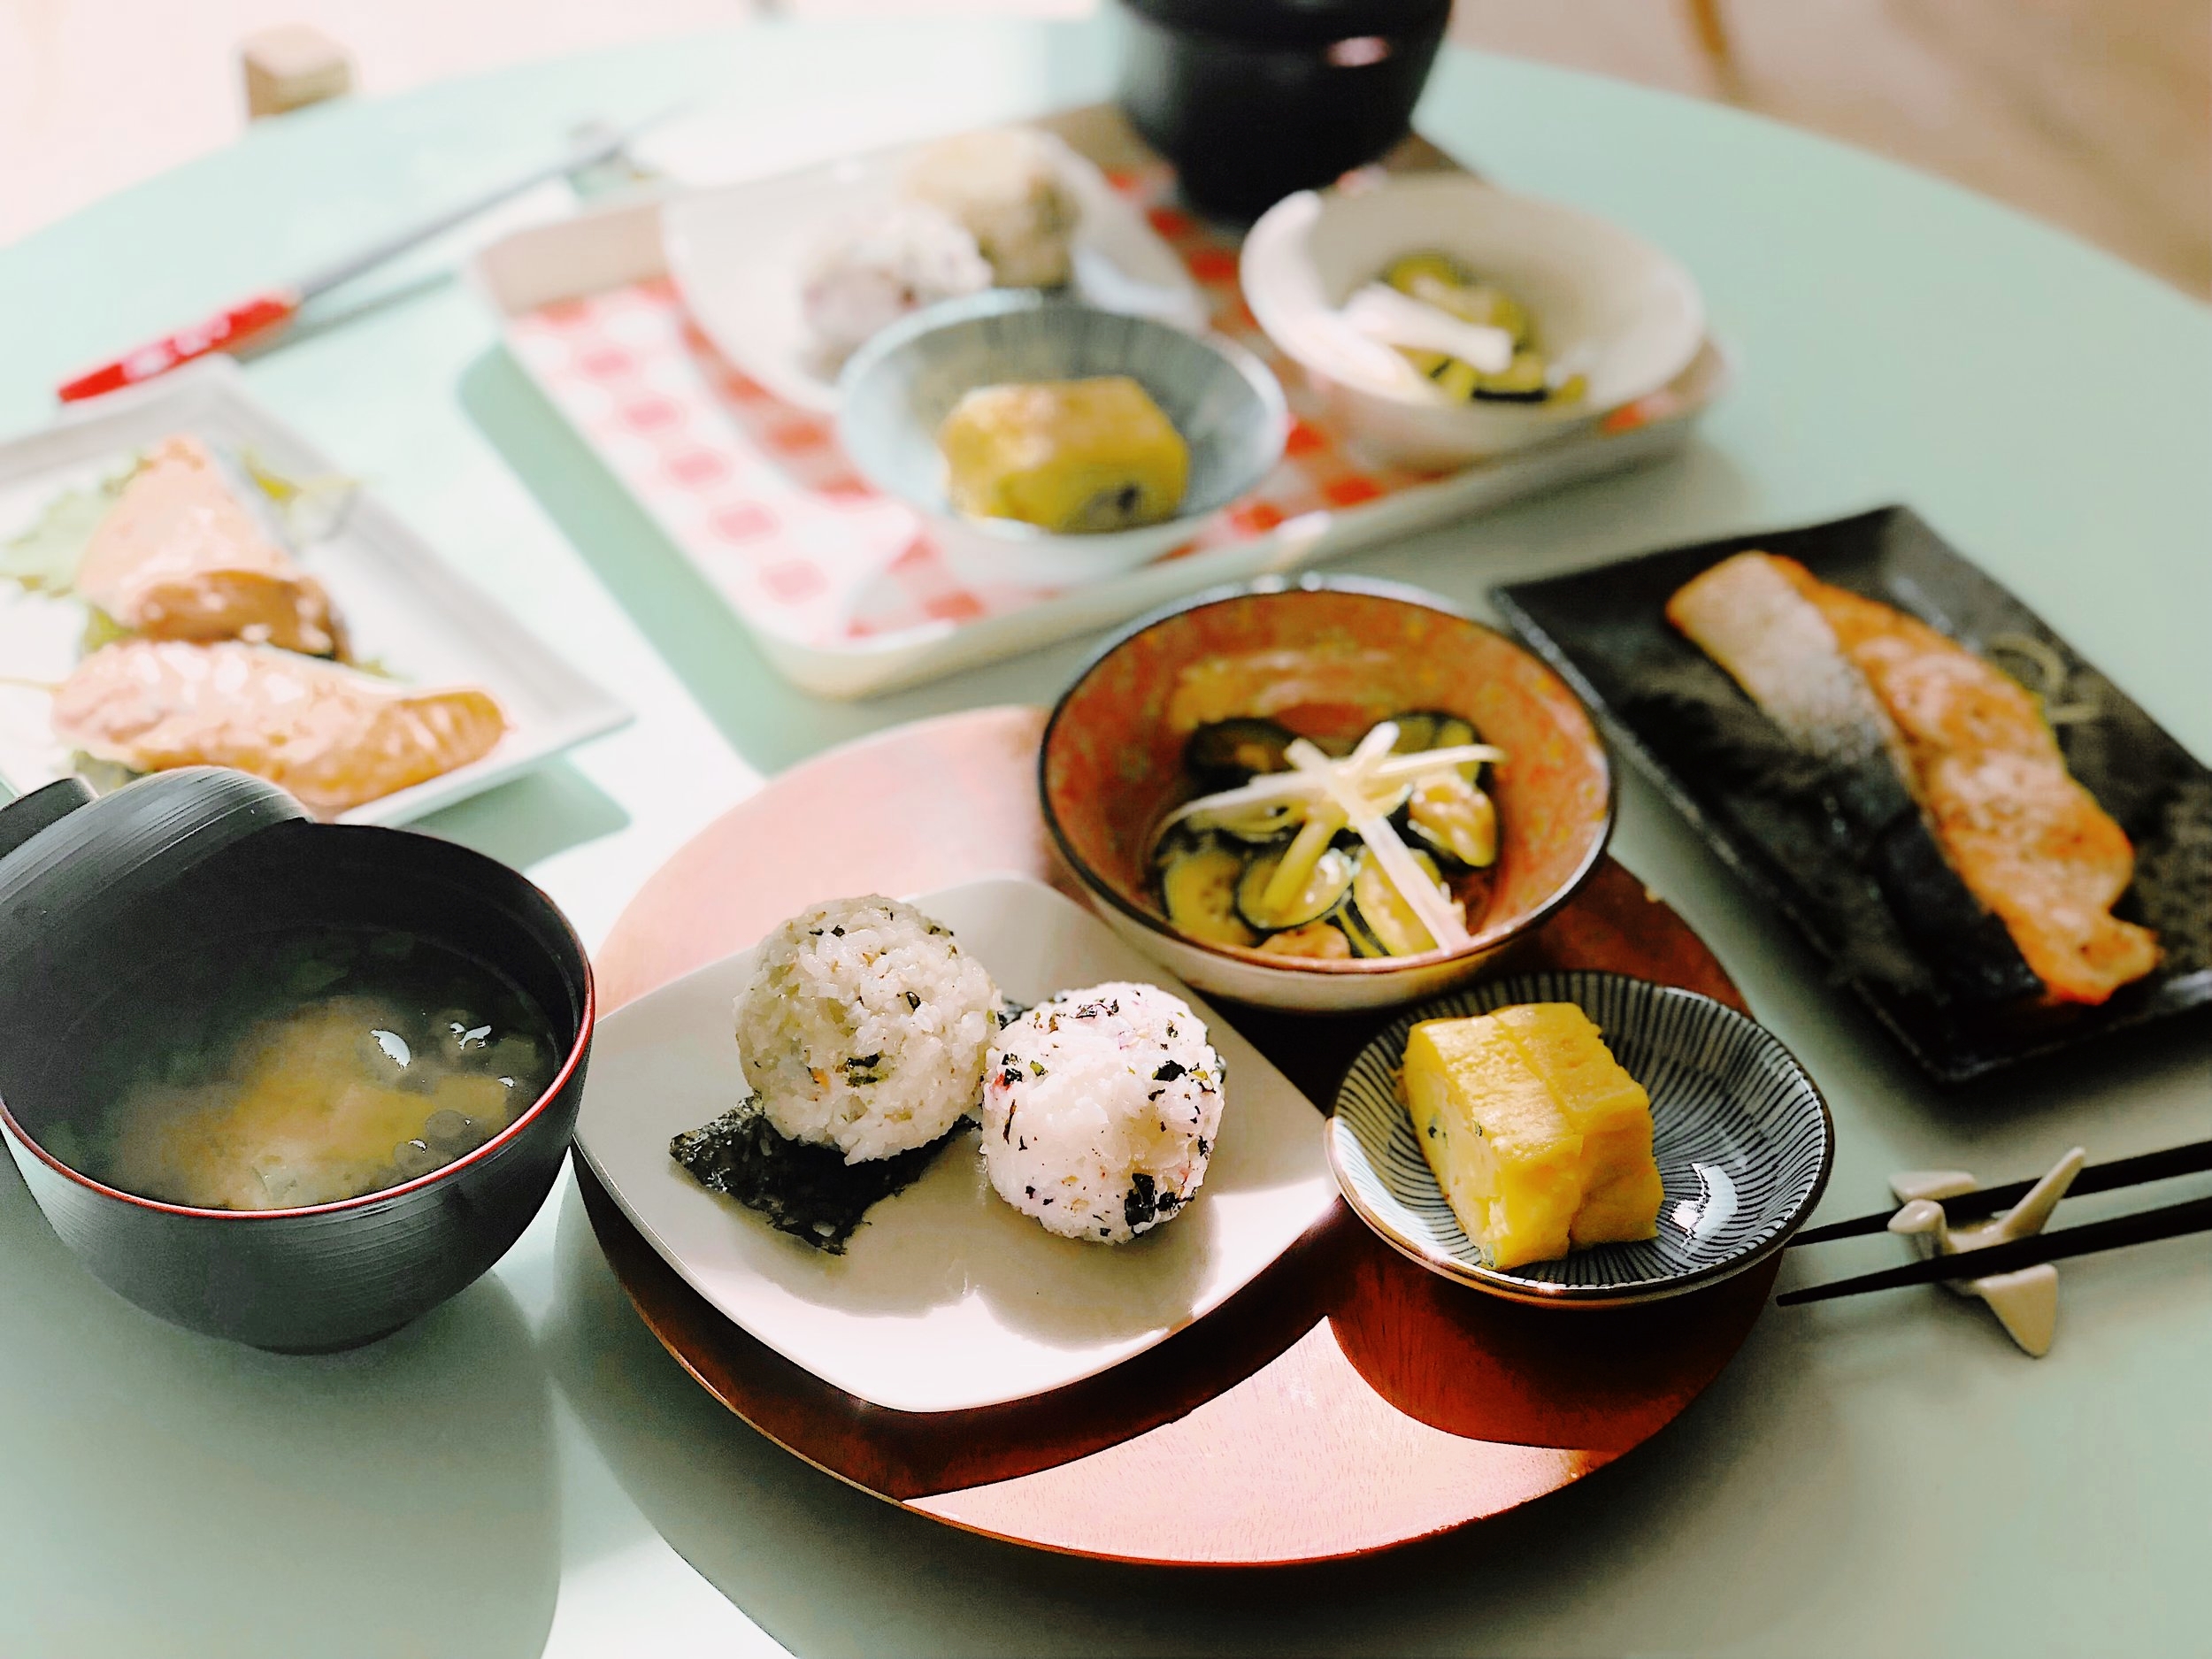
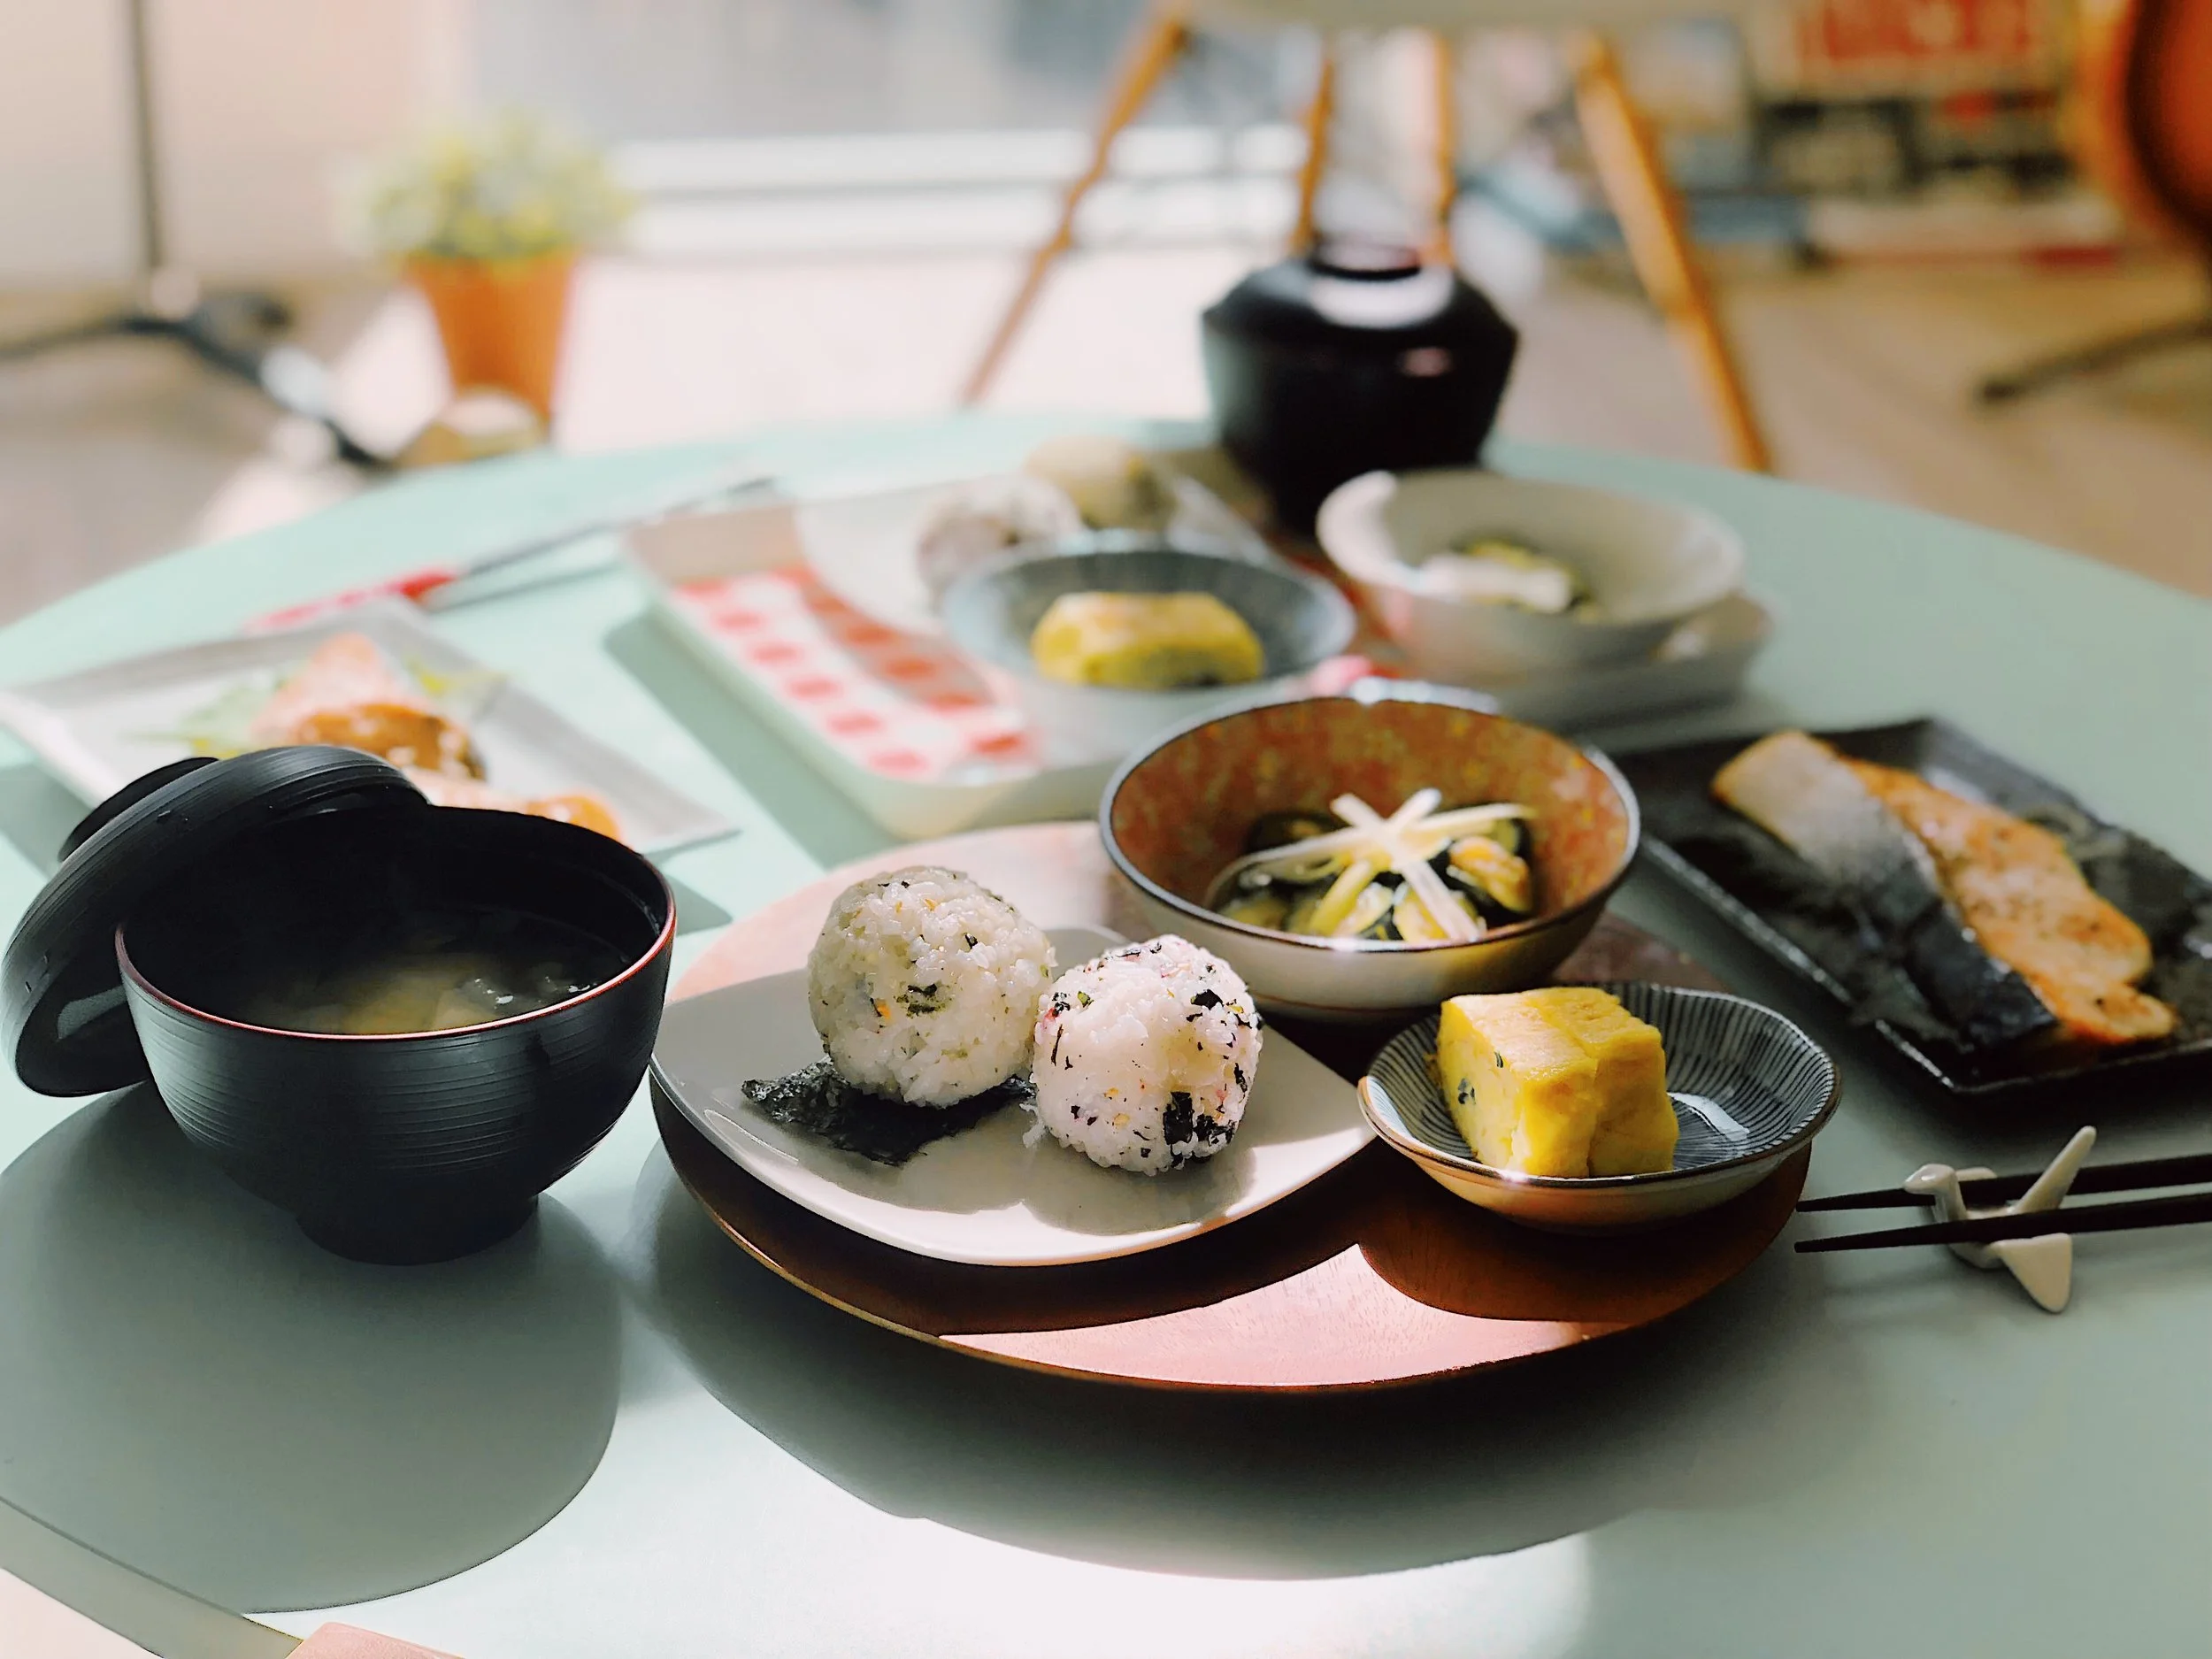
My Japanese breakfast consisted of (from left to right, top to bottom):  Miso soup, sautéed zucchini and enoki mushrooms, oven-baked salmon, onigiri, and tamagoyaki. These were all fairly easy to make, and I'll try to summarize the recipes to the best of my ability. Do note that I rarely measure ingredients when I'm cooking (as opposed to when I'm baking), so please season everything according to your own taste buds!


Baked Salmon
Baked Salmon


Oven-baked Salmon

To make the salmon, lay the filets skin side up on a sheet of parchment paper over a baking tray. Sprinkle with salt and pepper put inside a 350˚F (177˚C) oven for around 20-25 minutes, depending on how well-done you'd like it to be. Because I like my salmon a little more rare, I usually will turn off the oven around the 15 minute mark and leave the salmon in the oven for another 5-10 minutes. After taking it out of the oven, I served it with 2-3 pieces of shiso leaf underneath.

Because I love salmon sashimi so much, and because salmon has enough flavor to stand on its own, I try not to do too much when I'm seasoning it. Salt and pepper (and a little bit of olive oil if you're feeling fancy) is totally sufficient to season a fresh piece of salmon.


Tamagoyaki


Tamagoyaki

It's quite difficult to explain how tamagoyaki achieves its shape in words, so I'll link you to this video which taught me how to make it (if you love this YouTube channel as much as I do, let's talk). It helps if you have a square pan, but the overall shape is still totally achievable with a circular pan. Your rolls will just end up looking a bit uneven on the sides like mine. My egg mixture included 4 eggs, scallions, a pinch of salt, and a pinch of sugar.


Onigiri


Onigiri

Next up on the menu is onigiri, or rice balls that contain a variety of fillings such as salmon or umeboshi. I unfortunately didn't put too much effort into making these since the triangular ones are quite difficult to shape. To simplify the process a bit, I rolled my onigiri into circles and coated them with furikake. I used two kinds of furikake: one containing bits of umeboshi seasoning and a plain one consisting of seaweed and sesame seeds.


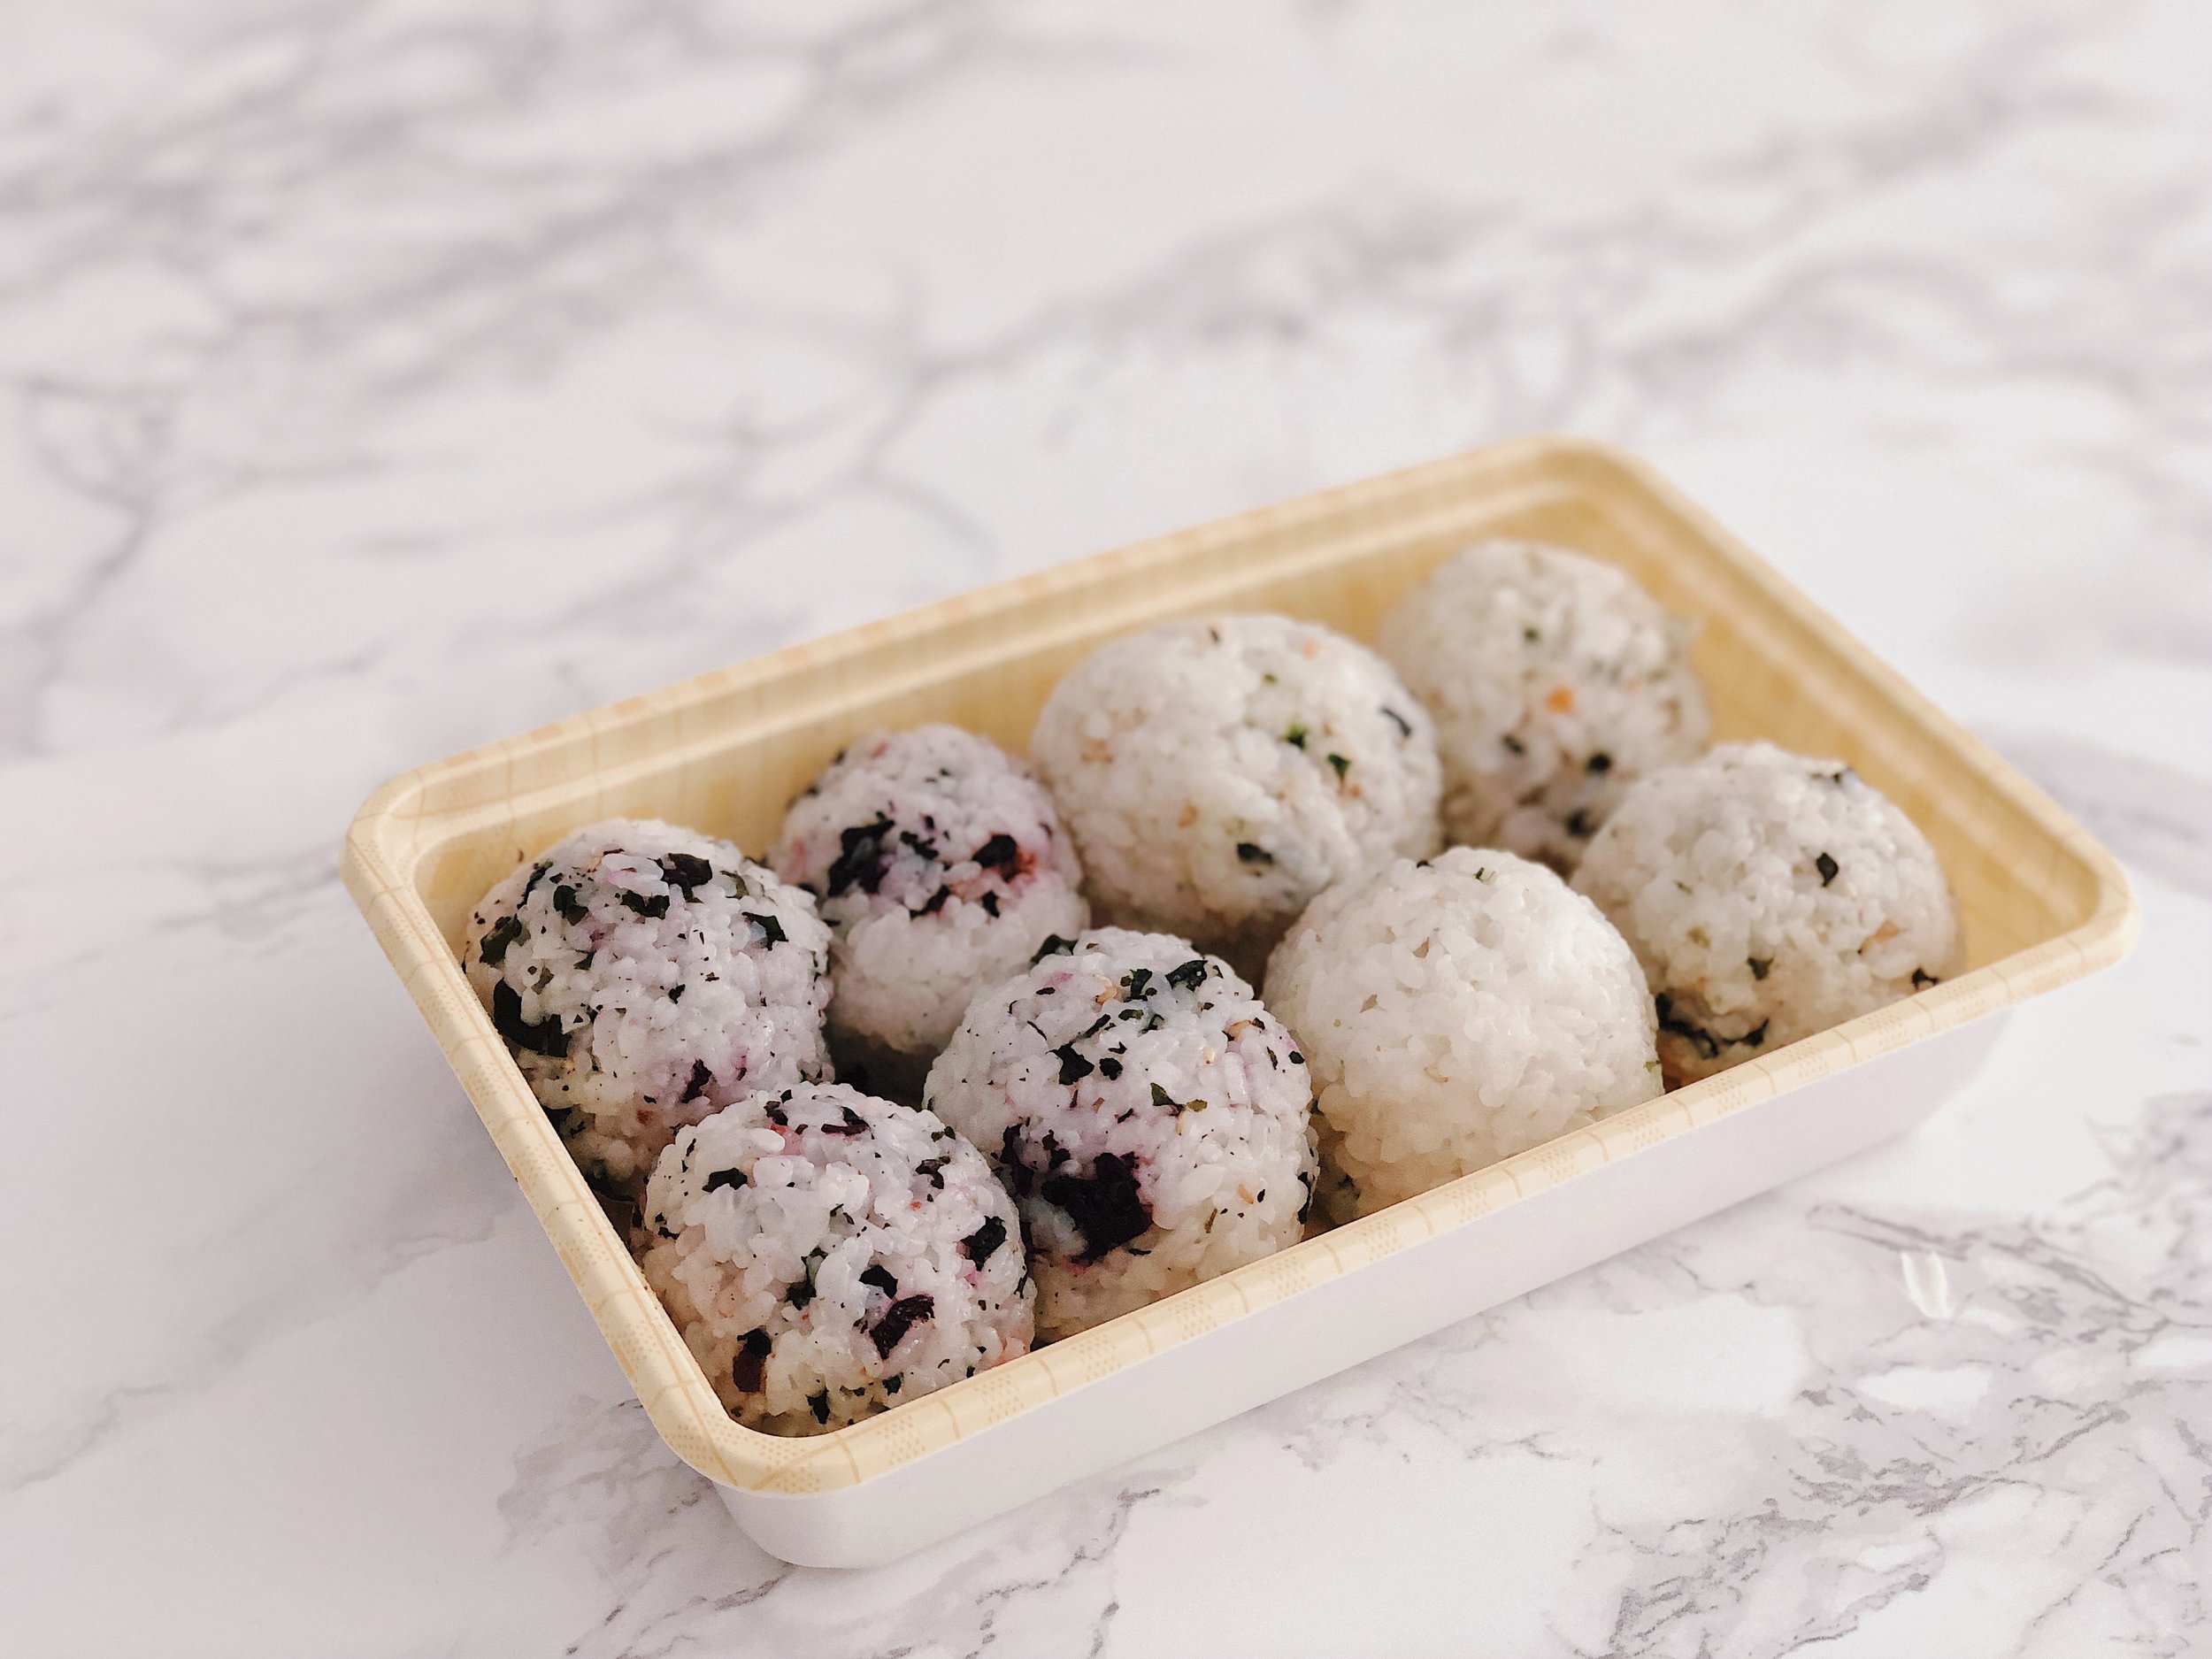
To make these, start off by cooking a cup of sushi rice. Set aside to cool after it's cooked to risk burning your hands. Separate into two portions and mix in the furikake seasoning into each portion. To shape the onigiri, wet your hands and sprinkle on some salt to prevent the rice from sticking to your palms. Roll them into spheres and you're done!


Japanese Breakfast


Miso Soup

To make the miso soup, I brought 3 cups of water to a boil and stirred in 2 tablespoons of dashi miso. Add sliced tofu, seaweed, and chopped scallions at the very end. I learned this bit from my mom: if you're cooking any kind of soup with vegetables, always put them in at the very end for them to retain their green color and freshness.

I learned how to make miso soup from this video, which I suggest watching before you attempt it. It suggests that you use dashi as the soup base, which is also quite simple to make by boiling  water with bonito flakes and then straining them out of the broth.


Japanese Breakfast


Though Bon, Nene didn't impress me very much, another option for Japanese breakfast I actually enjoyed was at a place called Casava. If you don't want to wander too far into the Richmond district, a great option closer to downtown is Samovar Tea Lounge, which serves a lot of healthy breakfast items with their wide selection of teas. Or... you can try making this at home like I did! Most of the recipes are simple enough and have a low chance of failure ;)

♥ Cindy

 
FoodCindy ZhangComment
(Super Easy!) Guava Pastries
Guava Pastries


These Cuban pastries were actually inspired by a visit to Saltroot Café (thanks to my friends Ren and Greg for the delicious recommendation!). Saltroot Café is a small, hole in the wall bakery in Outer Richmond serving guava-filled Brazilian Cheese Breads—also known as Pão de queijo in Portuguese. It was my first time having guava in a dessert, and to my surprise it was such a delicious compliment to the cheese inside the bread that I immediately wanted to get up and buy a few more. Unfortunately it was such a popular flavor that the bakery had sold out for the day (it was only 12:00PM at this point). Ever since then, I've been crazily craving guava, which is definitely a unique craving...


Guava Pastries
Guava Pastries


To my sadness, guava-filled desserts are not very common in San Francisco, so Plan B was to try to get my hands on some guava jam and to make my own. After searching a plethora of grocery stores—Safeway, Trader Joes, World Market, even the wallet-abusing Whole Foods, I wasn't able to find guava jam or guava paste anywhere. So I had to resort to good-old Amazon to purchase this can of guava paste (which looks very foreign and like it doesn't belong on any counter of any American grocery store).

The Brazilian Cheese Breads turned out to be quite difficult to master, so I opted for an easier option: Guava Pastries (also known as Pastelitos de Guayaba in Spanish), which luckily required only 5 ingredients: store-brought puff-pastry, cream cheese, guava paste, sugar, and egg.


Guava Pastries


I incorporated a tiny bit of sugar into my cream cheese to sweeten the mixture a little—but beware that guava-flavored jams/jellies are also very sweet themselves, so make sure to leave the work of sweetening the pastry to them and not the cream cheese.


Guava Pastries
Guava Pastries
Guava Pastries


Cut up each sheet of puff pastry into 9 pieces and spread some cream cheese and some chopped guava paste on the bottom layer. Brush an egg around the corners to seal the top layer, and then make slits to ensure that pastry has a nice puff. Finish off with a nice layer of egg wash.


Guava Pastries


I like to add a bit of a pattern around the edges with a fork and to ensure that they're completely sealed. Then pop those in a 400˚F (200˚C) oven for 20-25 minutes until golden brown and enjoy! -Staples Easy Button Voice- That was easy, right?


Guava Pastries
Guava Pastries


Super Easy Guava Pastries

Ingredients

  • 2 sheets of puff pastry, frozen *
  • 7 oz (around 200 g) of guava paste **
  • 1 egg
  • 2 tsp sugar
  • 7 oz (around 200 g) of cream cheese

Takes , Makes 9.

* I used store-brought, since watching how pastry is made/judged on the Great British Baking Show has frightened me too much to even bother
** I used a little less than a regular-size box


Instructions

  1. Pre-heat the oven to 400˚F (200˚C).

  2. Take out the puff pastry out of the freezer. It's important that the puff pastry stays cold, since the colder it is, the more it will puff up in the oven.

  3. Slice both sheets of the frozen puff pastry into 9 equal squares. I found that doing this while the pastry is still cold was easier and made for more even pieces. Roll out each of the squares into larger squares.

  4. Thoroughly mix the sugar into the cream cheese with either a hand mixer—or if you want more of a bicep workout, you can just use a regular whisk like me. :)
  5.  
  6. Slice up the guava paste into small pieces (Mine were around 1'"x 1/2" and half a cm in thickness). Then spread a small amount of cream cheese in the center of each bottom layer square of the puff pastry. Top with two pieces of guava paste.

  7. Beat an egg and brush the outside edges of each bottom layer pastry square.

  8. Cover each bottom layer (now filled with cream cheese and guava paste) with the top layer pastry. Press together to ensure that they are well-sealed (you can also use a fork like I did to create a pattern around the edges and to seal them together more tightly). Make 3 small slits on the top to allow the pastry to puff up easily.

  9. Finish them off with brushing the beaten egg on top of each pastry.

  10. Place them on a baking sheet lined with parchment paper and allow them them to bake in the oven for 20-25 minutes, or until golden brown


These were the perfect treat for one the most horrendously-windy and cold weekends in San Francisco. I sat at home eating these and felt like I was on a beach in Miami :-) If you have some left over, make sure to pop them in the microwave for around 15 seconds before eating (and be careful of the hot guava filling!).

♥ Cindy

 
Food, 2Cindy ZhangComment
Fig, Brie, and Prosciutto Bruschetta


I hosted a game night/potluck at my place a few weeks ago. Unfortunately the afternoon prior was filled with the stress of running to auditions and then miserably failing them because I was out of breath from running—so I didn't have much time to do any real cooking (I was also not in a good mood afterwards to put any love into my food). So I picked up some baguettes, prosciutto, brie, and fig butter from Trader Joe's and threw this bruschetta together. Luckily, they turned out tasty and fancy in the end despite me making minimal effort.


Fig, Brie, and Prosciutto Bruschetta


Topped with arugula, a splash of olive oil and balsamic vinegar, this is a perfect bite to accompany a glass of wine and board games on a cozy Saturday night in. It's sort of upscale/grown-up version of those Totino's Pizza Rolls or Bagel Bites, wouldn't you think? Although... because they require such minimal effort, I wouldn't say they're completely grown up (kind of like me :P).


Fig, Brie, and Prosciutto Bruschetta


Ingredients

I apologize for my eyeballing of ingredients and the fact that I'm not providing exact amounts for each item. My suggestion is just to try and balance the amount of bread you have with the amount of toppings you have. Since we're cooking and not baking, I'll let myself off the hook :)

  • Stick of French Baguette, Italian, or Sourdough Bread
  • Prosciutto
  • Brie
  • Trader Joe's Fig Butter (or, actual figs if you're feeling really grown up!)
  • Arugula
  • Black Pepper
  • Balsamic Vingar
  • Olive Oil


Directions

1. Pre-heat the oven to 375˚F (190 ˚C)

2. Cut the bread into half inch pieces and arrange them on a greased sheet pan. Place a thin slice of prosciutto on each slice of bread and toast in the oven for 5-10 minutes

3. Once the bread and prosciutto have finished toasting, set aside to cool and slice the brie into inch-wide pieces

4. Arrange the brie on top of the prosciutto and spread fig butter/jam on top

5. Add a few sprigs of arugula on top and lightly drizzle with olive oil and balsamic vinegar

6. Top it off with some freshly ground pepper (I avoided adding any additional salt since the prosciutto is quite salty already)


Enjoy! This is easy peasy and is 20392429243 times fancier than Bagel Bites. Time to impress your friends with little to no effort ;)


Food, 2Cindy ZhangComment
Honey Hong Kong Egg Tarts
Hong Kong Egg Tarts
Hong Kong Egg Tarts


Hong Kong Egg Tarts are one of my favorite Dim Sum dessert items. Luckily, they are also one of the easiest desserts to make and require the fewest ingredients (most of which are common staples everyone has in their pantries). I used to make these all the time for potlucks—mostly because of how simple it is and how impressed people were to see a standard Chinese bakery item replicated at home. To simplify the recipe a bit, I made a shortbread crust instead of the widely-known flaky pastry crust seen in restaurants and bakeries. To spice things up a bit, I added honey to the filling to give the egg custard a more interesting flavor profile.


IMG_4425.JPG
Hong Kong Egg Tarts


Although known as a more Chinese item nowadays, this dessert was preceded by the English Custard Tart and the Portuguese pastel de nata. These egg tarts are said to have first appeared in Guangzhou in the 1920s, and later introduced to Hong Kong in the 1940s and 1950s through cha chaan tengs—restaurants that offered affordable, eclectic western inspired menus.


Hong Kong Egg Tarts


Ingredients (makes 12):

Shortbread crust:

  • 2 cups of all purpose flour
  • 1/2 cup (or 1 stick) of butter, unsalted
  • 1 egg
  • 1/4 cup of powdered sugar
  • 1 tsp vanilla extract

Custard Filling:

  • 1/2 cup hot water
  • 1/2 cup of milk
  • 3 large eggs
  • 1/3 cup of sugar
  • 1 tbsp honey
  • pinch of salt
  • 1 tsp vanilla extract

Directions:

1. Pre-heat the oven to 400˚F ( 200˚C)

- Shortbread Crust -

2. Add the flour, powdered sugar, and butter to a large bowl. Beat the egg with the vanilla extract and add to the flour mixture. Knead the dough until smooth and shape into a long log shape

3. Cut the dough into 12 equal pieces. Take out a standard muffin pan and line them with scalloped cupcake papers. Take a piece of the divided dough and place it into one of the cupcake papers. Shape the dough into the pan by spinning the cupcake paper and covering the edges uniformly. Try to avoid a shell that's too thin. Repeat with all 12. (Note that it may be easier to shape these shells at the four corners of the pan—and then place them towards the center when done)

- Custard Filling -

4. Dissolve the sugar and honey into the hot water and add the milk. Set aside to cool

5. Beat the 3 eggs and slowly whisk in the hot water/milk/sugar mixture. Add a pinch of salt and the vanilla extract.

- Assembling and baking the egg tart -

6. Carefully pour the egg mixture into each of the short bread shells, leaving a bit of space on top. Bake for 15-20 minutes or until the egg mixture solidifies.

7. Place aside for 5 minutes to chill, remove the cupcake paper, and enjoy!


Food, 2Cindy ZhangComment