Posts in 2
Truffle Salt Avocado Toast


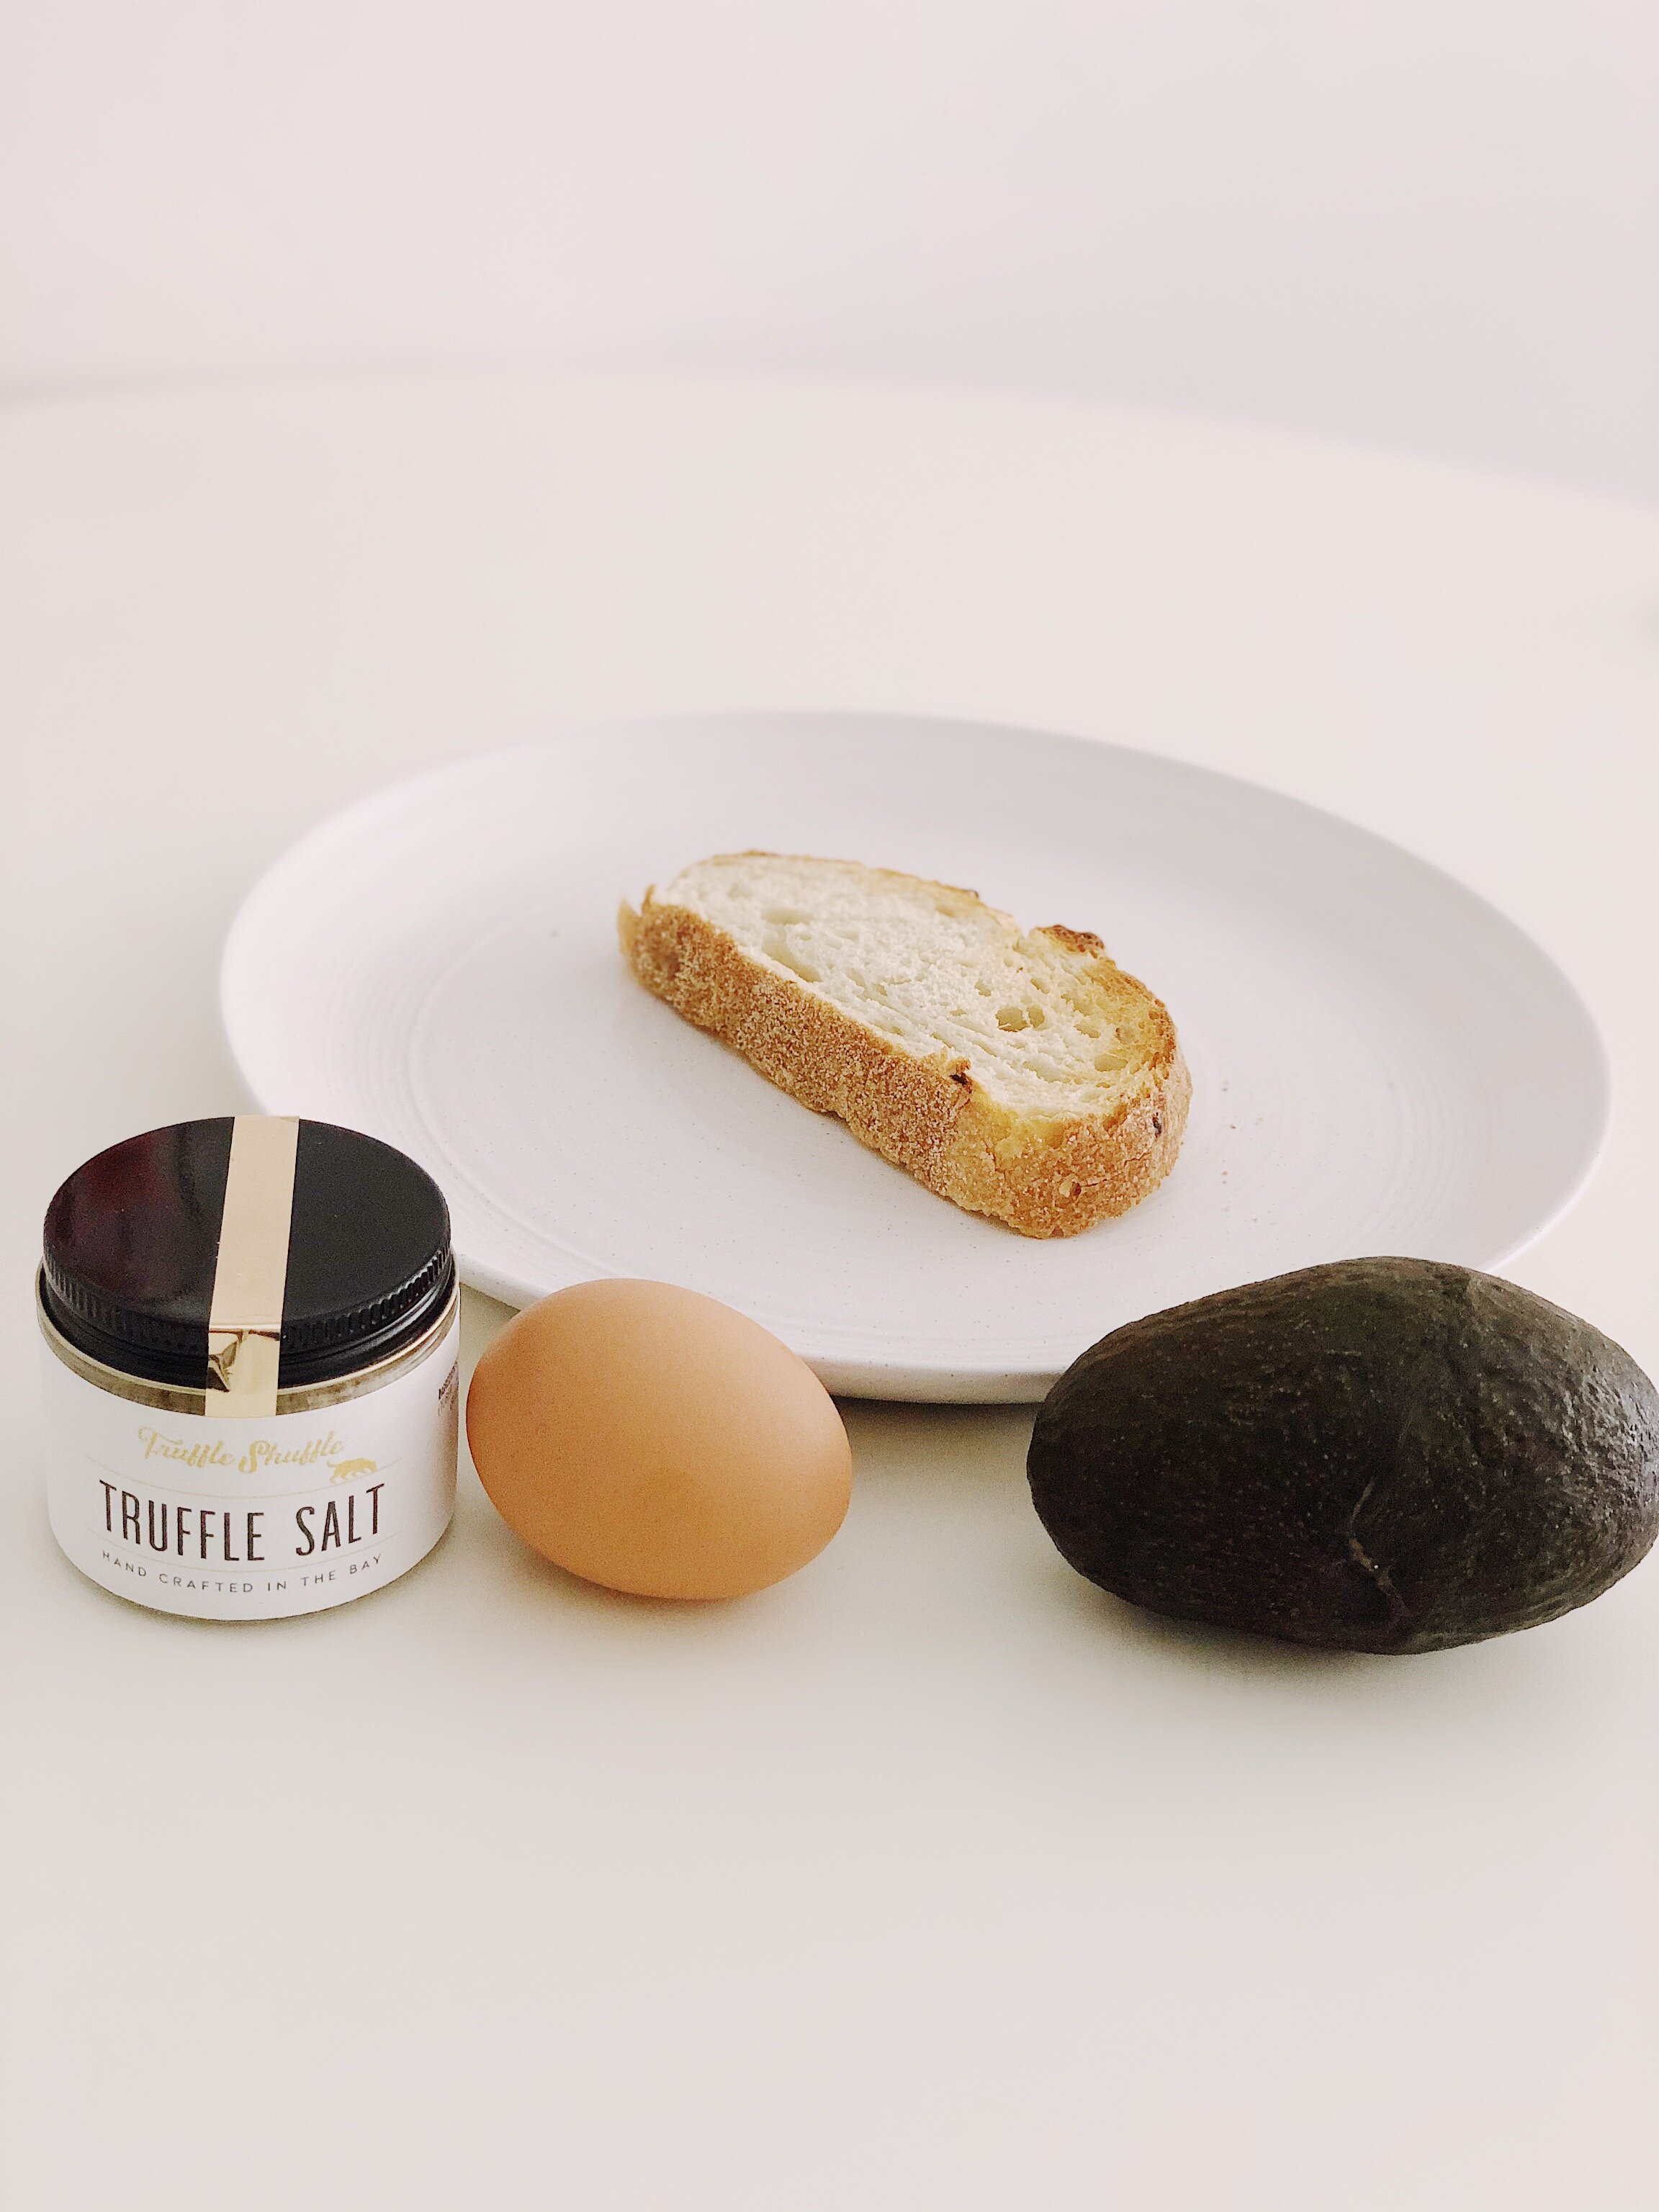
I recently made these luxurious truffle salt mashed potatoes for Thanksgiving. To continue with this truffle salt trend, I thought I’d share something that I made a couple months ago when I first got the truffle salt from Truffle Shuffle for my birthday—avocado toast! Since I love having avocado toast for breakfast, and because it’s something that’s pretty difficult to mess up, it naturally became the first canvas for the truffle salt.


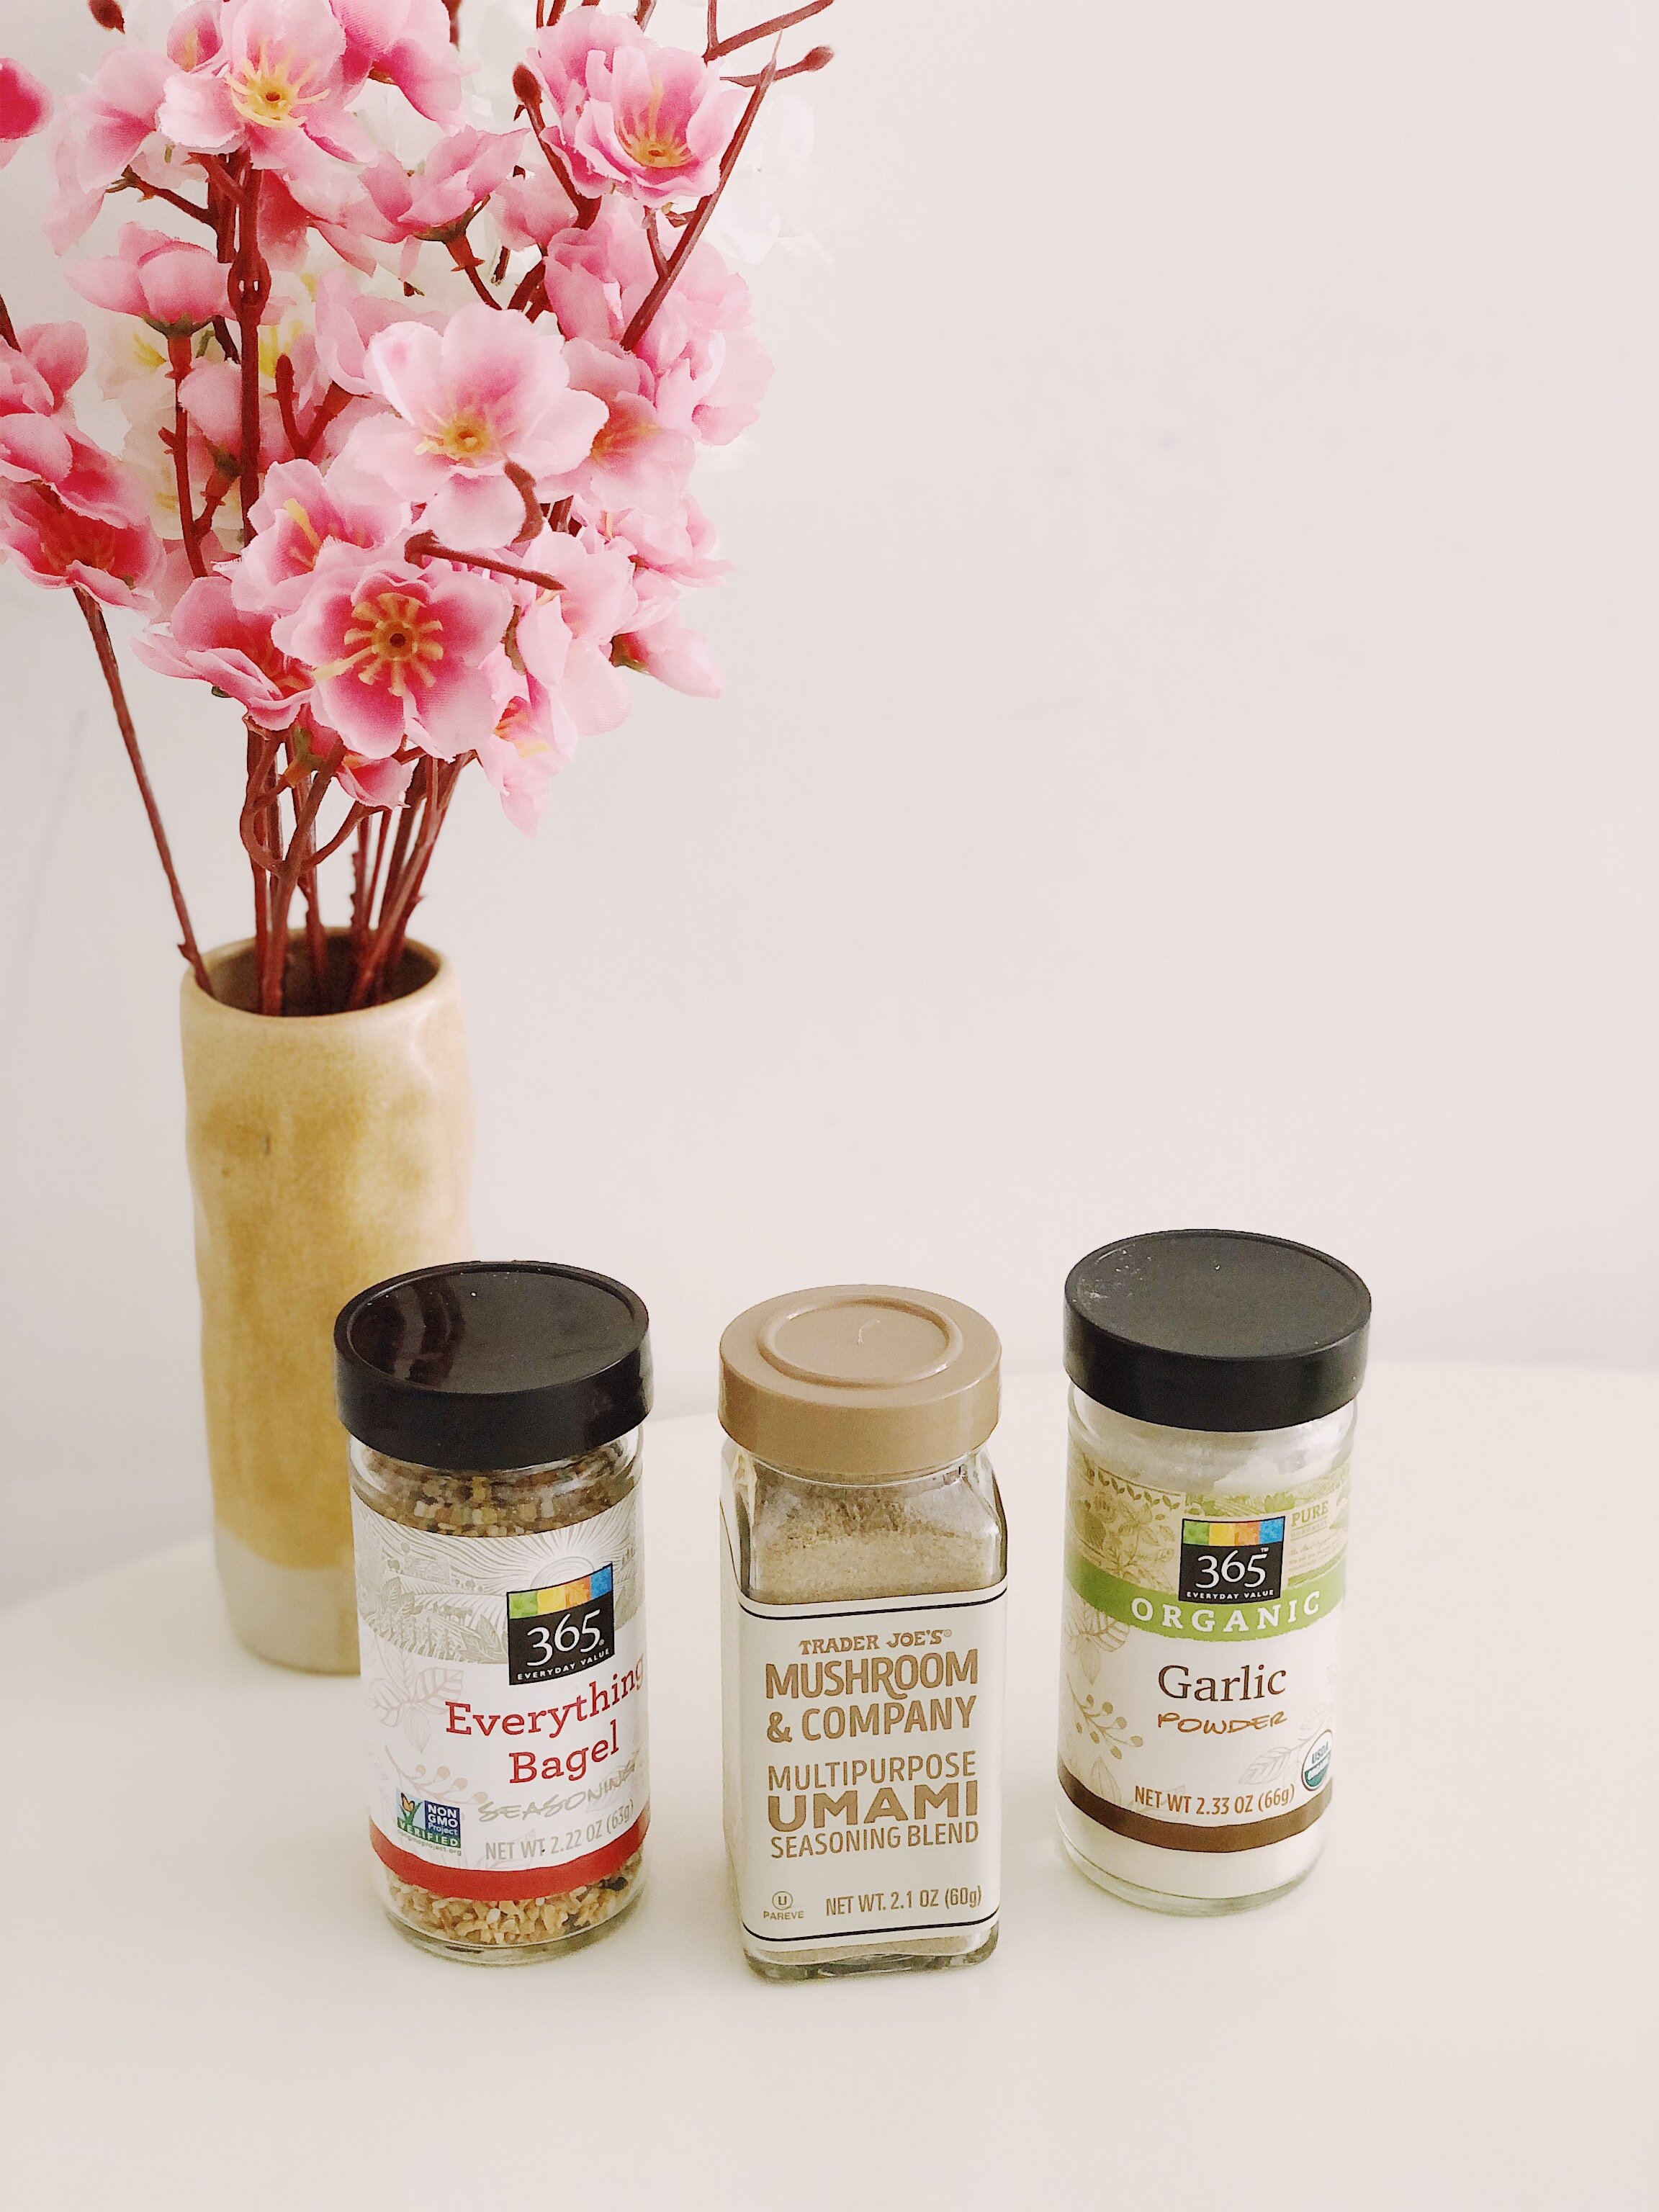
Besides the truffle salt, there are a few other staple spices that I usually like to add to my avocado toast: Everything Bagel seasoning, Trader Joe’s Mushroom & Company Umami Seasoning Blend, and garlic powder. Because I really wanted the truffle to stand out in this particular avocado toast, I made sure to only add a small amount of seasoning (especially knowing that there’s a lot of salt inside these seasonings as well).


Truffle Salt Avocado Toast


Step 1:

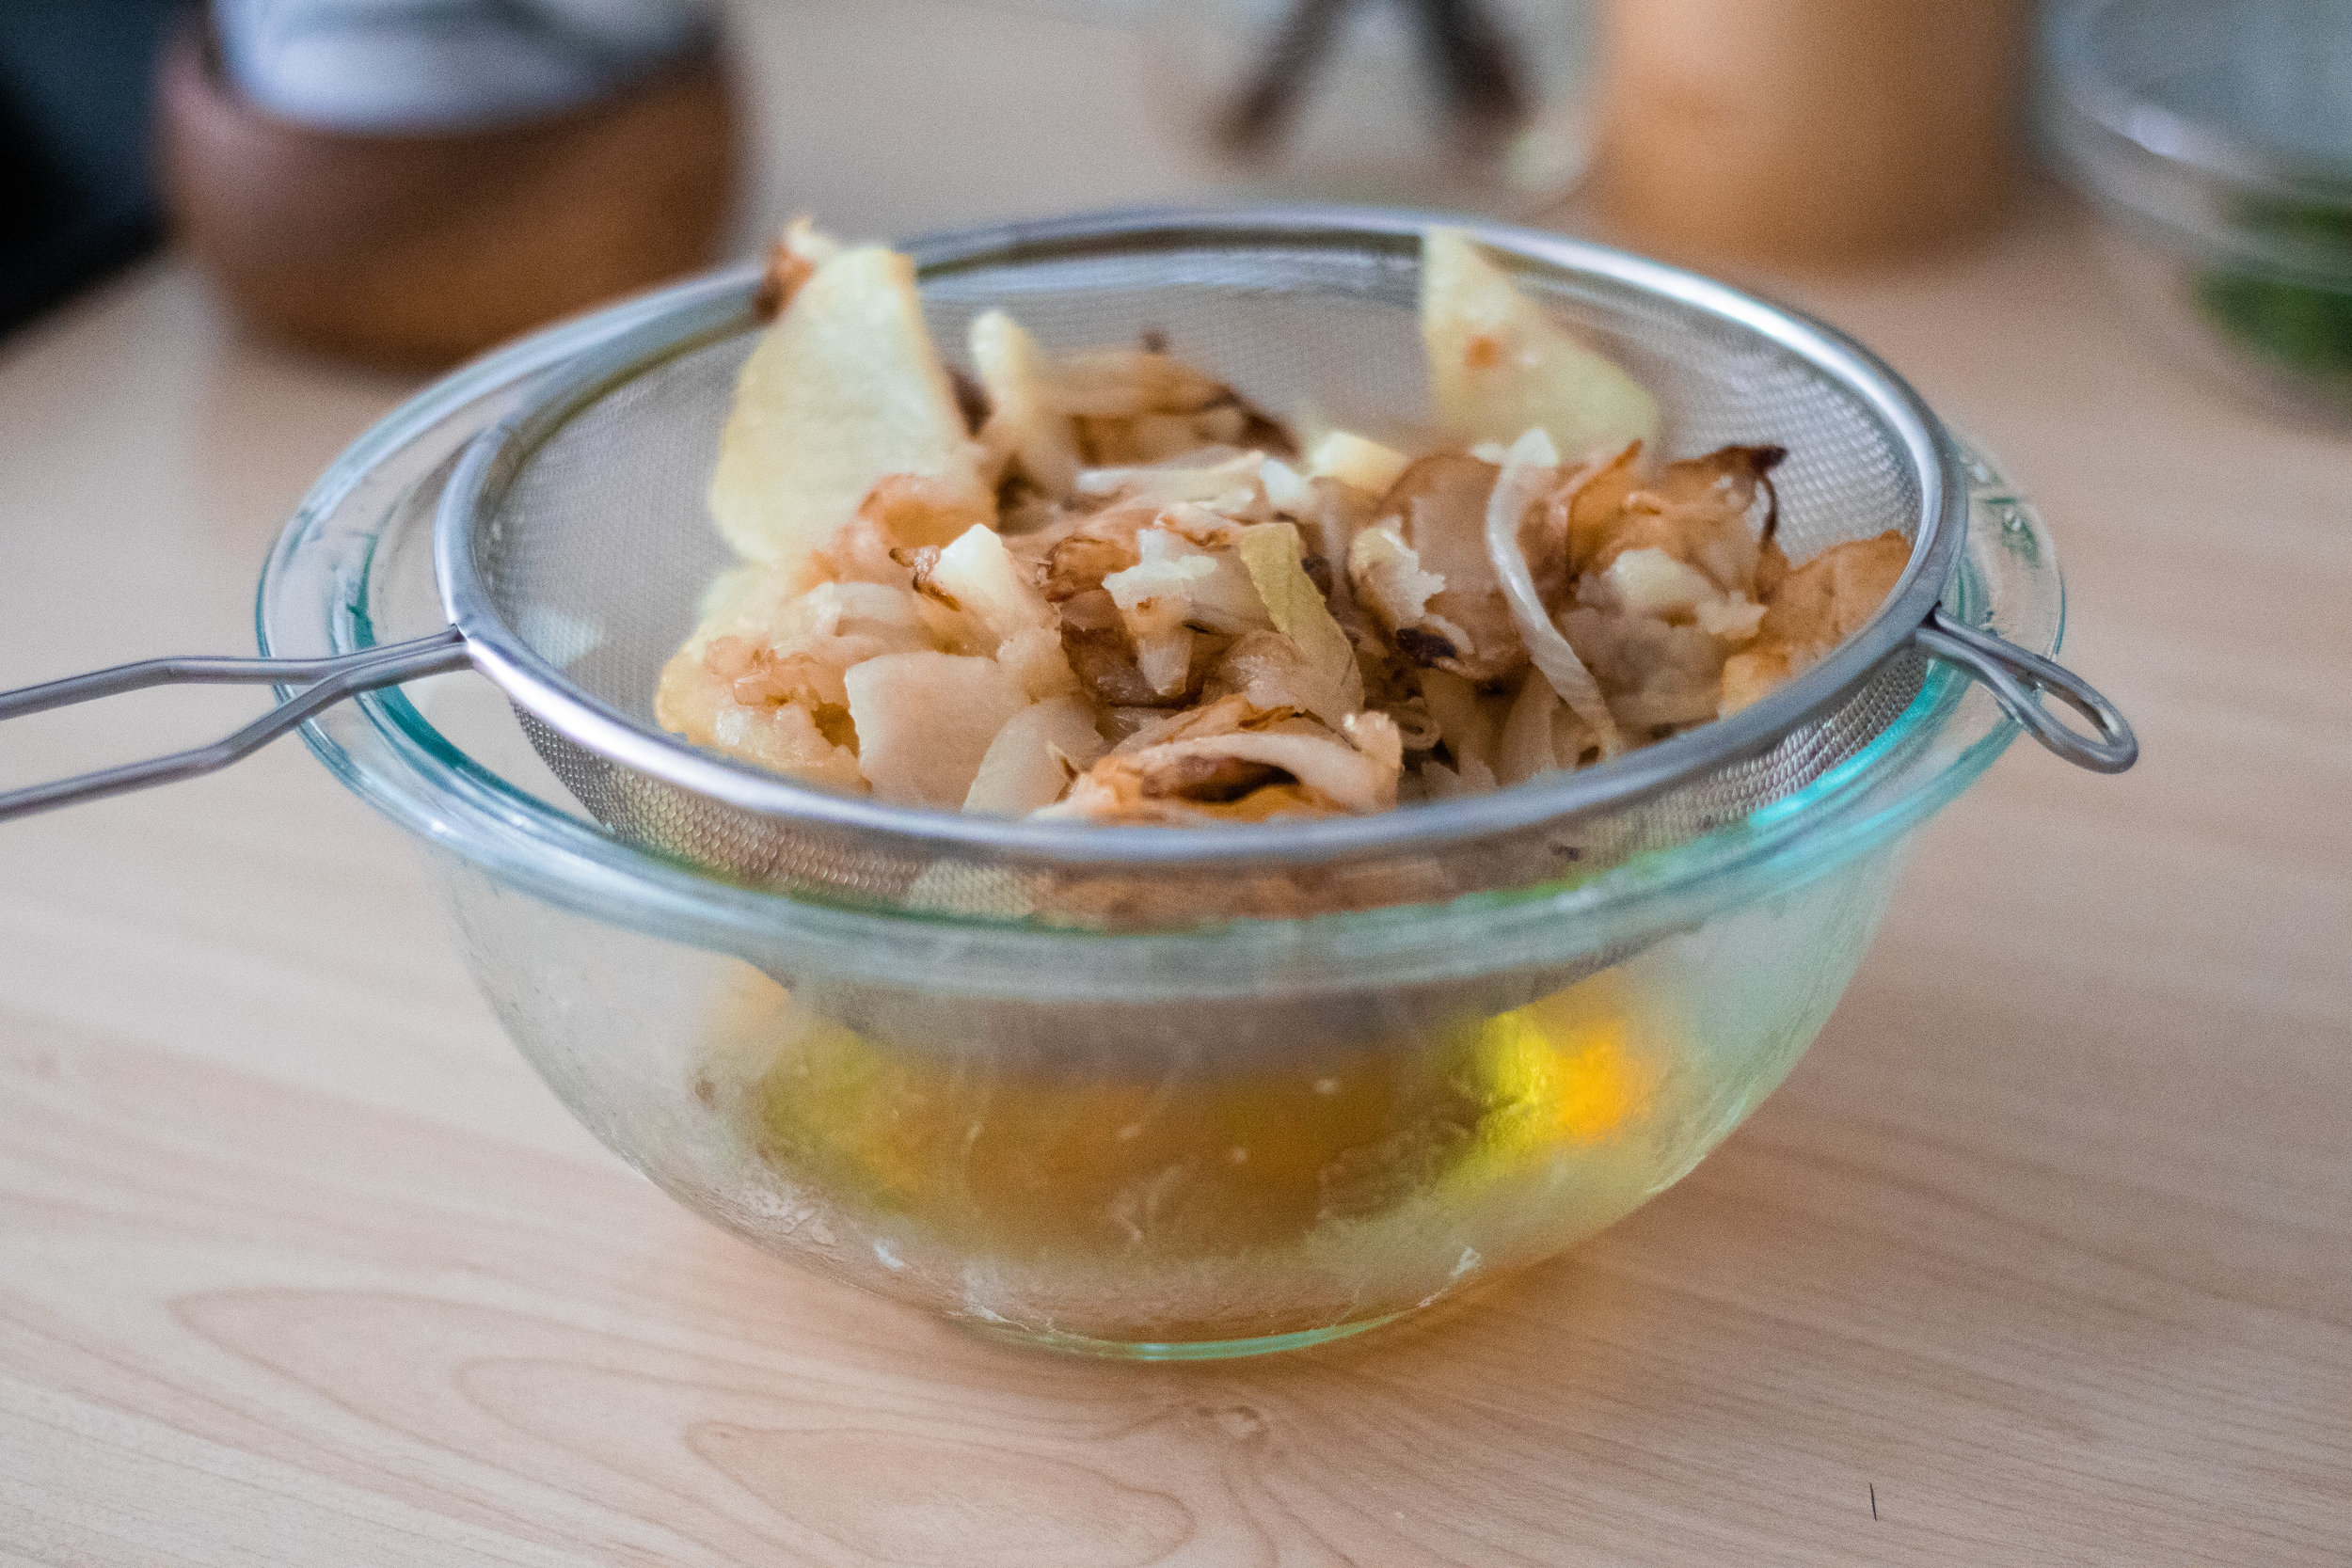
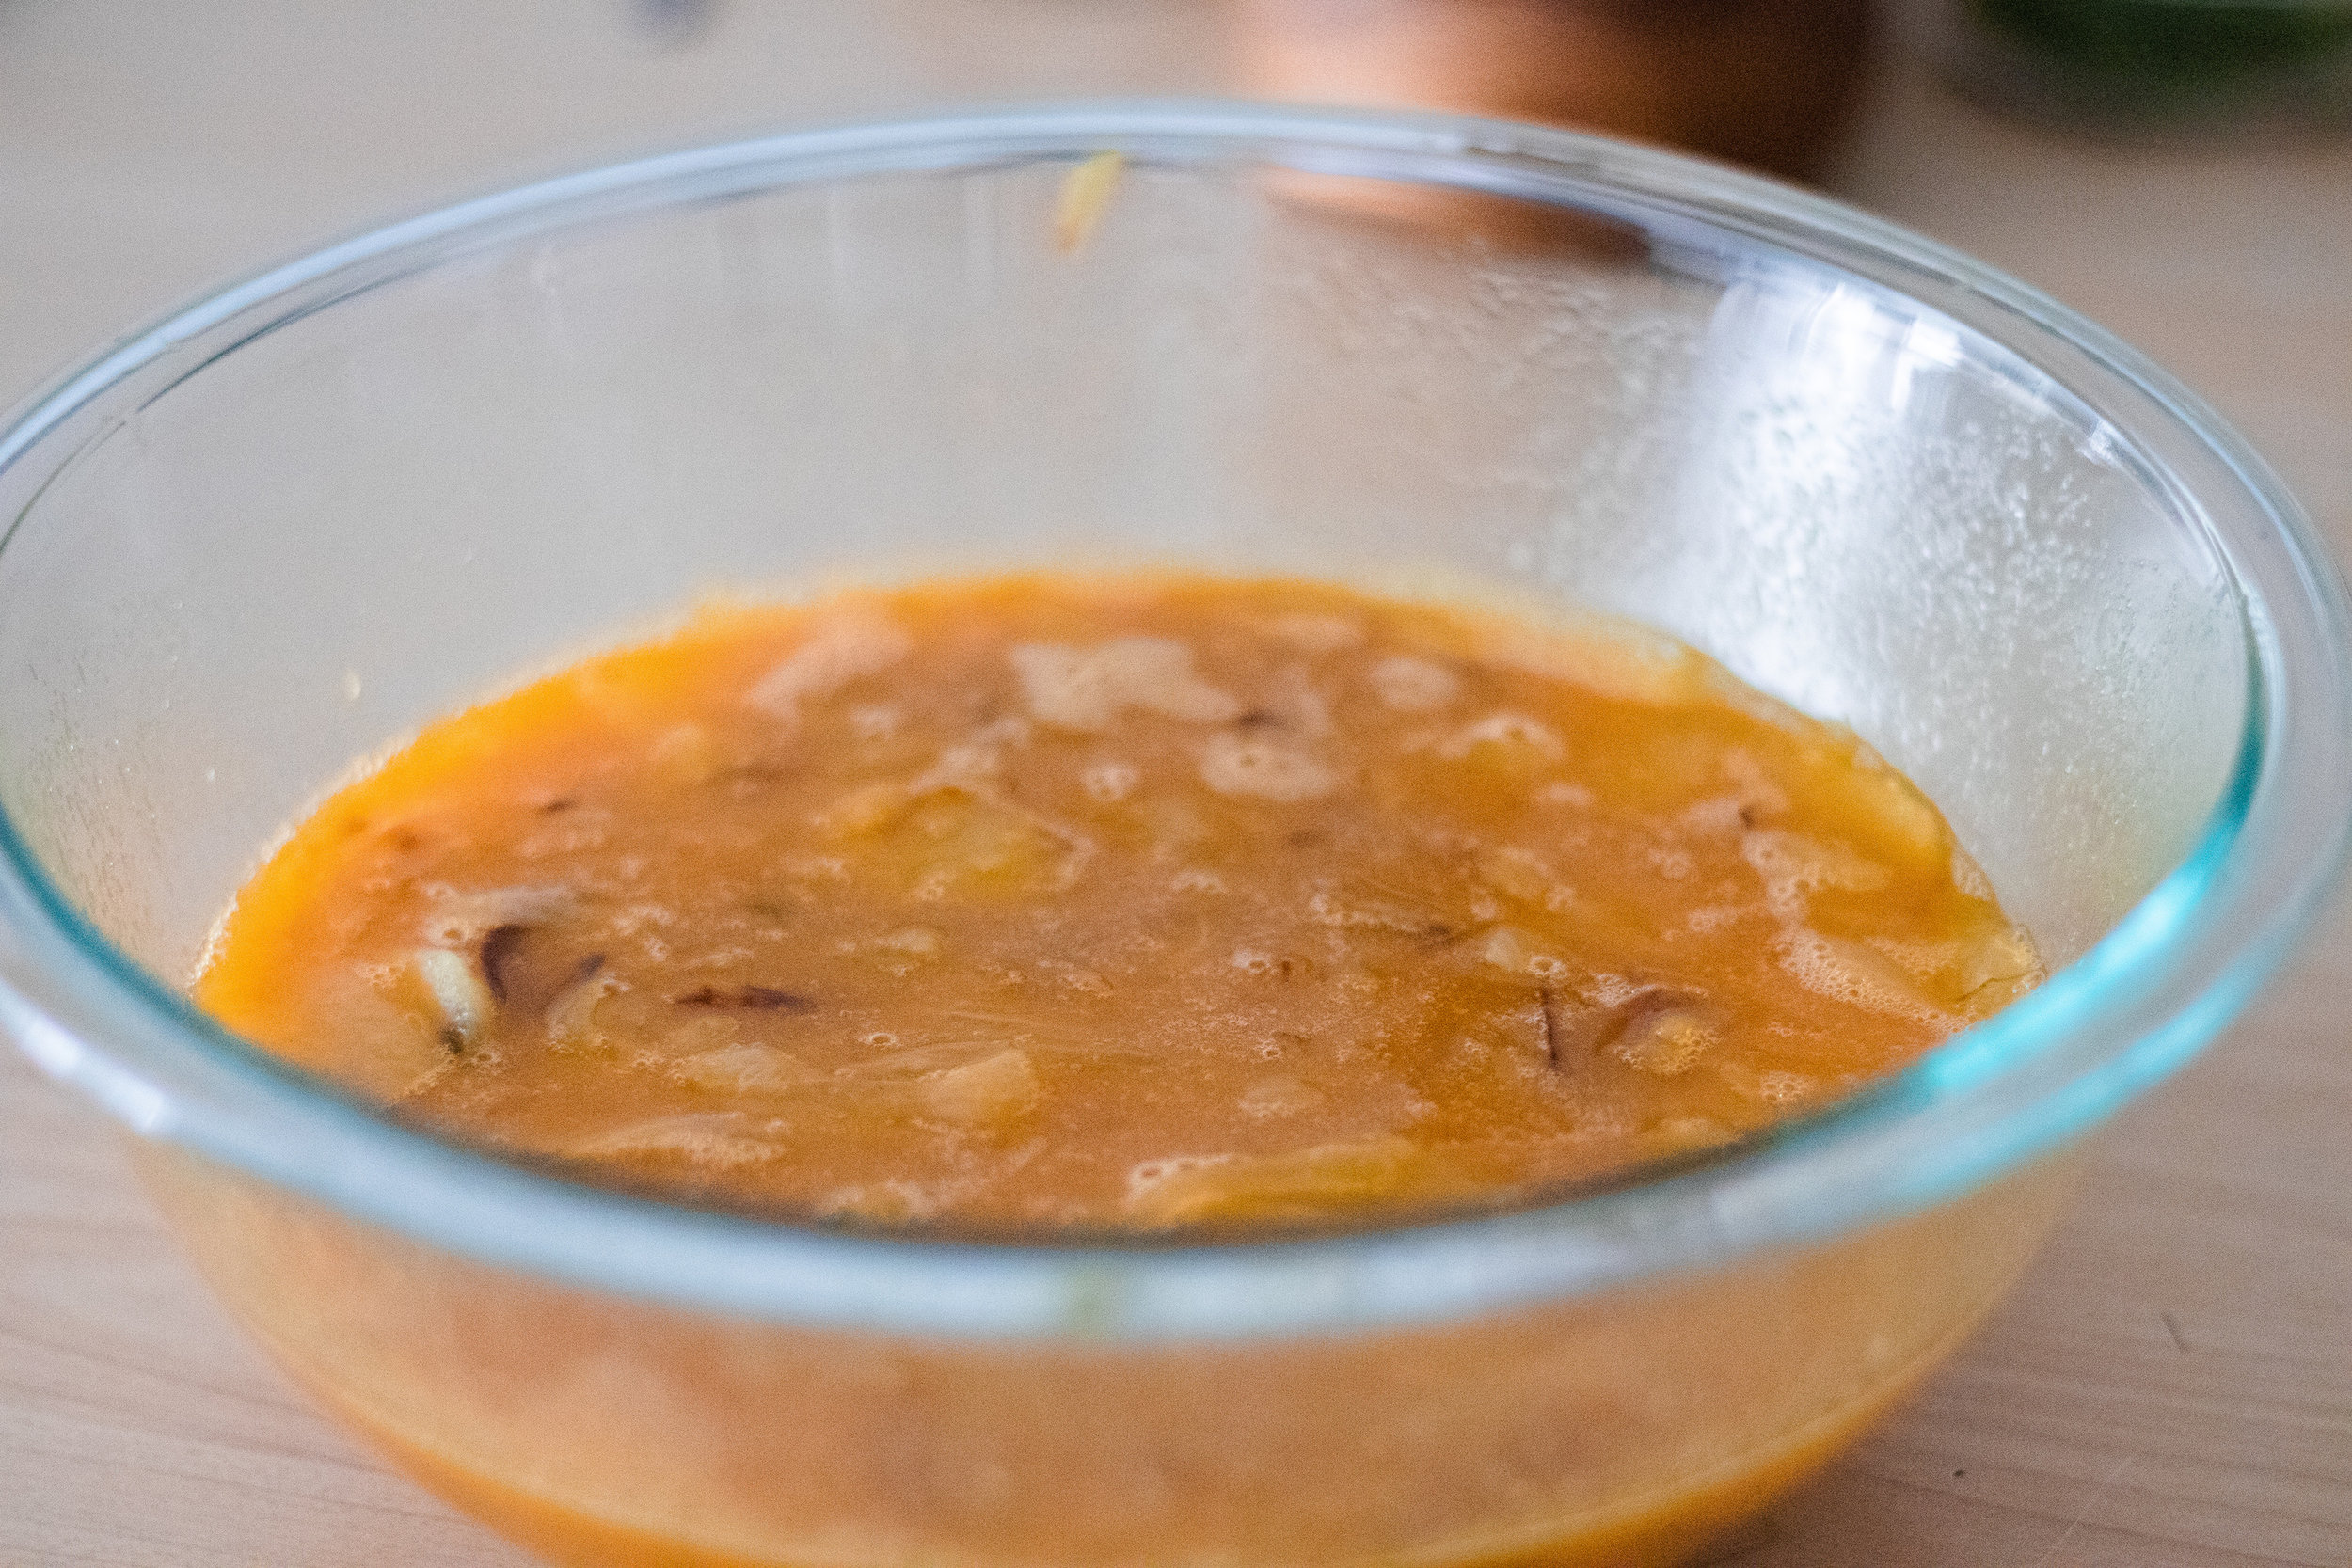
Cut up the avocado into small chunks and mash it up with the Everything Bagel seasoning, umami blend, garlic powder, and truffle salt to taste. Toast a piece of your bread of choice, and spread the avocado on top.


Truffle Salt Avocado Toast


Step 2:

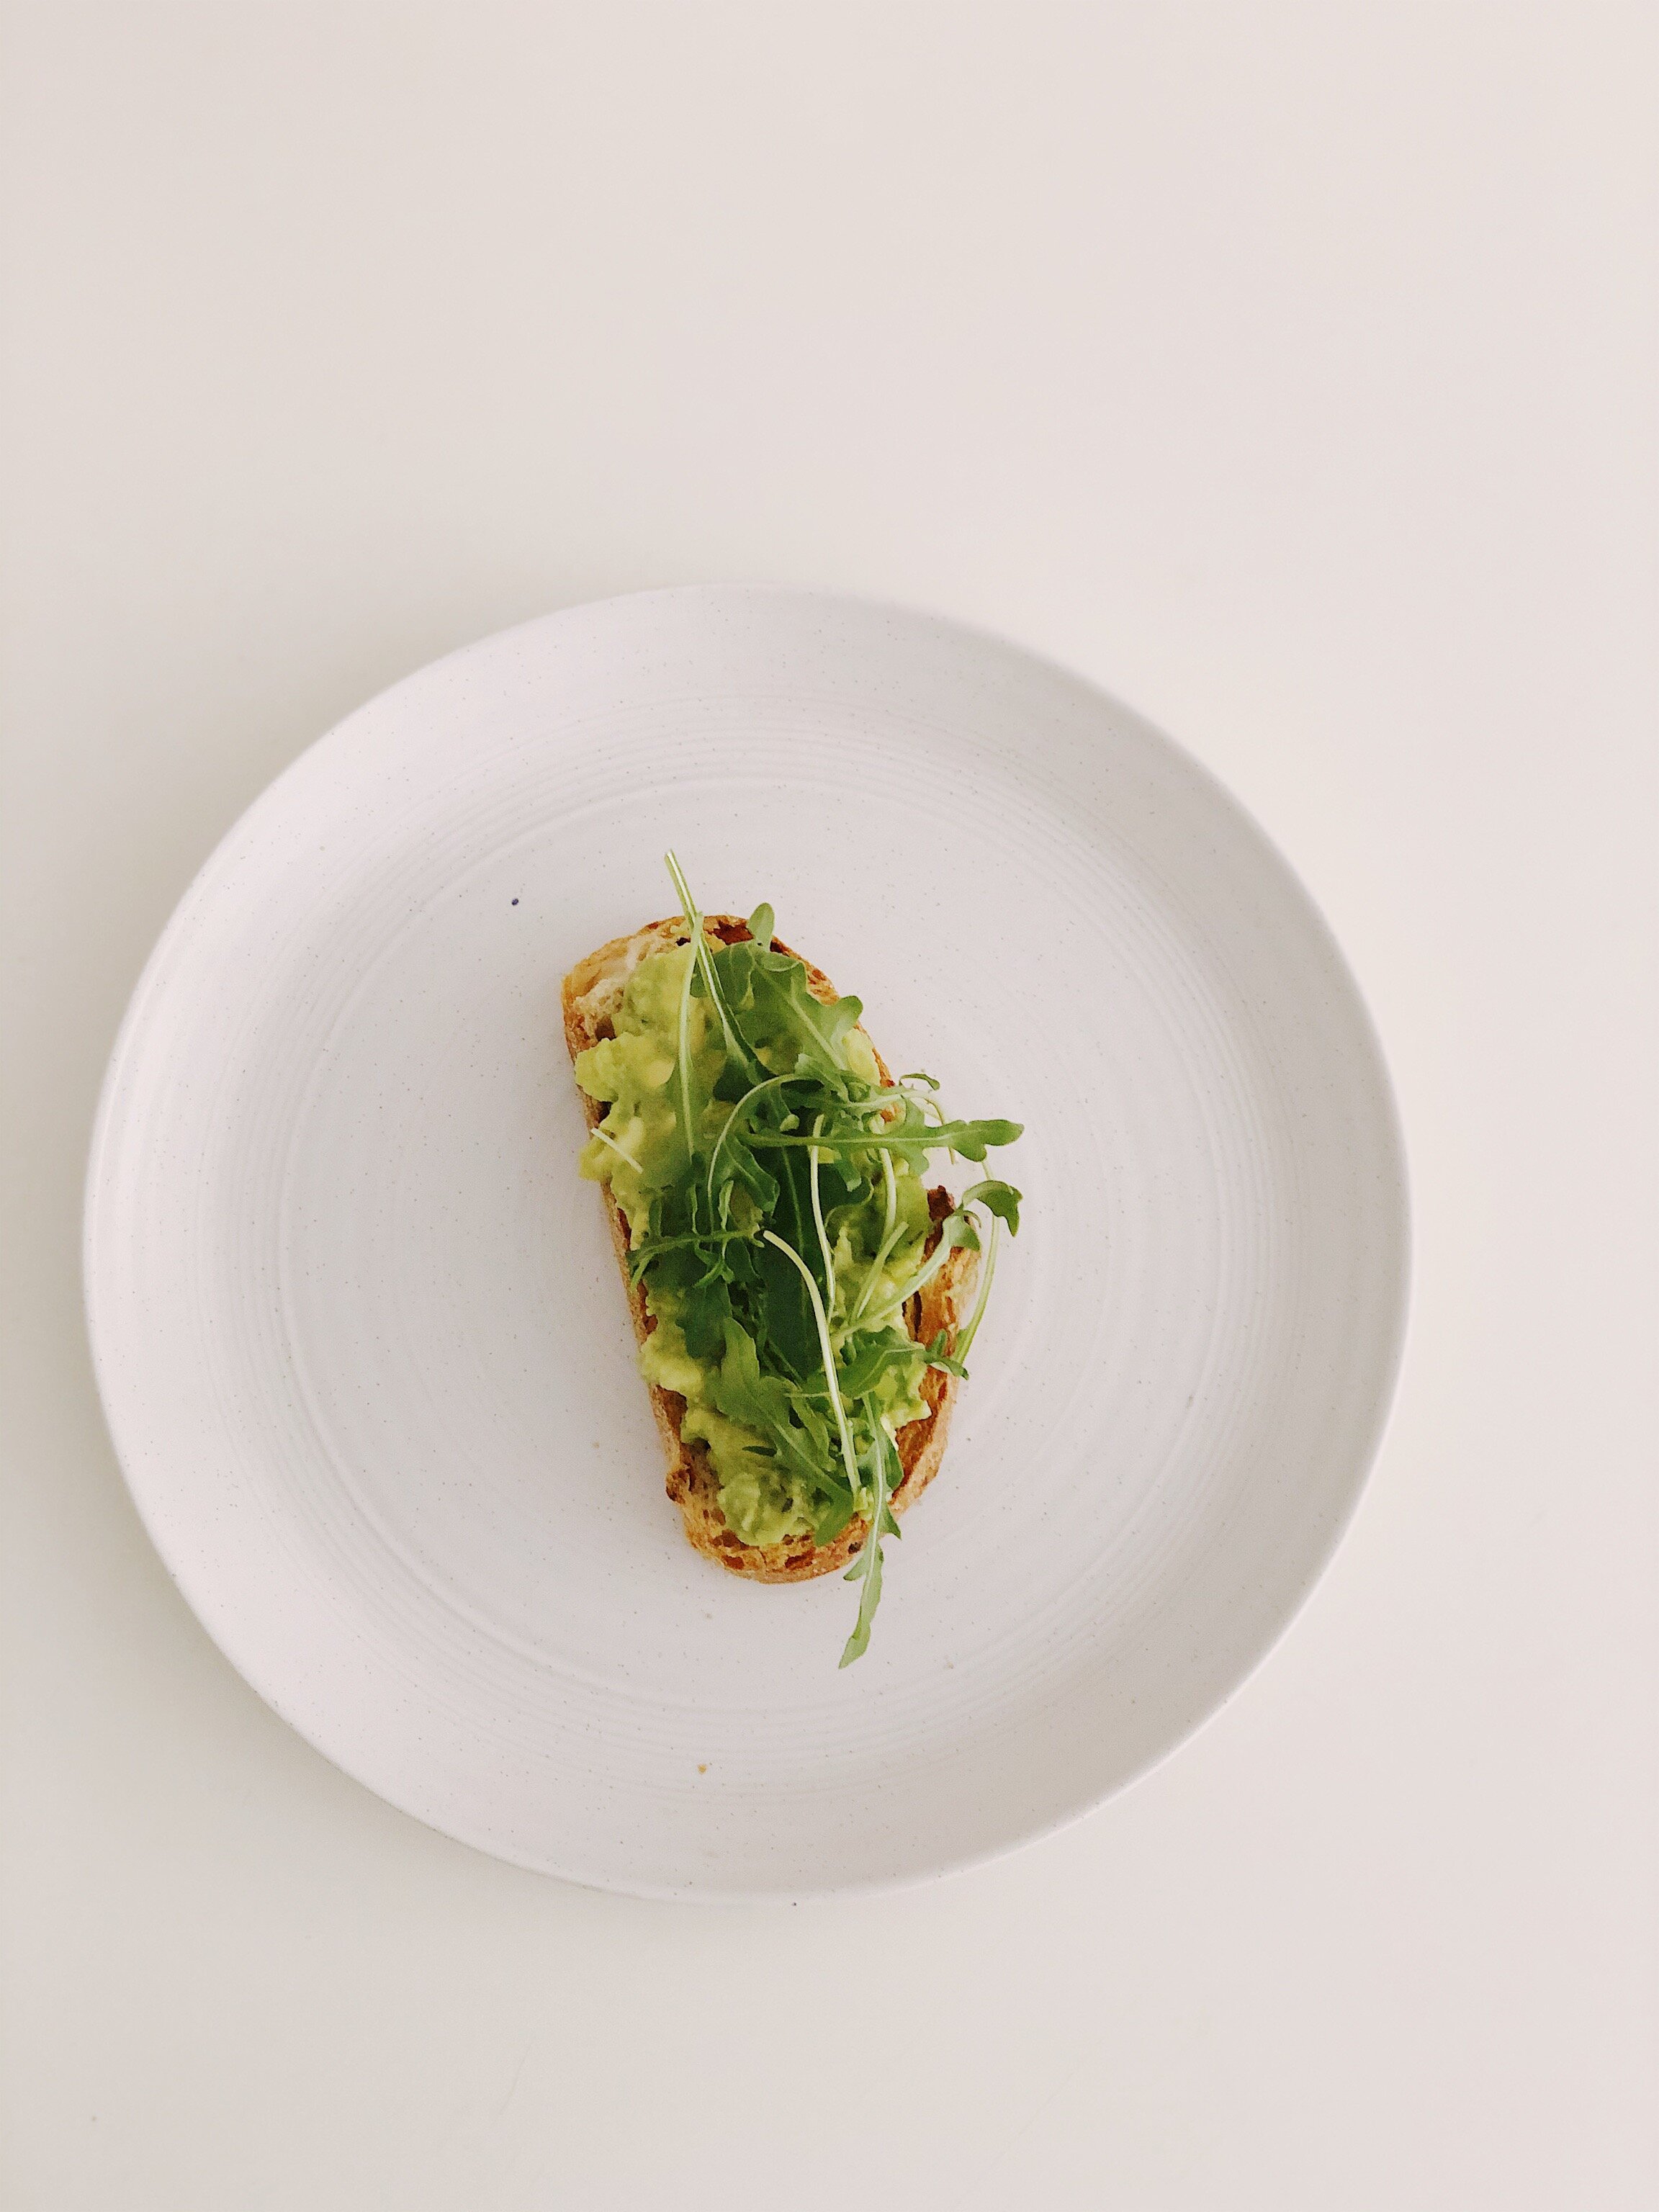
Add some veggies of your choice (my favorite is arugula!). But Microgreens, alfalfa sprouts, spinach, tomatoes, or radish slices are also really great toppings.


Truffle Salt Avocado Toast


Step 3:

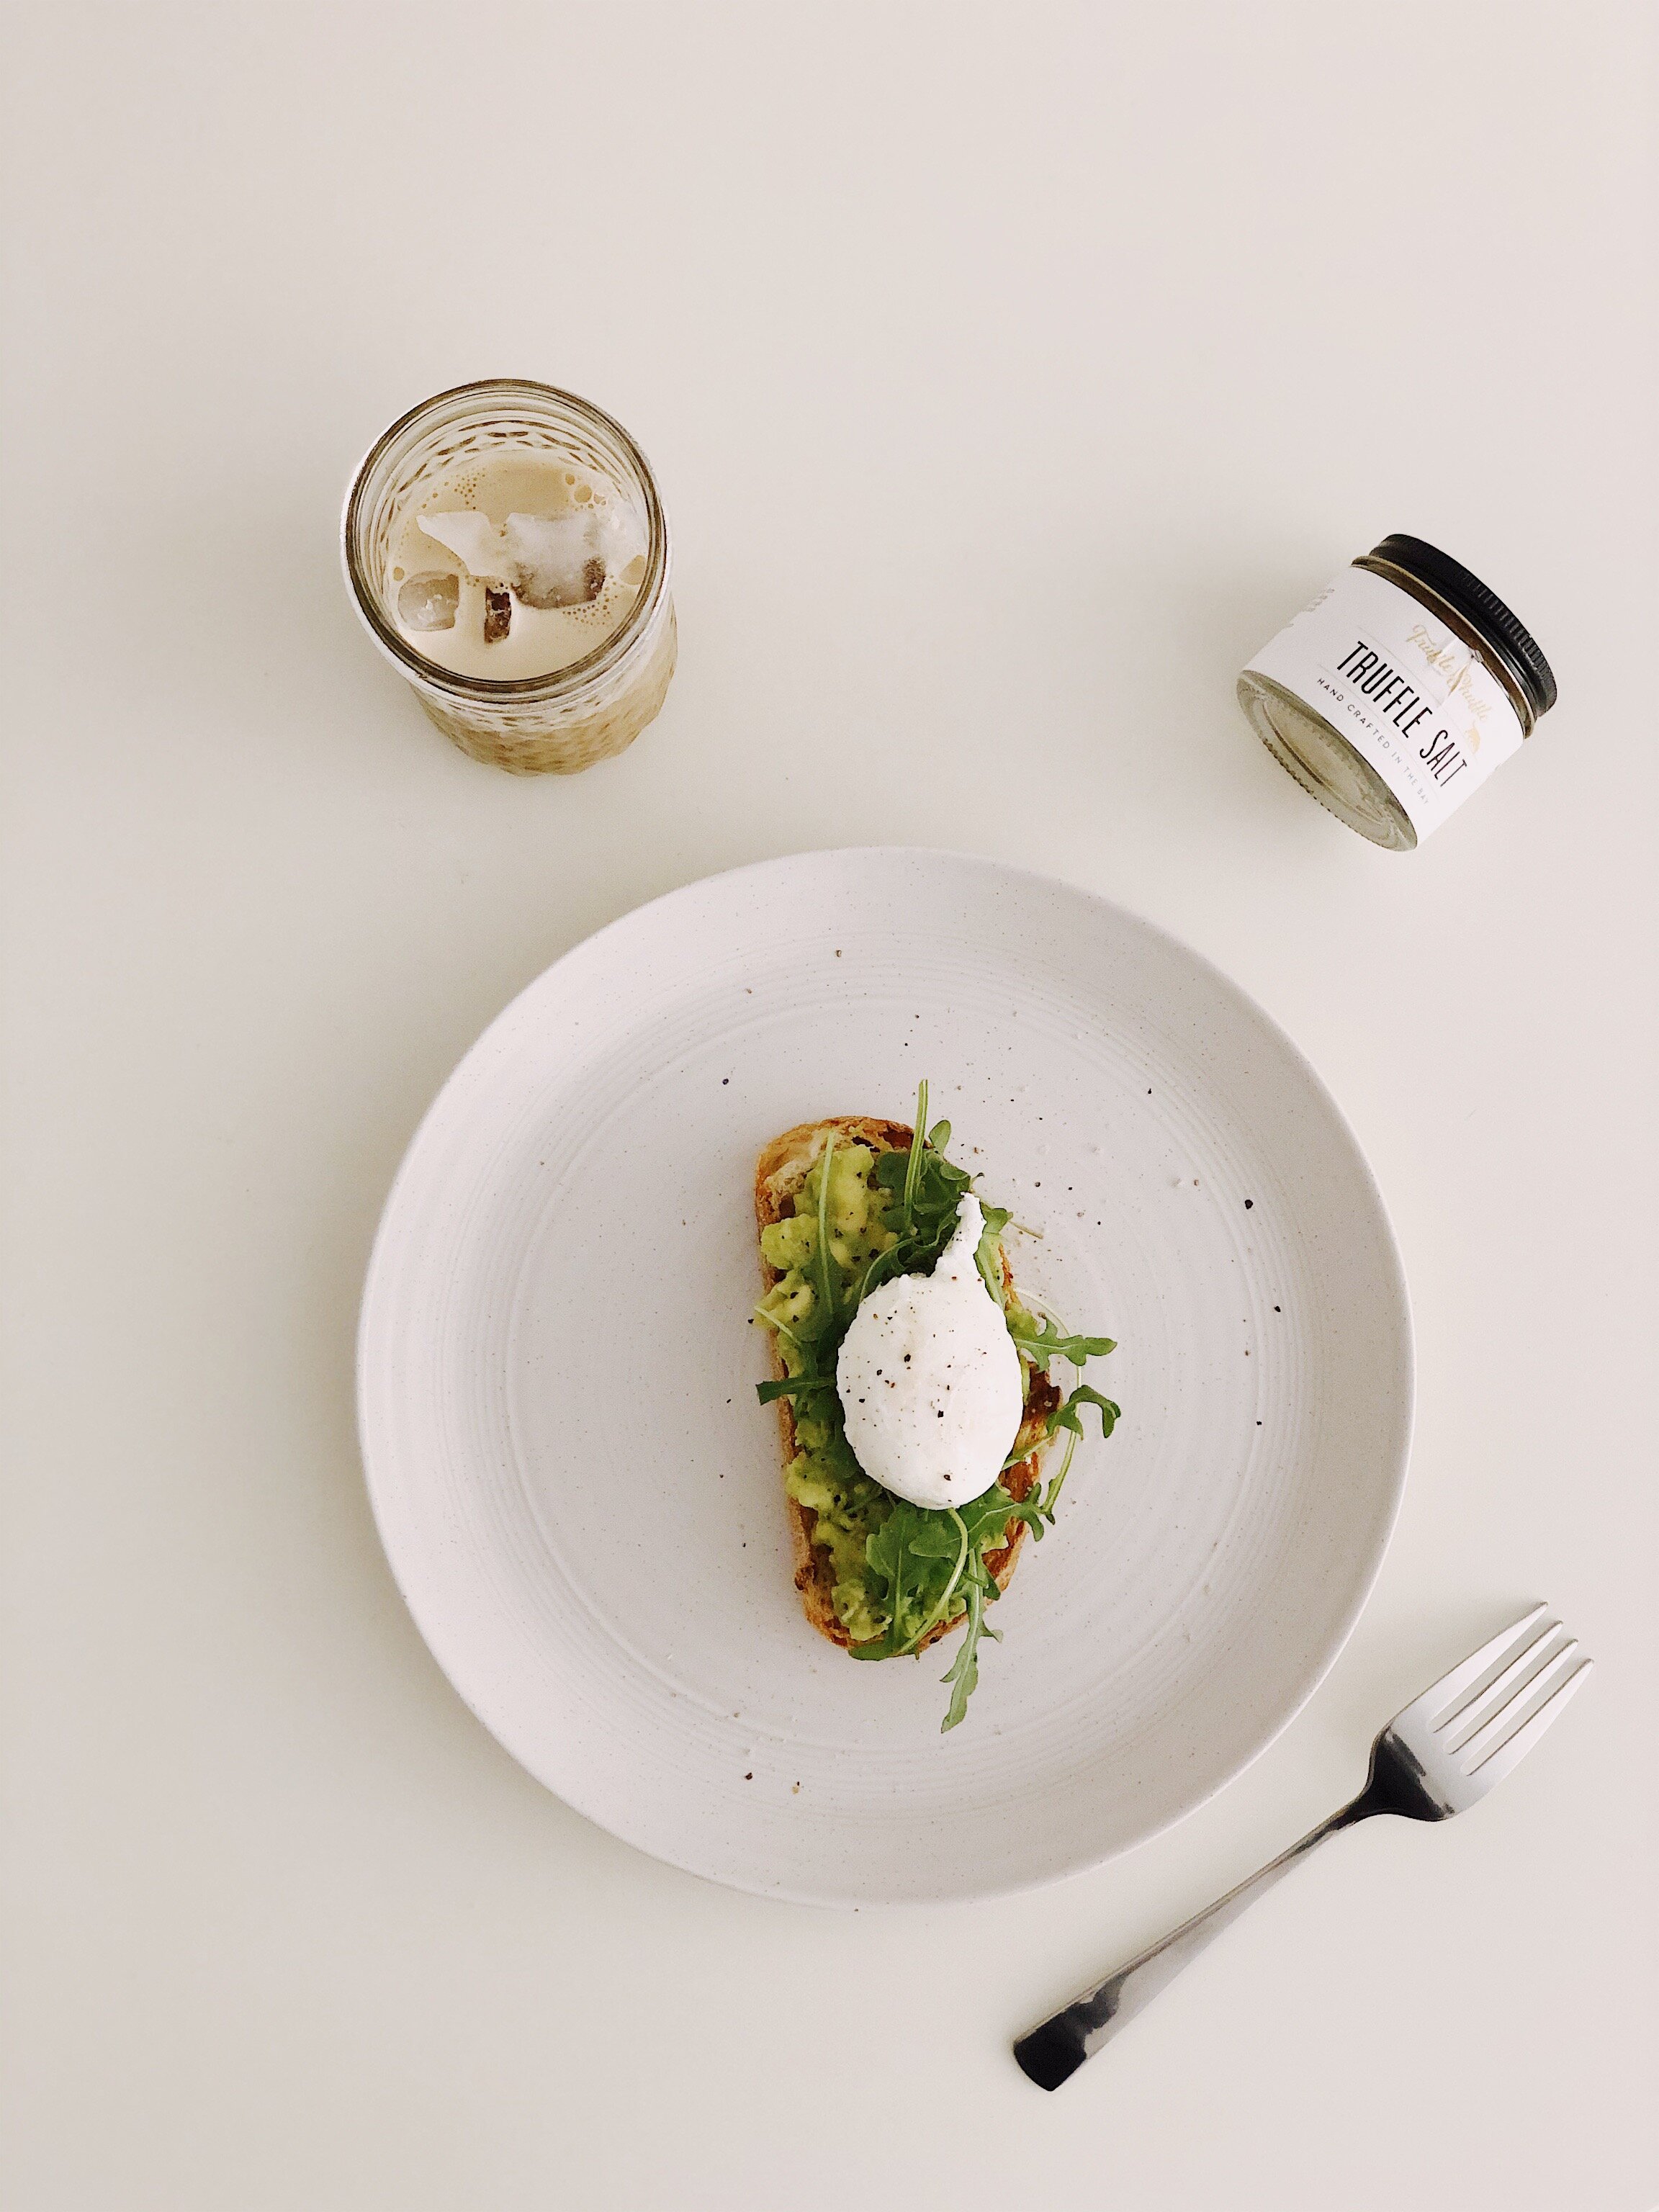
Avocado toast is always better with an egg (non-negotiable unless you’re vegan—don’t @me). I think a poached egg works the best, and cooking it is really not as intimidating as you think. You can find some tips and tricks on this blog post here.


Truffle Salt Avocado Toast


Step 4:

Sprinkle a little more truffle salt on top of the egg, and add freshly ground pepper on top.


Truffle Salt Avocado Toast


Truffle Salt Avocado Toast

Ingredients (serves 2)

  • 1 medium-large avocado
  • 2 eggs
  • 2 slices
  • 1-2 tsp truffle salt
  • 1 tsp Everything Bagel Seasoning*
  • Pinch of Garlic Powder*
  • Pinch of Trader Joe's Mushroom and Company multipurpose umami seasoning blend*
  • A few sprigs of arugula

* Feel free to replace these seasonings with your own favorites!

Takes , Makes enough for 2 people.


Instructions

  1. Cut the avocado into small chunks and mash it up with the Everything Bagel seasoning, umami blend, garlic powder, and truffle salt to taste. You won't need too many of these seasonings, since their salt content is quite high. Toast a piece of your bread of choice, and spread the avocado mix on top.

  2. Top the avocado off with a few sprigs of arugula. Microgreens, alfalfa sprouts, spinach, tomatoes, or radish slices are also really great toppings.

  3. For the poached egg on top: Bring a pot of water to a soft boil/simmer. Crack the egg into a small bowl to avoid egg shells when you add it into the water. Make a "tornado" in the water with a spoon before adding the egg. This will allow the egg to spiral onto itself and prevent it from falling apart in the water. Should you add vinegar? It’s totally optional. A little bit of white vinegar can help the egg stay firm, but I’ve made plenty of poached eggs without it.

  4. Poach the egg for 3-4 minutes, and let it drain on a paper towel before adding it on top of the avocado toast.

  5. Sprinkle a little more truffle salt on top of the egg, and add freshly ground pepper on top.

Hope this will inspire you to try out a glammed up version of this simple breakfast. Thanks again to Truffle Shuffle and my friend Sam for giving this jar to me for my birthday 💖

♥ Cindy

 
Food, 2Cindy Zhang Comment
Black Sesame Cheesecake Macarons


Watch the video for a in-depth tutorial on how to make these macarons. If you enjoyed watching, please give me a thumbs up/subscribe to me on YouTube!


Black Sesame Cheesecake Macarons


Probably one of the most intimidating desserts to ever grace my kitchen: French Macarons. They’re notorious for being sold at high prices at fancy patisserie shops. After trying them out in my own kitchen, I realized the ingredients that go into making them are actually not very expensive at all, and you could probably find most of them already sitting in your fridge or pantry (with the exception of almond flour, maybe). In my opinion, the real reason why they’re so expensive is because there’s so much that can go wrong when you’re making them. You truly have to be a perfectionist during every step of the process, and not rush to the finish line—as there is a lot of waiting involved.

In these past few months, I’ve made my fair share of macarons, and also experienced my fair share of failures. I will try to share everything I’ve learned in this post, so you won’t make the same mistakes I did.


Black Sesame Cheesecake Macarons


wet ingredients + the perfect meringue

  1. Separate your egg yolks from the egg whites using your clean hands. Using the shell to separate them could risk puncturing the yolk and leaving them behind in the whites. Your egg whites have to be absolutely pristine for macarons, and a little bit of yolk could ruin everything.

  2. Make sure the bowl you are working in has no traces of oil or water. Egg whites will not whip properly in the presence of oil and water. You can use a paper towel doused in a bit of vinegar to wipe the bowl clean.

  3. The size of your egg matters! When a recipe calls for “3 eggs,” there’s a lot of variation that can happen there. I try to weigh out my egg whites on a kitchen scale, or try to figure out whether I should use small, large, or x-large eggs in my recipe.

  4. Do you need to age your egg whites? Not necessarily. But I found that it’s easier to whip your egg whites when they’ve been sitting for a day or two in the fridge. I usually don’t think far ahead enough to age them for that long, but I’ll try to separate the egg whites and leave them hanging out at room temperature in the morning if I know I’ll be making macarons in the afternoon.

  5. Make sure your egg whites are whipped to stiff peaks (that is, the peaks aren’t drooping at all when you lift your whisk). Another way to test this out is to lift the bowl upside down: the meringue should be strong enough to stick to the bowl and not drip out.


Dry Ingredients

  1. Make sure to use blanched almond flour over natural almond flour. I accidentally used unblanched almond flour once, and not only did the macarons turn out looking very ugly, but they also cracked on top.

  2. Run your dry ingredients through a food processor if you have one to ensure that they’re superfine.

  3. Sieve your dry ingredients 2-3 times to ensure that your macaron shells have a smooth top.

how to macaronage perfectly (Look for that figure 8!)

Macaronage is just a fancy word describing the process in which we fold the dry ingredients in with the meringue. But this is probably the trickiest stage in making macarons. Under-mixing or over-mixing the batter will completely ruin the macaron shell.

  1. Fold in the dry ingredients a little at a time.

  2. Use a rubber spatula (or something pliable) to fold in the dry ingredients. This way, you can scrape down all the excess ingredients on the sides of the bowl.

  3. People say the desired texture of the batter should be “ribbon-like” or resemble lava. I actually find those two descriptions quite difficult to understand. Instead, opt for the Figure 8 test instead: you should be able to make a Figure 8 by drizzling the batter with your spatula without it breaking. Once you’re at this stage, stop mixing and start piping.


Piping the macaron shells

  1. There are a lot of macaron baking mats out on the market, but parchment paper is actually the best surface to bake on, since they will dry the shells out the most. You can make your own by drawing circles on a sheet of parchment paper (I used a shot glass 🤦🏻‍♀️) and then flipping over the parchment paper so the macaron shells can be piped onto the other side.

  2. Try to pipe the macarons to be a little smaller than your desired size. You will need to tap them on the table later to get rid of air bubbles, which will make them grow outward.

  3. Pipe with confidence! Especially at the end of each one. Lift your pastry bag quickly so you don’t leave any batter hanging.

  4. After piping, make sure tap your pan against the table to get rid of all of the air bubbles in the batter. If you want to go the extra mile, you can even take a toothpick and pop out each individual air bubble yourself so your cookies have the smoothest surface possible.


Black Sesame Cheesecake Macarons


Baking your Macarons (and waiting to bake them)

  1. It’s imperative that you let your macarons rest before baking them. I usually wait around 40 minutes to an hour. During that time, you can start working on your filling, or even take care of some dirty dishes :) After resting, the batter will have developed a clear film on top, and you’ll be able to brush your finger across the surface without any of the batter coming off.

  2. Too high of an oven temperature may fade the food coloring and make it more yellow—for example a pink macaron could end up looking more peach-colored. Most recipes call for 300°F, but I’ve found that 290°F has worked better in preserving the color.

  3. After taking them out of the oven, be sure to let them rest before taking them off the parchment paper. They should be completely cooled down when you start piping any sort of filling on top of them.


Black Sesame Cheesecake Macarons


Though the macaron shell/cookie can be one of the trickiest things in the kitchen to get right, the filling for macarons is quite the opposite. You can literally go in any direction with the filling: American, Swiss, or French buttercream, chocolate ganache, cream cheese frosting, lemon curd, or even something more Asian inspired: like this black sesame “cheesecake” filling.

(calling it cheesecake mostly just due to my addition of cream cheese into the buttercream 🙃)


Black Sesame Cheesecake Macarons


Black Sesame Cheesecake Macarons

Ingredients (Makes 18 Macarons/36 individual cookies)

    The cookie:
  • 100 g Egg Whites - around 3 large egg whites (at room temperature)
  • ¼ cup white sugar (50 g)
  • 2 cups powdered sugar (200 g)
  • 1 cup blanched almond flour (120 g)
  • pinch of salt
  • ¼ tsp cream of tartar (2 ml)
  • 2-3 drops of black gel food coloring
    Black sesame cream cheese buttercream:
  • 1/3 cup black sesame seeds, toasted (30 g)
  • 1 cup powdered sugar (100 g)
  • 1 cup butter (227 g or 2 sticks)
  • 2 oz cream cheese (57 g)
  • 1 tbsp heavy cream
  • 1 tsp vanilla extract

Takes , Makes 18 filled macarons, or 36 individual cookies.


Instructions

  1. Separate the egg whites from the yolks ahead of time and leave them at room temperature for at least 30 minutes (it’s even better if you age them for a few days).
  2. Sieve the dry ingredients (powdered sugar and almond flour) 2-3 times and discard the bigger pieces that won’t pass through the sieve.

  3. Whisk the egg whites with the salt and cream of tartar in a clean bowl that is free of oil or water. Add the granulated sugar gradually in batches. Whisk until your meringue acquires stiff peaks, and sticks to the bowl when you lift it upside-down.

  4. Add the dry ingredients into the meringue in batches, and fold them in gently. Once the mixture looks combined,and resembles a lava-like texture, transfer half of the mixture to another bowl, and add 2-3 drops of black gel food coloring. Continue to fold both the black and white batter.

  5. You’ll know when you’re done when you’re able to make a Figure 8 by drizzling the batter with your spatula without it breaking. Once you’re at this stage with both the black and white batter, stop mixing and start piping.

  6. Put the black and white batters into separate piping bags. Push the batter all the way to the tip of the bag.

  7. Fit another piping bag with a round tip, and insert the two closed piping bags with the black and white batter into it, pulling the ends of the two bags through the round tip. Cut open the ends of the two pastry bags and you’re ready for piping.
  8.  
  9. Use the leftover batter to cover the four corners of the baking pan, then put a piece of parchment paper on top of the pan. This will prevent the parchment paper from sliding around when you’re piping.

  10. Pipe 3/4 inch circles on the parchment paper, leaving space between each cookie. Try to do this in a circular motion to create a “marbling” effect.

  11. Tap the pan against the table to get rid of air bubbles.

  12. Preheat the oven to 290°F / 140° C and let the macarons rest for 40 minutes to 1 hour before baking.

  13. Bake for 20 minutes. After baking, let them rest for 15 - 30 minutes before lifting them from the parchment paper and make sure they’re completely cool before piping on the filling.
  14. Meanwhile, make the black sesame cream cheese buttercream: start off by toasting the sesame seeds in a small pan for 3-4 minutes until fragrant. Let them cool down, and put them into a ziplock bag and use a rolling pin to grind them to a powdery texture. If you have a food processor or an herb grinder, you can use that instead.
  15. Cream the room temperature butter, cream cheese, black sesame powder, heavy cream, and vanilla extra together with an electric mixer.
  16. Put the filling into a pastry bag and pipe them onto the cooled macaron shells. Cover the top with another shell and sandwich the cookie together. And you’re done!
  17. Please keep them refrigerated if you’re not going to eat them right away.


Black Sesame Cheesecake Macarons


This is definitely one of the trickiest recipes on this blog, and it took a lot of batches of ruined macarons before I could finally make this post. I hope you found the tips above helpful, and that you’re confident to go try these out yourselves!

Let me know how it turns out for you by tagging @cinders_zhang on Instagram! Support me by saving this recipe on Pinterest, and subscribing to my Youtube channel :)

If you’re feeling a little inspired by France now, go check out this related blog post for a Paris bucket list 🇫🇷

♥ Cindy

 
Food, 2Cindy ZhangComment
5 Back to school outfits


Sad news: summer is over. But on the bright side, I always get super excited about new school year—whether it’s seeing my friends again, buying school supplies, or even… being able to see my crush again after two long months of summer 🙃. But what excites me the most is the back to school outfits!

So even though I’m not going back to school this year, I thought it would be cool to show you some back to school outfits that I would’ve loved to wear for Week One. 


5 Back to school outfits


Monday

First Day of School

So for Monday, the first day of school, I thought I’d keep it simple with this preppy striped shirt and these white jeans.

Top - Missoni (via Rent the Runway) | White flared jeans - Cheap Monday | Shoes - Alfani | Backpack - Topshop (similar) | Earrings - H&M


5 Back to school outfits


Tuesday

The art student

She’s definitely a little more put together and sophisticated than your Monday girl, and probably has a membership at the MoMA and the symphony.

Turtleneck - Yesstyle | Skirt - Chuu | Satchel - Cambridge Satchel Company | Beret - Urban Outfitters | “Picasso” earrings - from a Sydney thrift store (similar) | Oxford Shoes - Modcloth (similar)


5 Back to school outfits


Wednesday

“On Wednesdays we wear pink!”

For this outfit, I went with a Mean Girls meets the 70s meets French girl look

Blouse - Petite Studio (similar)| Flared jeans - 3x1 (via Rent the Runway) | Boots - Calvin Klein | Straw circle bag - Club Monaco (similar) | Turtle hoop earrings - from a Sydney thrift store (similar)


5 Back to school outfits


Thursday

K-pop (?!!)

Channeling K-pop girl group vibes.

Mustard Corduroy Jacket - Topshop| Striped cropped tank - Brandy Melville | White tennis skirt - American Apparel | Brown leather backpack - Forever 21 (similar) | Cortez Sneakers - Nike | White fishnet socks - ASOS (similar)


5 Back to school outfits


Friday

Street style

For the last day of class before the weekend, I wanted to be a bit more adventurous and play with a lot of contrasting elements.

NASA T-shirt - Urban Outfitters (similar)| Body con midi skirt - H&M| “Love you” tote - Rebecca Minkoff | Chunky dad sneakers - FILA | Saturn earrings - made by my aunt (similar)


I hope this video and post gave you some inspiration to create your own outfits for the upcoming semester. Wishing you an amazing 2019-2020 school year!

♥ Cindy

 
Fashion, 2Cindy ZhangComment
Tortilla Española (Spanish Omelette)


Watch the video for a in-depth tutorial on how to make this dish. If you enjoyed watching, please give me a thumbs up/subscribe to me on YouTube!


Tortilla Española (Spanish Omelette)


One dish that I came across literally everywhere in Spain was Tortilla Española, also known as the Spanish omelette. I found it served as a side dish in paella restaurants, in tapas bars with other small eats, and even stuffed into a croissant for breakfast at small cafés. Because this dish is insanely simple, and is traditionally made with only 5 ingredients—eggs, potatoes, onions, olive oil, and salt—I couldn’t wait to come back home and make it in my own kitchen, and now, share with y’all how to make this as well :)


Tortilla Española (Spanish omelette)


This dish can be served cold or hot, as a simple lunch with some salad, or for breakfast in place of your usual omelette. It’s blasphemy to the Spanish to add anything else inside this omelette besides potatoes and onions, but you can definitely get more creative in the comfort of your own kitchen by adding your favorite omelette ingredients—just make sure there aren’t any Spanish people watching you :)

Unfortunately, as you can see from the photo above, the sides of my omelette didn’t turn out to be very smooth and I had some egg jutting out at the edges. If you want to avoid making my mistake, make sure you tuck in the egg mixture on the sides of the pan as you’re cooking.


Tortilla Española (Spanish Omelette)


To make this dish, all you need is 5 simple ingredients: eggs, potatoes, onions, olive oil, and salt. If you don’t have any onions, feel free to leave them out (including onions in your Tortilla Española is a very controversial topic).


You might be shocked at the large amount of olive oil we’ll need to use to initially fry the onions and potatoes. But don’t fret, we’ll drain out the oil from the potatoes and onions and reuse it for frying the omelette later on.


Tortilla Española (Spanish Omelette)


Cooking a Spanish omelette requires a lot of confidence when you’re flipping your pan upside down onto a plate. If you do it fast and definitively, you’ll have no problem flipping the egg out of the pan and won’t make a mess. A lightweight, 8-inch pan will also help in making the flipping easier, as well as making a small enough omelette to work as a side dish.


Tortilla Española (Spanish Omelette)


Tortilla Española is also perfect as a filling inside sandwiches. In Seville, I had breakfast at a café called Salt & Sugar that served the omelette inside a croissant. So at home, I also tried stuffing a slice of the omelette into a toasted croissant with some sliced salami (though traditionally, Spanish people will eat it with sliced chorizo, which I didn’t have).


IMG_3144.jpg


Tortilla Española (Spanish Omelette)

Ingredients (Makes 2 8-inch omelettes)

  • 2 potatoes, peeled
  • 1 medium onion
  • 6 eggs
  • 1/2 cup olive oil
  • 2 tsp salt
  • Chopped chives for garnish (optional)

Takes , Makes 2 eight-inch omelettes.


Instructions

  1. Slice the onion into thin half-moon pieces. Peel the potatoes and also slice them thinly into half-moon pieces, about the same size as the onions.

  2. Heat up ~1/2 cup of olive oil in a skillet, and toss in the onions before the potatoes. Adding the onions first will bring out their sweetness to infuse with the potatoes later.

  3. Add the potatoes and simmer with the onions in the olive oil for about 10 minutes, or until they are slightly crispy and browned.

  4. Crack 6 eggs into a large bowl and whisk them together thoroughly.

  5. Put a strainer on top of a heat-proof bowl and strain the oil away from the onions and potatoes. Set aside the onions and potatoes to cool before adding them to the egg mixture to avoid scrambling the eggs.

  6. After they've cooled down, add the potatoes and onions into the egg mixture and combine with about 2 tsp of salt.
  7.  
  8. Heat some of the leftover strained oil in an 8-inch nonstick skillet, making sure to coat the bottom of the pan entirely. Add half of the egg mixture and stir gently to cook the eggs evenly.

  9. Add a lid on top of the skillet and let the eggs cook for about 2-3 minutes.

  10. Put a plate on top of the skillet and flip the skillet upside down onto the plate, so that the omelette is cooked side up. Make sure to do this away from the stove to prevent accidents.

  11. Add some more oil to the pan and slide the omlette from the plate back into the pan, uncooked side down.

  12. Cook for another 2-3 minutes, and flip the omelette upside down onto a plate once again.

  13. Garnish with chopped chives if you'd like, and serve as a side dish, with a salad, or inside a croissant.


Tortilla Española (Spanish Omelette)


It’s been a while since I posted any food content on the blog or made a cooking video. I hope you enjoyed this recipe and that you try this in your own kitchen! Let me know how it turns out for you by tagging @cinders_zhang on Instagram! Support me by saving this recipe on Pinterest, and subscribing to my Youtube channel :)

If you’re looking for more content on Spain, check out my posts for Barcelona and Seville.

♥ Cindy

 
Food, 2Cindy ZhangComment
My Travel Essentials


Now that summer is here, we’re all thinking about traveling to new places and going on adventures. But travel can be pretty frustrating at times—from the hassle of carrying a bag full of outlet converters to your phone running out of battery constantly from high usage at the airport. In this post, I’ll share the essential items that I bring with me whenever I travel, along with all of the gear I use for photos and videos.


My Travel Essentials


Essentials for the need-to-document-everything type

Fujifilm QuickSnap Flash 400 Disposable 35mm Camera - I like to bring a film camera on trips in addition to my digital camera because it’s always a great surprise to see the photos after they’re developed, along with all the captured memories I’ve accumulated in the last few months or weeks. We’re all so used to digital photography and the instant gratification of snapping countless photos mindlessly and getting to see what they look like immediately. With only 27 photos in one camera, and not being able to see what photos look like until weeks later makes you much more conscious of how you’re composing the photo, and what you decide to take a photo of in the first place. Plus, after your film gets developed, your photos will all have a cool vintage film look to them. (See how my film photos of Italy turned out)

Camera charger and spare camera batteries - Never, ever, ever forget this if you’re planning on bringing your DSLR with you. When you’re snapping photos all day, your camera is bound to run out of battery pretty quickly, and it’s quite a hassle to find a camera store and try to get a new battery pack in a new city. (You can usually find camera stores in airports, but their products are usually overpriced)

Canon EF 50mm f/1.8 STM Lens - (For photos of food, of course!! and people) When you’re traveling, a standard lens that has a wide range of focal lengths is an essential. But, if you’re extra like me and like to take closeups of food or people, you should also invest in a zoom lens with a small aperture. I found the Canon 50mm f/1.8 to be super affordable and fantastic for dramatic photos with lots of bokeh.

Spare Micro SD cards - If you’re like me and find yourself taking photos of everything you find beautiful or interesting, then you’re likely to run out of space pretty fast. Bring a couple of spare Micro SD cards with you and remember to carry them with you before you go out exploring the town. Store a couple in your camera bag or in your wallet to keep them (and your memories) safe.


My Travel Essentials


DJI osmo Mobile 2 - If you love making videos of your travels and want to capture smooth, buttery footage as you walk around, a gimbal like the osmo Mobile 2 is a great affordable stabilizer. Pair it with a smartphone that has a nice camera to create cinematic content that people won’t believe was shot on a phone.

iPhoneX - “The best camera you have is the one you always carry with you,” right? For a reference on how to edit photos quickly straight on your phone, check out this post (for basic color correction) and this post (for removing unwanted objects in photos).

Canon EOS T7i - (Not pictured, because I was using it to take the above photo) The T7i is a lightweight DSLR that can do a whole lot—from great videos and audio quality to Canon connect: so you can instantly transfer photos to your phone to share with the world.


My Travel Essentials


Solving the outlet problem forever

HAOZI All-in-one Universal Travel Adapter with 2.4A 4USB - Yes, the world sucks for having so many different types of outlets, and before this gadget, I was wasting money on all sorts of converters and lost track of them after a trip ended. This all-in-one adapter for UK, EU, AU, Asia (covering 150+ countries) is not only great as an outlet adapter, but also just for charging all of your electronics since it has 4 built-in USB inputs. I found myself freeing up a lot of my luggage space by carrying this and not a bag full of outlet converts, plugs, and usb wires.


My Travel Essentials


If you’re out and about using your phone for directions or at the airport using it to kill time, you’re bound to use up your battery pretty quickly. When I travel, I carry around this huge Anker PowerCore 20100mAh power bank that is said to be able to charge an iPhone 7 almost seven times. It also has two USB ports in case a friend also needs to charge his or her phone, or if you need to charge other electronics as well.


My Travel Essentials


Because my eyesight is super bad, I always remember to bring my contacts as well as a pair of glasses to give my eyes some rest on long plane rides or when I’m relaxing at the hotel. A pair of classic Clubmaster sunglasses is also essential for the summer months, and will go with any outfit.


My Travel Essentials


Skincare

I tend to break out quite often on trips, and so I try to keep my skin clear by cleansing it thoroughly every night and keeping it moisturized. Because it’s tiresome to keep up with a full 5-7 step skincare regimen while traveling, I condensed it down to 2-3 steps: cleanser + sunscreen in the morning, and makeup remover + cleanser + moisturizer at night—with the occasional sheet mask here and there to do all the work for me while I’m relaxing after a long day.

Because it’s tough to carry around large skincare items (they’re heavy, plus they cause trouble at airport security), I like to carry sample size items that I received using my Sephora points or giveaway samples.

Sunscreen is also super important if you’re walking around outdoors all day. One that really works for me is Glossier’s Invisible Shield sunscreen, which is super lightweight and has a formula that you can barely feel. Because I get sunburnt pretty easily, I never rely on sunscreen alone and try to take a wide-brimmed hat along with me as well if I know I’m gonna be out and about.

Not really skincare, but—this foldable toothbrush is also super convenient for travel.


My Travel Essentials


Sorry for the lack of posts lately, but I hope you found this helpful! If you did, please don’t hesitate to save it to a board on Pinterest :)

Bon voyage! ✈️

♥ Cindy

 
A weekend in Seville, Spain (+vlog)

Shot on Canon T7i and edited with Adobe Premiere. Please subscribe to me if you enjoyed the video.


Known for being the birthplace of Flamenco, Seville is a unique city that blends Spanish culture with its Moorish past. Filled with colorful houses, narrow streets, and delicious tapas, it’s the perfect place to explore on a warm summer weekend.


A weekend in Seville, Spain


People have told me that different regions of Spain are like different countries—and it really showed when I flew into Seville from Barcelona. The large city blocks of Barcelona became small narrow streets—inhabited by cars, bikes, and pedestrians all at the same time. The large apartment buildings turned into small colorful townhouses, influenced largely by Moorish architecture in their design.

Seville is much smaller compared to Barcelona, and you can visit most of its attractions by walking. Here’s a map of my favorite spots.


A weekend in Seville, Spain


The Santa Cruz Neighborhood

I stayed in the Santa Cruz district (formerly known as the Jewish Quarter). This neighborhood is walking distance from a variety of attractions—including the Alcázar, Cathedral of Seville, and Plaza de España. Food options are limitless here, as it is home to countless tapas bars, formal sit-down restaurants, and cafés. To put the cherry on top of it all, this neighborhood is also filled with gorgeous narrow streets surrounded by colorful homes inspired by both Spanish and Moorish design.


Where I stayed

Sevilla Luxury Rentals - Alcázar 

Calle Miguel Mañara, 14
Seville

Pros: The location. It’s situated right next to the Alcázar and the Seville Cathedral. Its location in the Santa Cruz neighborhood makes finding food extremely easy. There are also several convenience stores located just outside the hotel. The check-in process was easy, and the staff even offered to provide a taxi service to and from the airport.

Cons: Because of how close it is to the Alcázar, the price ended up being pretty high. It also felt pretty touristy and didn’t feel as authentic as staying in someone’s Airbnb.


A weekend in Seville, Spain


The Real Alcázar of Seville

Explore the Alcázar of Seville, which was a Christian royal palace built on a Muslim residential fortress. Its unique architecture is influenced by its rich history of Christian and Moorish rule. Be sure to visit the Hall of Ambassadors, which contains one of the most gorgeous ceilings. If you’re a Game of Thrones fan, you might also recognize the Alcázar’s Patio de las Doncellas courtyard, which was used as the filming location of the Kingdom of Dorne.


A weekend in Seville, Spain


There’s lots to explore in this huge palace: including lush outdoor gardens adorned with palm trees and the Baths of Maria De Padilla, which is an underground pool that’s guaranteed to be kept cool in the sweltering summers.

Be sure to book your tickets ahead of time for a given time slot, as the line for the tickets can get extremely long. 


A weekend in Seville, Spain


Plaza de España

Otherwise known as the “Spanish Square”, Plaza de España is one of the most beautiful open areas to stroll through in Seville. The pavilion buildings are decorated with mosaics, and encloses a small stream where you can take a relaxing boat ride. 


A weekend in Seville, Spain


If you’re looking for free attractions in Seville, this plaza is great for viewing open Flamenco performances and musicians alike.


A weekend in Seville, Spain


El Pinton for Lunch

If you’re looking to eat tapas in a sit-down, upscale ambiance, try El Pinton. Their spacious dining room is illuminated by a huge window in the ceiling that lets in a lot of natural light. Even though the dishes and the setting might seem pretty fancy, the price point is really not too bad (especially compared to San Francisco prices). You can get a main for around 9.5 euros at lunchtime. The restaurant was fairly empty when I went at noon, but I’ve heard that it gets super busy around dinner time—so try making a reservation ahead of time.


A weekend in Seville, Spain


I made the effort of waking up early to take street photos again :) Unfortunately, Seville’s sunrise happens fairly late (around 7:50-8:00), so the streets were still fairly dark when I went out.


c
A weekend in Seville, Spain


las setas

Also known as Metropol Parasol (the Mushrooms of the Incarnation), Las Setas gets the crown for being the largest wooden structure in the world. Its modern design stands out against the city’s traditional Spanish and Moorish houses, and acts as a great viewpoint for the rest of the city. There’s even an underground farmers market where you can find fresh produce and small cafés.


It can get pretty confusing trying to figure out how to get up to the top of the structure. All you have to do is go down to the bottom-most level to purchase tickets (3 euros) to take an elevator up to the top.


A weekend in Seville, Spain
IMG_2789.jpg
A weekend in Seville, Spain


See a Flamenco show

Seville is the birthplace of Flamenco, so definitely try to catch a show while you’re here. I bought tickets to see an amazing show at the famous La Casa del Flamenco, but you can also catch a lot of flamenco action out on the streets in Santa Cruz and in the Plaza de España. It’s amazing to see all the dancers so in sync with the guitarist and singer.


A weekend in Seville, Spain


Breakfast and coffee at salt and sugar

Seville can get pretty touristy, which means I got tricked into having breakfast one morning at a coffee shop that served frozen pizzas (say what..?!). I found Salt and Sugar the next morning after an early photo walk and was drawn in by the dainty interior. I had a toasty croissant stuffed with a slice of a Spanish omelette (Tortilla Española) and a vanilla café con leche—which was so deliciously creamy and sweet (but probably super high in calories… but who cares when you’re on vacation, right?)


A weekend in Seville, Spain


Seville Cathedral

If you’re looking for something to do after visiting the Alcázar, the Seville Cathedral is located right next door. If you’re not too tired at this point, you can climb the La Giralda tower to get a great view of the city. Fun fact: Christopher Columbus is actually buried underneath the cathedral!


Eat Moroccan food

If you’re looking for a break from tapas, Seville is a great place for Moroccan food (considering it was previously ruled by the Moors). I went to Fez for lamb tagine (hearty moroccan stew eaten with cous cous) and Al Wadi for kebabs and seriously some of the best hummus I’ve ever had. Moroccan restaurants are also super accommodating for delicious vegetarian options.


A weekend in Seville, Spain


Now… if you don’t mind, I’m going to dump more photos of the gorgeous Santa Cruz neighborhood here :)


A weekend in Seville, Spain


Photos were taken on the Canon T7i and edited in Adobe Lightroom CC, with the exception of a few taken on my iPhone and edited with VSCO.

With its middle-eastern influences, Seville was definitely one of the most unique cities in Europe I’ve visited. It’s also one of the most colorful cities I’ve seen (up there with Burano!). Seville’s small size also makes it really convenient to see all the attractions in a day or two—perfect for a weekend getaway!

♥ Cindy

 
Travel, 2Cindy ZhangComment