Maple Honey Cake with Pistachio + Ricotta Frosting
 
Maple Honey Cake with Pistachio and Ricotta Frosting


Maple syrup, though lovely on a high stack of pancakes or waffles, also does a surprisingly good job in cakes and cookies. After having the maple pound cake at Icing on the Cake, a bakery in Downtown Los Gatos, I knew I needed to recreate it at home and experiment with my own additions. By the way, if you ever get a chance to visit the quaint, suburban, peaceful neighborhood of Los Gatos, Icing on the Cake is an amazing bakery on Main Street to stop by. They have a wide selection of delicious cookies and cakes with super quirky flavors. They also sell a huge variety of cute kitchen tools and decor... which are honestly really hard to say no to.


Maple Honey Cake with Pistachio and Ricotta Frosting


I really don't care if you hate the word "moist"—I'm just gonna say it. There's no other way to describe a good cake. What makes this cake particularly moist is the mix of maple syrup, honey, and condensed milk.


Maple Honey Cake with Pistachio and Ricotta Frosting
1559B472-F15E-49A4-BE9E-2A53E704595B.JPG


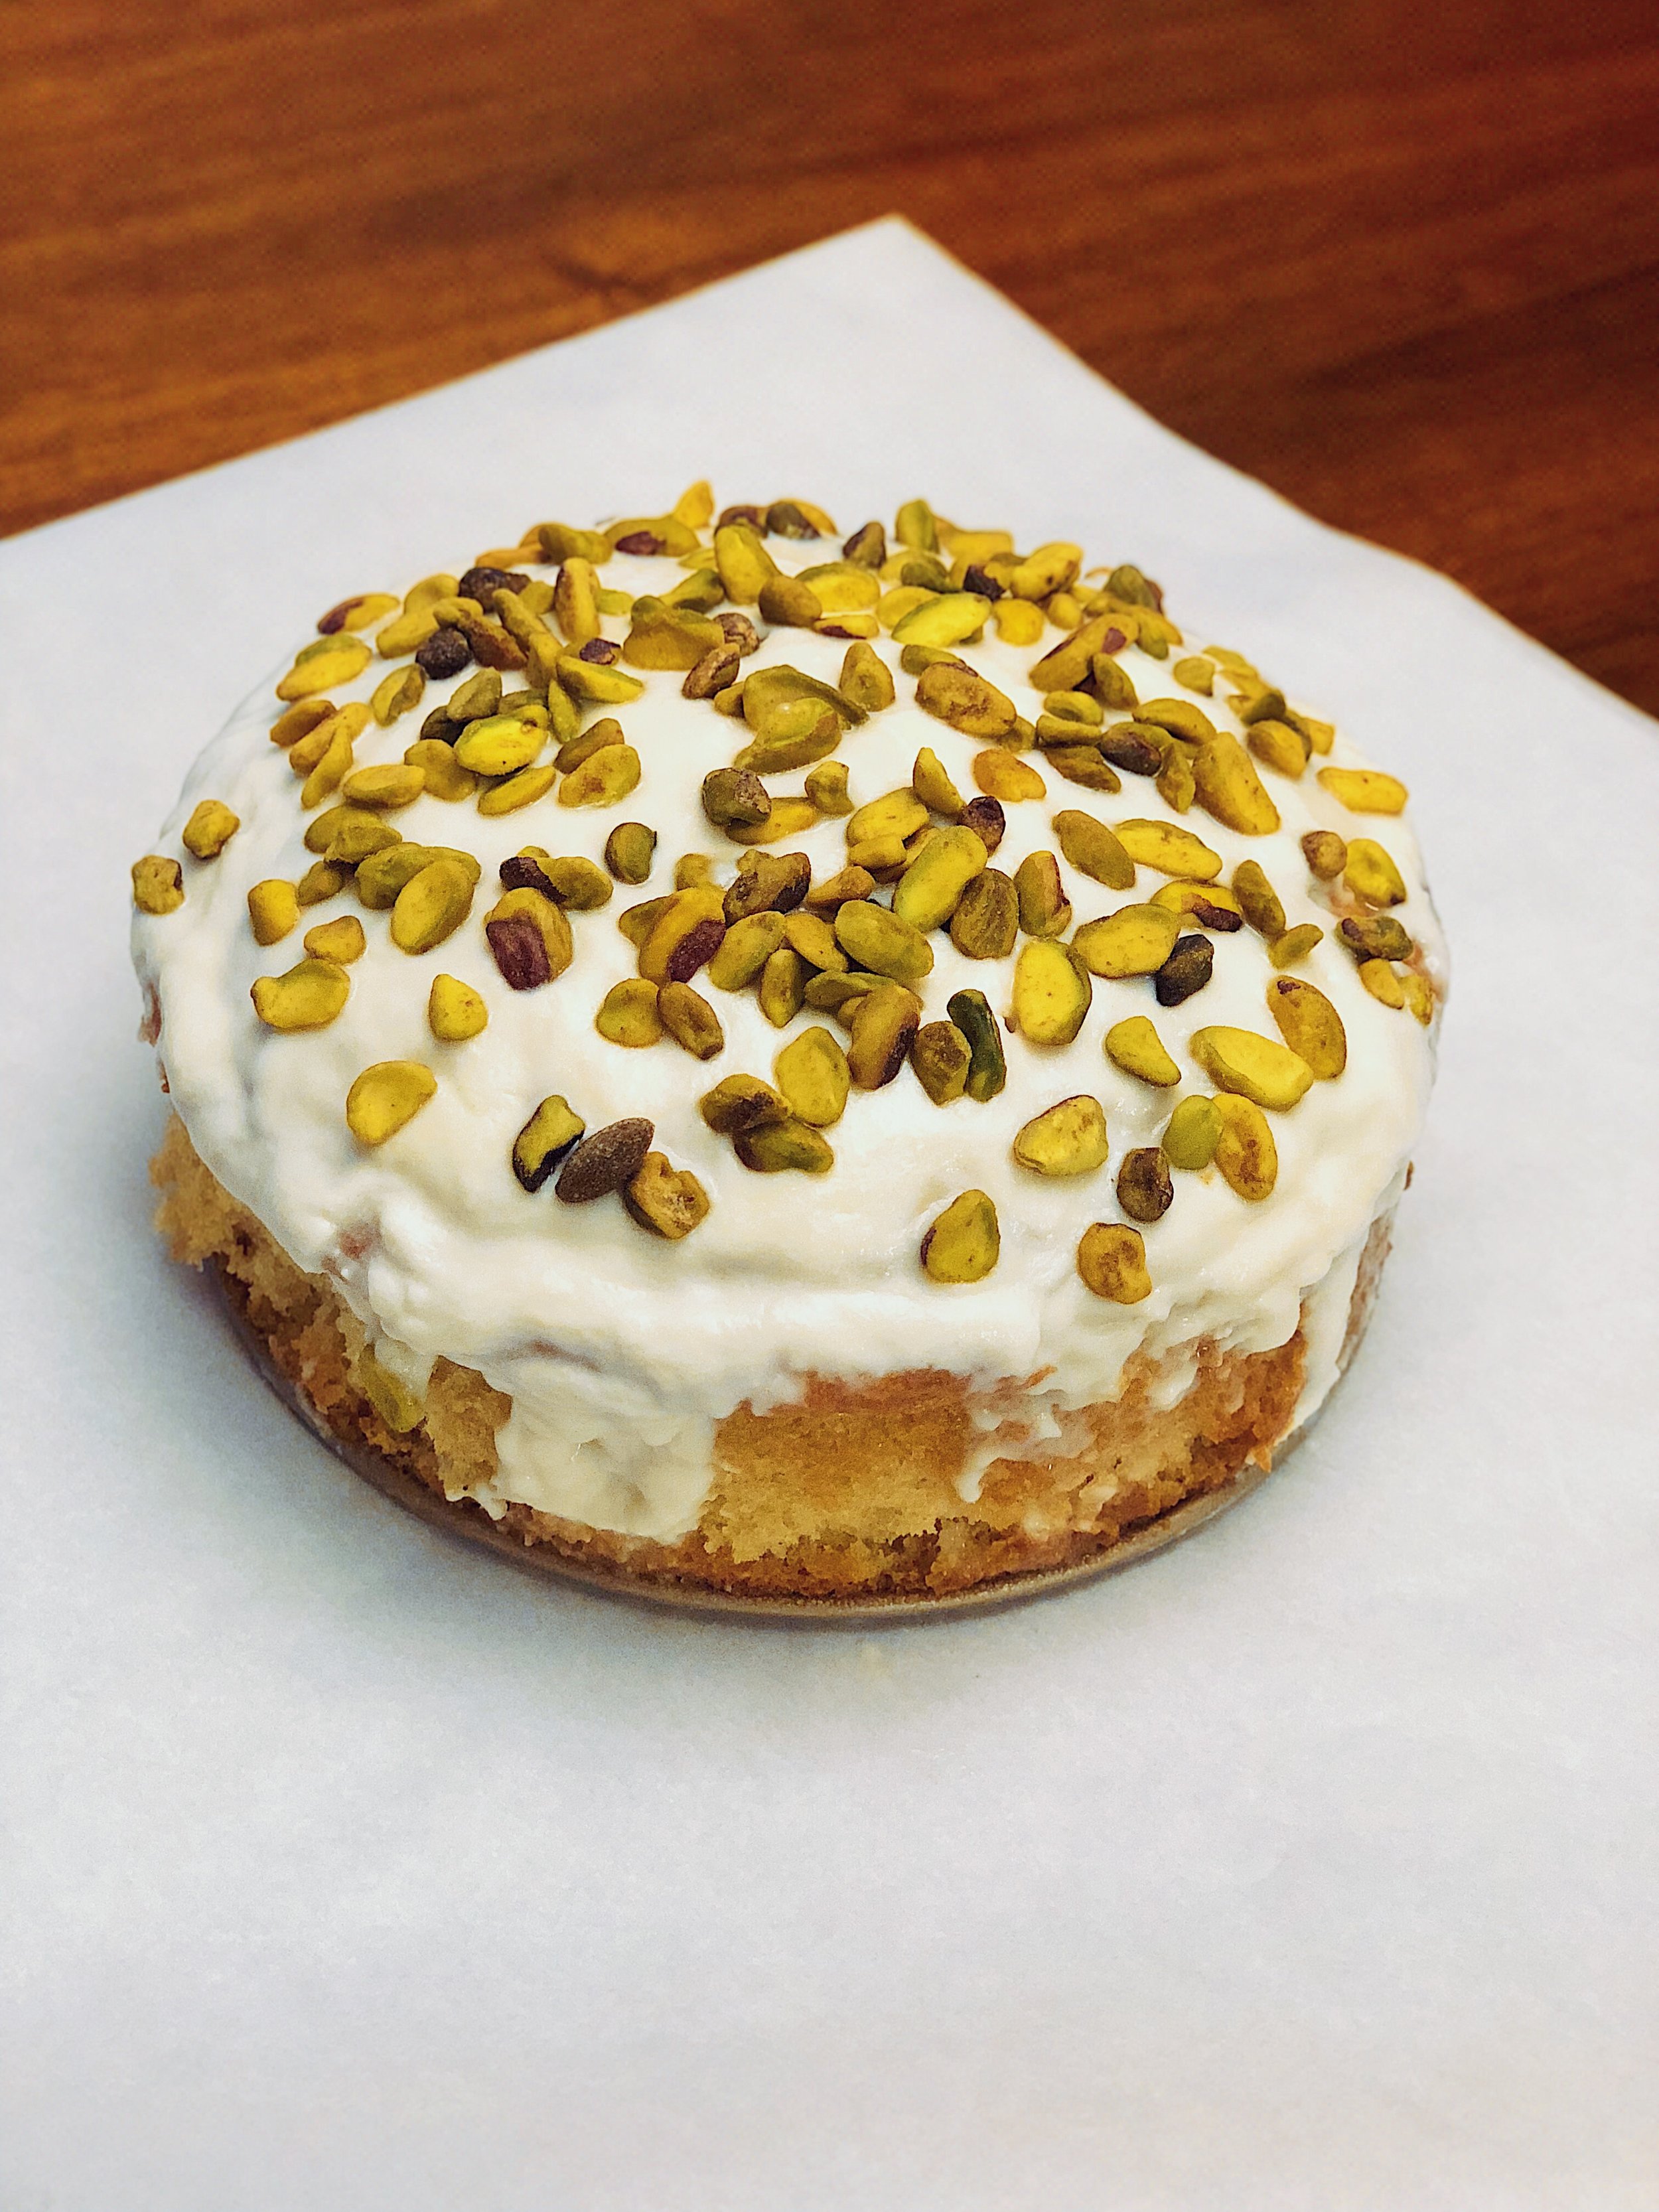
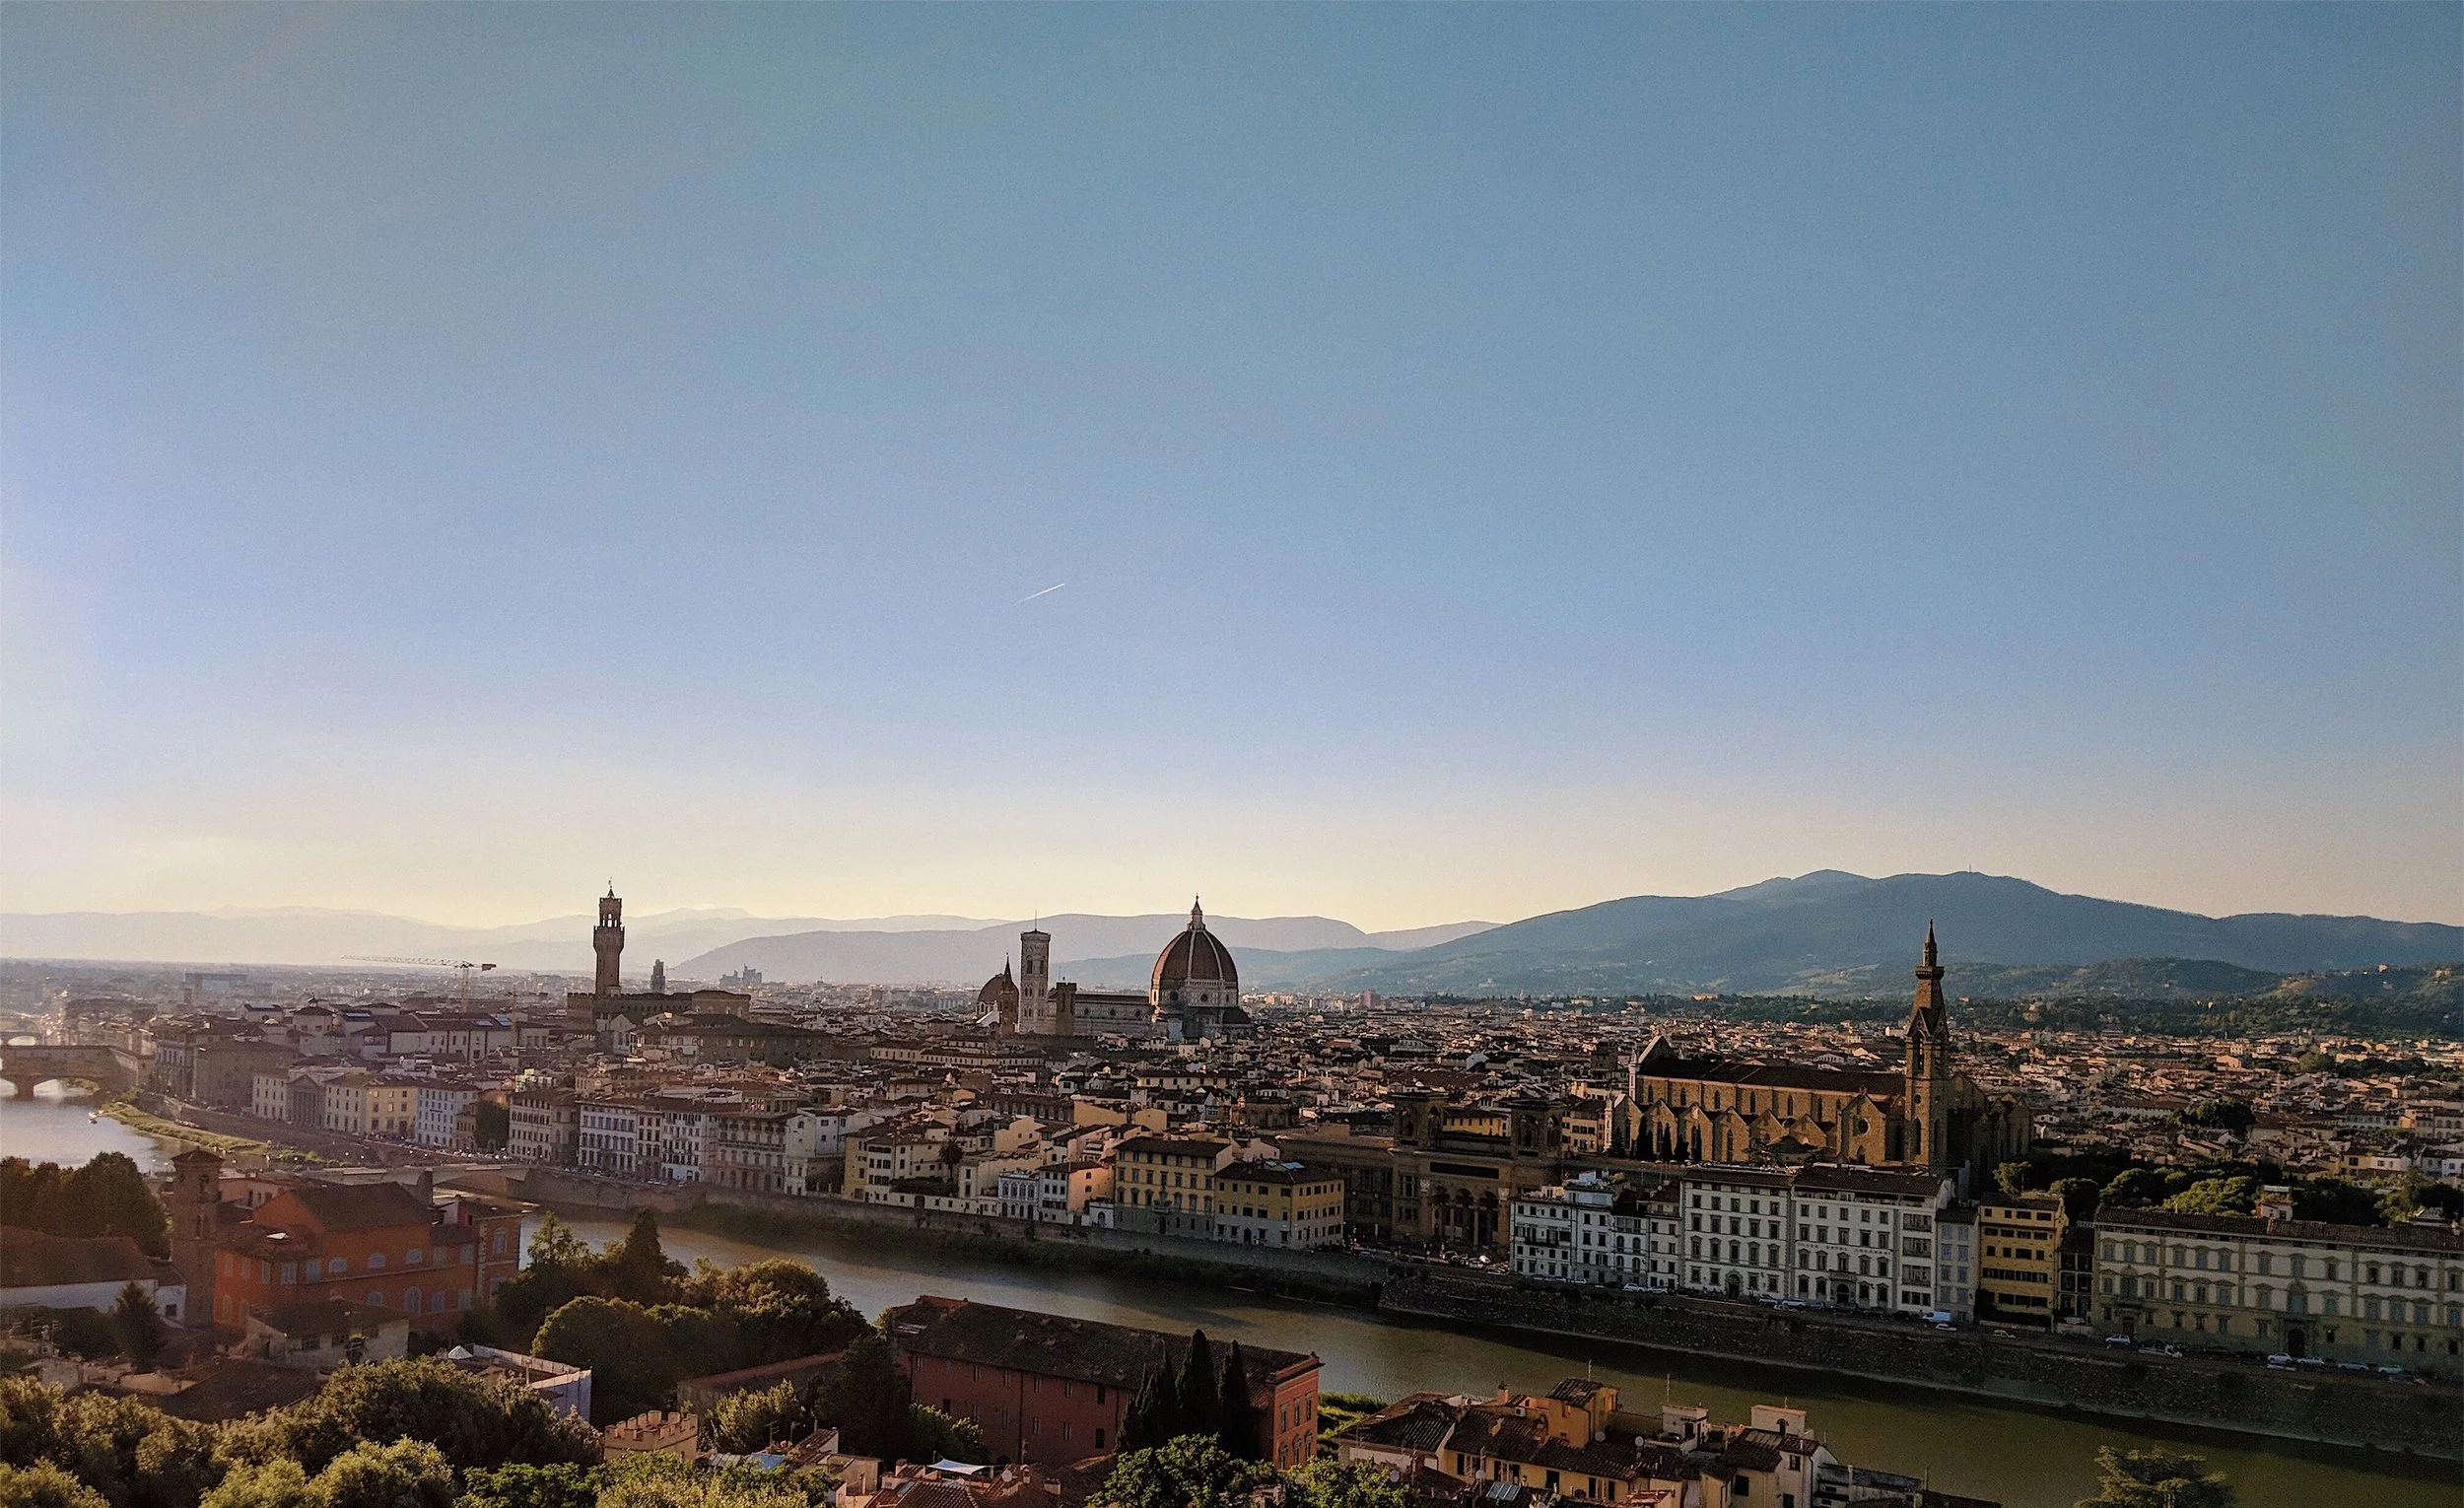
In terms of the frosting, I tried to balance out the maple syrup, honey, and condensed milk (which all add a lot of sweetness) with a savory element: pistachios. I always find nuts helpful not only in adding texture to desserts, but also in balancing out the overwhelming sweetness of certain ingredients. Pistachios also have a super sophisticated flavor profile—one that's really hard to recreate artificially. Kudos to the Gelaterias in Italy that do Pistachio-flavored gelato so damn well by making it seem like I'm eating freshly-toasted pistachios right out of the shell. The gelato ice creams here in the US definitely do not compare.


Maple Honey Cake with Pistachio and Ricotta Frosting


Maple Honey Cake with Pistachio + Ricotta Frosting

Ingredients

Cake
  • ¾ cups Canola Or Vegetable Oil
  • ½ cup Sugar
  • ½ cup Honey
  • 1 cup Sour Cream
  • 1 tsp Vanilla Extract
  • 3 Eggs
  • ¼ cups Pure Maple Syrup
  • 2-¾ cups All-purpose Flour
  • 2 tsp Baking Powder
  • ¼ tsp Salt
  • ½ cup Sweetened Condensed Milk
Frosting
  • ¼ cups Maple Syrup
  • 1 cup Powdered Sugar
  • ½ tsp Vanilla Extract
  • 1 cup Ricotta Cheese
  • ½ cups Shelled Pistachios

Takes , Makes 8 servings.


Instructions

  1. Preheat the oven to 325° F (160° C). Line the bottom and sides of a circular pan with parchment paper and spray with nonstick cooking spray

  2. In large bowl, combine all the wet ingredients: oil, sugar, vanilla, eggs, maple syrup, sour cream, milk, and honey.

  3. Sift flour, baking powder, baking soda, salt, and combine all of these dry ingredients in another bowl.

  4. With the mixer on low, slowly add the wet ingredients to the dry ingredients in multiple stages. Ensure that everything is mixed well by pausing the mixer to scrape down the sides. You'll know when you're done when the mixture is ribbon-like and has no clumps.
  5.  
  6. Pour the mixture into a deep circular pan and bake for 55 minutes to an hour, or until a toothpick comes out clean. Let the cake rest for 15 minutes after taking it out of the oven.

  7. After resting the cake, poke small holes on the top of the cake with a toothpick. Pour the condensed milk onto the cake and let it sink into the holes of the cake created by the toothpick.

  8. For the frosting, combine the ricotta cheese, powdered sugar, maple syrup, and vanilla extra until well-mixed.
  9.  
  10. Toast the shelled pistachios by either putting them in a hot pan or in the oven for a few minutes. Frost the cake with the ricotta mixture, and top it off with toasted shelled pistachios.
  11.  


Recipe adapted from Lauren's Latest


It's clear that this recipe, unlike the other ones you've seen from me, is pretty time-consuming and requires a plethora of ingredients. But it's definitely great to try out if you're looking for something to bake and eat on a rainy night-in. The cake is so so worth it—and, so moist :^)

♥ Cindy

 
Food, 2Cindy Zhang Comments
Tomboy Street Style
San Francisco streetstyle
Tomboy Street Style


To be honest, I've been obsessed with menswear as early as middle school. I've always loved the sharp lines of a crisp tailored blazer, the classic leather of a men's messenger bag, and the fancy laces on a shiny pair of oxford loafers. Sadly, as a middle schooler, I didn't have a lot of courage to rock these pieces due to a longing to fit in with the rest of the students, who chose Abercrombie & Fitch fleeces and jeans to be their uniform. Now, as a working adult, I find that menswear actually plays really well into a woman's work wardrobe. So much that I often feel more confident being in a classic blazer and button up combo than a feminine dress and heels.


Tomboy Street Style
Tomboy Street Style


The suit combo trend has been another one of my obsessions lately. I've been scouring for a two-piece suit with a bold color or pattern for a while, but haven't found the right one in the right size (shopping for suits or any two-piece sets can be quite the challenge for petites). So to recreate this suit combo look, I merely took a classic black blazer from the back of my closet and paired it with my classic black cigarette trousers. Because the all-black combo can look a bit stuffy and overly-formal, I made sure to layer a casual T-shirt underneath it and to compliment the suit with a pair of Adidas Stan Smiths. 


Tomboy Streetstyle
 
 
San Francisco Streetstyle collab


This was a joint shoot with Maya Deschamps of M.A.D Mgmt, a San Francisco-based style and beauty consulting company. Maya, who used to model in Paris and walk runways for fashion houses like Christian Dior, reached out to me via my post about the Glossier pop up, and I was super excited to meet up and collaborate with her on new style content instantly.  If you're interested in more of her work, follow her on Instagram and check out the style consulting services at M.A.D Mgmt.


Earrings - Yesstyle | Lipstick - Fenty Mattemoiselle in "Spanked" | T-shirt - from Emily King's "You and I" tour


To downplay the formal vibe created by the black suit, I decided to layer a minimal white graphic underneath it. This T-shirt I purchased when I saw Emily King in her "You and I" tour back in 2017. The graphic in this tee is actually an outline of the photo in the cover of her album titled "The Switch," which I put on repeat throughout my senior year in college. I love how the tour tee is just a simple outline, and not gaudy or overly-colorful like many artist's fan merchandise turn out to be. 


Emily King - The Switch


Blazer - Uniqlo | Trousers - ASOS | Sneakers - Adidas Stan Smith | T-shirt - from Emily King's "You and I" tour


Apparel: Blazer: Uniqlo| T-shirt: tour tee from Emily King's "You and I" tour| Pants: ASOS| Sneakers: Adidas Stan Smith in green| Earrings: Yesstyle

Photos: Bianca Hudetz


Earrings - Yesstyle | Lips - Fenty Mattemoiselle in "Spanked" | T-shirt - from Emily King's "You and I" tour


Earrings - Yesstyle | Blazer - Uniqlo | T-shirt - from Emily King's "You and I" tour | Lipstick - Fenty Mattemoiselle in "Spanked"


To complete the outfit, I added a feminine touch to balance out the menswear with some jewelry. I added a pair of dangly hoops, which helped add a little shine to monochromatic outfit. These hoops, which were found on Yesstyle, are also super minimal, which helped tie together the clean lines from the blazer and the minimal art in the graphic tee.


Earrings - Yesstyle | Lips - Fenty Mattemoiselle in "Spanked" | T-shirt - from Emily King's "You and I" tour


Location: These were taken on the corner of Alabama and 18th in the Mission, which is filled with colorful murals and beautiful walls. This area in the Mission is also home to some great dining, including Tartine Manufactory, Flour + Water, and Farmhouse Kitchen.


Blazer - Uniqlo | Trousers - ASOS | Sneakers - Adidas Stan Smith | T-shirt - from Emily King's "You and I" tour


A huge thanks to Bianca for taking the photos and Maya for coordinating the shoot! 

♥ Cindy

 
Fashion, 2Cindy ZhangComment
Stuffed Dates 5 Ways (my first cooking video!)

Video was shot using the iPhoneX + DJI Osmo Mobile 2 for stabilization. Edited with Adobe Premiere Pro CC 2018 and Adobe After Effects CC 2018.


Welcome to episode 1 of "Cooking with Cinders", a new segment on my YouTube channel focused on cooking and baking!


Stuffed Dates 5 Ways


I've always posted food content on my blog, but I never put much thought into actually filming a cooking demo until after I finished up my Italy vlogs. Thanks to editing those long videos, I became way more familiar with Premiere and After Effects than I ever would've imagined, and it only seemed natural to apply this knowledge to creating a cooking video as well!

The first episode of this series is going to be on making stuffed dates. And not only one kind of stuffed date, but five. Because, let's face it: you're going to go on some pretty drastically different dates in life. Some of them are gonna be great and others are going to start and end terribly and make you cringe just at the memory of them. But don't worry, the five dates in this post won't fail you and are going to be very, very delicious.


Stuffed Dates 5 Ways


Dates are a great alternative to more processed, sugary snacks when you're craving something sweet. Not only are they delicious, but they're full of health benefits. Because they're rich in fibers, they'll help reduce bloating and digestion. They're low on sodium but loaded with potassium, which helps strengthen the nervous system. In addition, they contain a lot of protein, which make them a great post-workout snack or breakfast option. 

The most attractive aspect of dates for me is their skincare benefits. They're rich in Vitamin C, which is widely known for fading dark spots and helping with your skin's elasticity. They also contain Vitamin D, which boosts your skin's immune system and destroys free radicals that can cause premature aging.


Stuffed Dates 5 Ways


Dates are a great canvases or both sweet and savory ingredients. Here are five different ways to use dates to create the perfect spread for a cocktail party, afternoon snack, or healthy breakfast:


Pistachio, Honey, and Ricotta Stuffed Date

1. Pistachio, Honey, and Ricotta Stuffed Date

Ingredients (makes 12):
1/2 cup ricotta cheese
1 tbsp honey
1/4 cup shelled pistachios
12 dates with pits removed

Directions:
1) Combine the ricotta cheese and honey. Be sure not to add too much honey since the dates will already contribute a lot of sweetness

2.) Finely chop the pistachios

3) Stuff the open dates with the ricotta and honey mixture and sprinkle the chopped pistachios on top. Drizzle extra honey on top if desired

4) Optional: Toast in a 400° F (around 200° C) oven for 3-5 minutes

 
Earl Grey, Fig, and Ricotta Stuffed Date

2. Earl Grey, Fig, and Ricotta Stuffed Date

Ingredients (makes 12):
1/2 cup ricotta cheese
1 tbsp honey
1/4 cup of earl grey tea
1/4 cup of fig jam*
12 dates with pits removed

* If you can't find fig jam, feel free to substitute with any other fruit jam. I found my jar from Trader Joes.

Directions:
1) Combine the ricotta cheese and honey. Then add in the earl grey (I simply took my tea from an earl grey tea bag)

2) Stuff the open dates with the ricotta and earl grey mixture and add a dollop of fig jam on top

3) Optional: Toast in a 400° F (around 200° C) oven for 3-5 minutes

Banana and Walnut Stuffed Date

3. Banana and Walnut Stuffed Date

Ingredients (makes 12):
1 ripe banana
12 walnuts
12 dates with pits removed

Directions:
1) Slice the banana thinly into 12 pieces for each date

2) Stuff the open dates with a slice of banana and 1 piece of walnut

3) Optional: Toast in a 400° F (around 200° C) oven for 3-5 minutes

 
Lemon and Cream Cheese Stuffed Date

4. Lemon Cream Cheese and Sesame Stuffed Date

Ingredients (makes 12):
1/4 cup lemon zest
1/4 cup of lemon juice
1/2 cup of cream cheese, softened
1 tbsp sesame seeds

Directions:
1) Soften up the cream cheese by taking it out of the refrigerator in advance, or microwaving it for a few seconds

2) Combine the lemon juice and cream cheese, and stuff the mixture into the open dates

3) Top off each date with the lemon zest and sprinkle on the sesame seeds

4) Optional: Toast in a 400° F (around 200° C) oven for 3-5 minutes

 
Prosciutto Wrapped Dates stuffed with Brie

5. Prosciutto wrapped Dates stuffed with Brie

Ingredients (makes 12):
4 oz prosciutto
Brie
12 dates with pits removed

Directions:
1) Slice the Brie into bite-sized pieces

2) Slice the prosciutto into inch-wide pieces that will cover the surface area of the date

3) Stuff each open date with a slice of Brie and wrap a slice of prosciutto around the outside

4) Secure each date with a toothpick and they're ready to eat! 


Surprisingly simple, right? Definitely feel free to get creative with these, and stuff them with your own set of favorite ingredients—or even whatever you have left in the fridge and pantry.


Stuffed Dates 5 Ways


It is not by any means required that you toast these dates in the oven. I just find that by doing so, you give bring out the flavor of the nuts more, and allow the honey to carmelize on top of the dates.


Stuffed Dates 5 Ways


I'm all in favor of making delicious food that don't take a large amount of time or a wide range of ingredients—and it looks like my previous posts have all been focused on making foods of this nature. If you have a preference for more complicated recipes or simpler dishes that you can just whip up, please let me know in the comments :)

If you enjoyed watching, please give the video a thumbs up. If you'd like to see more cooking demos, please subscribe to my YouTube Channel to stay updated! 

♥ Cindy

 
Food, 2Cindy Zhang Comment
The most comfortable pants in the world
Pants - Urban Outfitters | White Loafers - Everlane


One of the worst things about waking up in the morning the thought of having to force myself into a pair of tight jeans for the day. And I'm sure I'm not the only girl in the world who feels this way. So lately, I've been gravitating towards looser bottoms, like maxi skirts and wide-leg pants, which not only provide the length needed for the always-chilly San Francisco weather, but also the comfort of a pair of sweatpants.


Oversized Denim Jacket - Yesstyle


I’ve loved experimenting with oversized items of clothing lately—especially by putting an oversized jacket on top of an oversized pair of pants. It’s a little bit tricky to do on my 5’3’’ frame, but as long as the pants aren’t too long, and you’re still showing a little bit of ankle, you should be fine. To add a bit of contrast to the oversized denim jacket and baggy pants, I layered a tight, simple black bodysuit from Brandy Melville underneath to make sure the volume didn’t swallow me up completely.


Pants - Urban Outfitters | White Loafers - Everlane
Bodysuit - Brandy Melville | Pants - Urban Outfitters | White Loafers - Everlane


To add a little polish to the outfit, I turned to my white loafers from Everlane (probably my favorite pair of shoes at the moment). The simplicity of these loafers and its clean lines really helped balance out the loud colors in the pants and to bring a more upscale look to the outfit. These are probably one of the more expensive shoes in my closet, but also one of the most versatile. I’ve found myself wearing these shoes with flowy dresses and skirts to add a more masculine, edgy persona... and also with more casual jeans + T-shirt combos to make them feel more put together.


Bodysuit - Brandy Melville | Pants - Urban Outfitters | White Loafers - Everlane


Apparel: Oversized Denim Jacket: Yesstyle| Black bodysuit: Brandy Melville | Pants: Urban Outfitters| White loafer mules: Everlane

Photos: Jeffery Wang


I know I haven't posted much fashion content here for a while, but it's been getting difficult to find time to schedule photoshoots lately. Hopefully I'll have a few more outfit posts up before summer ends!

♥ Cindy

 
FashionCindy Zhang
4 Ingredient Pasta - Cacio e Pepe
Cacio e Pepe - Simple Pasta with only 4 ingredients


If you're not counting the egg, Cacio e Pepe is a dish that requires only 4 ingredients: pasta, black pepper, pecorino cheese, and pasta water. A common staple in Roman cuisine, this dish appeared on the menus of multiple restaurants I visited in Italy. Since this dish is extremely simple, it was not intimidating at all to recreate it in the comfort of my own kitchen. 

Because this dish contains so few ingredients, I decided to add a poached egg on top of the pasta for a protein boost. Poached eggs might seem like a tricky item to make, but all it takes is a few tips and tricks to make sure that you succeed.


Cacio e Pepe - Simple 4-ingredient Pasta


Noodles are always better with a runny egg on top—no questions asked.


Cacio e Pepe - Simple 4-ingredient Pasta


poached eggs tips and tricks

Use a small bowl—crack the egg into a small bowl before dropping it into the water. This will make sure that the egg occupies a smaller space in the water, thus staying together better. Doing this step will also ensure that you don't accidentally leave any egg shells in the egg.

Spin the water—Make a "tornado" in the water with a spoon before adding the egg. This will allow the egg to spiral onto itself and prevent it from falling apart in the water.

Be patient, but not too patient—although overcooking a poached egg is a big no-no, the egg will still need to stay in the water for while before you can actually pick it up with a spoon. I can't tell you how many times I've removed an egg too early from the water only to have it fall apart on my dish or within the pot.

No need for vinegar—I find that sour eggs are not exactly palatable and that you can make an completely perfect poached egg without adding vinegar to firm it up. Simply making sure that the water is moving and spiraling before you add in the egg will suffice.


Cacio e Pepe - Simple 4-ingredient Pasta


Cacio e Pepe, directly translating "cheese and pepper" in Italian, is usually made with a thin pasta like spaghetti. Because this recipe is so minimal, it can be a great backdrop to showcase a high quality pecorino cheese or freshly grated black pepper. To reduce the cooking and cleaning time even further, you don't even have to complete the pasta on the stove in another pan. You can simply mix the pasta, cheese, black pepper, and pasta water in a large bowl to finish it up. The pasta water will emulsify the cheese to create a creamy sauce while also seasoning the pasta with the salt you previously added to the water.


Cacio e Pepe - Simple 4-ingredient Pasta


Why not give this a try as a simple weekday dinner?


Cacio e Pepe - Simple 4-ingredient Pasta


Cacio e Pepe


Ingredients

  • 16 oz of Spaghetti (or another long thin type of pasta like Linguini)
  • 6 oz of Pecorinio Cheese, grated
  • Freshly ground black pepper to taste
  • Salt to taste (and to season the pasta water)
  • Optional: Eggs

Takes , Makes 4 servings.


Instructions

  1. Bring a pot of water to a boil. Ensure that it's reasonably seasoned with salt before adding the pasta

  2. Add the spaghetti and cook for about 10 minutes or until Al Dente

  3. Bring the cooked spaghetti into a large bowl and slowly incorporate the pecornio cheese while ladling in the leftover pasta water. Stir well to allow the hot water to emulsify the cheese.

  4. Add a generous amount of freshly cracked black pepper. Mix well to infuse pasta with the pepper. If needed, season with salt to taste.

  5. Add a poached egg on top if desired (Please refer to the above "Poached Eggs Tips and Tricks" section for extra guidance).
  6.  


Note:  This recipe is intended for simplicity. Please feel free to improvise off of it and to add your own twist with other ingredients!


I've been ignoring food content on my blog for a while now, so I hope this post was a breath of fresh air. I've mostly been focused on trying to present everything I collected in Italy in an organized manner, so I've been spending large amounts of time editing travel vlogs and photos. I still have some content on Italy left, but they're mostly going to be fashion-related. If you're interested on the Italy content, please visit the new travel section I created—filled with travel tips, ideas, and oh so many food recommendations.

I also have some video content coming out for recipes, so please subscribe to my YouTube Channel to stay updated!

Please try this out if you're looking for a simple meal to make. It literally takes no time at all and is super delicious :)

♥ Cindy

 
Food, 2Cindy ZhangComment
Italy Travel Diary + Vlog | Part 3 - Florence

Video was shot using the iPhoneX + DJI Osmo Mobile 2 for stabilization. Edited with Adobe Premiere Pro CC 2018 and Adobe After Effects CC 2018.


Buonasera! Here is the final installation to my trilogy of Italy vlogs—a short video on my 24 hours in Forence. If you haven't done so already, be sure to check out Part 1 on Rome, and Part 2 on Venice + Burano (probably my favorite out of the 3). If you're liking the videos so far, please give them thumbs up, or subscribe to my YouTube channel.

Although I was only offered 24 hours in Florence, I was able to explore a variety of places because the city was very condensed and easy to navigate on foot. Considered the birthplace of the Renaissance, Florence is filled with famous masterpieces such as Michelangelo’s David and Sandro Botticelli's The Birth of Venus. Despite not being very well-versed in art history, I still found the city to be intriguing and filled with gorgeous monuments. Oh, and scattered with delicious authentic Italian food on every street corner.


Duomo - Florence | Italy Travel Diary + Vlog Part 3
(Duomo) Florence - Italy Travel Diary + Vlog Part 3


We decided once again to do one of our early morning photo/filming trips. Since the area around the Duomo (otherwise known as Cattedrale di Santa Maria del Fiore) is always crowded with tourists during the day, I attempted to get some nice shots at dawn but found dozens of other photographers and vloggers trying to do the same thing.


Duomo - Florence | Italy Travel Diary + Vlog Part 3


As a general rule of thumb: your knees and shoulders must be covered whenever you enter a cathedral or church in Italy. But don’t be alarmed, there are dozens of vendors selling scarves and capes outside the church for women like myself—who, finally getting a break from her work wardrobe, chose to bring along the most revealing pieces from her wardrobe on her vacation.


Piazzale Michelangelo - Florence | Italy Travel Diary + Vlog Part 3
On the way to Piazzale Michelangelo - Florence | Italy Travel Diary + Vlog Part 3
Piazzale Michelangelo - Florence | Italy Travel Diary + Vlog Part 3


Piazzale Michelangelo is one of the best vantage points to get a view of Florence as a whole. Do note that you will have to work for it though. Google maps might tell you that it’s a twenty minute walk from wherever you are in the city… but that twenty minute walk is a walk straight uphill. And if you’re doing it in the 90 degree Italian summer, do expect a workout before you’re rewarded with the view.


Florentine steak at La Giostra - Florence | Italy Travel Diary + Vlog Part 3
Pear Ravioli at La Giostra - Florence | Italy Travel Diary + Vlog Part 3
Free antipasti platter at La Giostra - Florence | Italy Travel Diary + Vlog Part 3


After hiking up to Piazzale Michelangelo, we were quite starving by the time of dinner. Because Italians usually eat very long dinners late into the night, we booked a reservation at La Giostra at 9:15PM. I was dying to try the Florentine steak, and the internet was telling me that La Giostra was the place to try it. Although the steak itself set us back 84 euros, the restaurant provided us with multiple glasses of wine on the house and a free appetizer platter. We also ordered the pear ravioli, which was divine.

And by no means did they skimp on this appetizer sampler. On it was a tasty salad, bruschetta, foie gras, vegetable fritters, and house-made bologna. This would’ve set me back at least 15 bucks in San Francisco. But here it was 0.


La Giostra - Florence | Italy Travel Diary + Vlog Part 3


The restaurant is dimly lit with hundreds of small ceiling lights that created a romantic but nostalgic vibe. On the wall are photos of famous celebrities that have visited in the past, including John Travolta and Tom Hanks. If you’re interested in dining here, be sure to make a reservation in advance on La Giostra’s website.


Cute Airbnb in Florence | Italy Travel Diary + Vlog Part 3


Our small but cute Airbnb. Filled with all sorts of nostalgic furniture.


Shakeratos at a café in Florence | Italy Travel Diary + Vlog Part 3


The shakerato was definitely my favorite drink in Italy. Such a shame you can’t get it in the States…


Michelangelo's David in Florence | Italy Travel Diary + Vlog Part 3
Music Gallery at the Accademia Gallery in Florence | Italy Travel Diary + Vlog Part 3


Being a tourist, I was obligated to say hi to the David statue at the Accademia Gallery. David was created by Michelangelo when he was only 26, and is considered one of the most renowned works of the Renaissance. Because it’s such a famous piece of art, be sure to book your tickets to the Accademia online in advance to avoid waiting in the long line that stretches far around the block.

The Accademia is also home to a myriad of other famous works of the Renaissance. If you get tired of looking at paintings and sculptures, be sure to stop by the music gallery that showcases a variety of ancient instruments.


Ponte Vecchio Florence | Italy Travel Diary + Vlog Part 3


Stop by Ponte Vecchio, a bridge that houses multiple shops selling everything from jewelry to leather goods.


Mercato Centrale Florence | Italy Travel Diary + Vlog Part 3


Taking the train out of Florence? Stop by Mercato Centrale Firenze, a hipster marketplace/food court that’s located few minutes away from the Firenze SMN train station. You’ll find a variety of vendors selling authentic Italian street foods, and loads of locals and tourists alike enjoying a casual lunch.


Mercato Centrale Florence | Italy Travel Diary + Vlog Part 3


Below the food court is a marketplace, selling fresh vegetables, meats, spices, olive oils, pastries… you name it. I was really hard to walk through without the urge to get myself a second lunch.


Frecciargento fast train - Florence | Italy Travel Diary + Vlog Part 3


I had a fairly smooth time traveling throughout Italy thanks to the Frecciargento—which is the high speed train that connects Italy’s major cities. Previously known as the Italian Eurostar, the train got me from Rome to Florence in 2 hours and from Florence to Venice in another 2 hours. I would highly recommend taking the Frecciargento or Frecciarossa, especially if you’re traveling first class, in which case they will offer you a free small bottle of wine and snacks!


Italian Eurostar (frecciargento) to Venice


Although I’m relieved that I’m done with all my Italy vlogs, I’m also sad to finally put this vacation behind me. I truly had a great time, and learned lots of the Italian language and customs along the way. If you found any of the content helpful, please pin these ideas on your boards on Pinterest, give the video a thumbs up, or subscribe to my YouTube channel :)

♥ Cindy