Posts in 2
72 Hours in Barcelona (Itinerary + Vlog)
 

Barcelona is a city full of beautiful street corners, unique architecture, and incredible food. It’s perfect for exploring on foot, and a heaven for photographers and foodies.


72 Hours in Barcelona


With all it has to offer, Barcelona might seem a bit overwhelming to tackle in under 72 hours. But no worries—I documented my itinerary for sightseeing and places to eat from Sunday night until Wednesday morning, putting locations that are closer together in one day so you can visit them in the most efficient way possible. If you’re curious, you can also check out the map to see all of these locations in context.


72 Hours in Barcelona
72+Hours+in+Barcelona


SUNDAY, 5:00PM: CHECK INTO APARTMENT

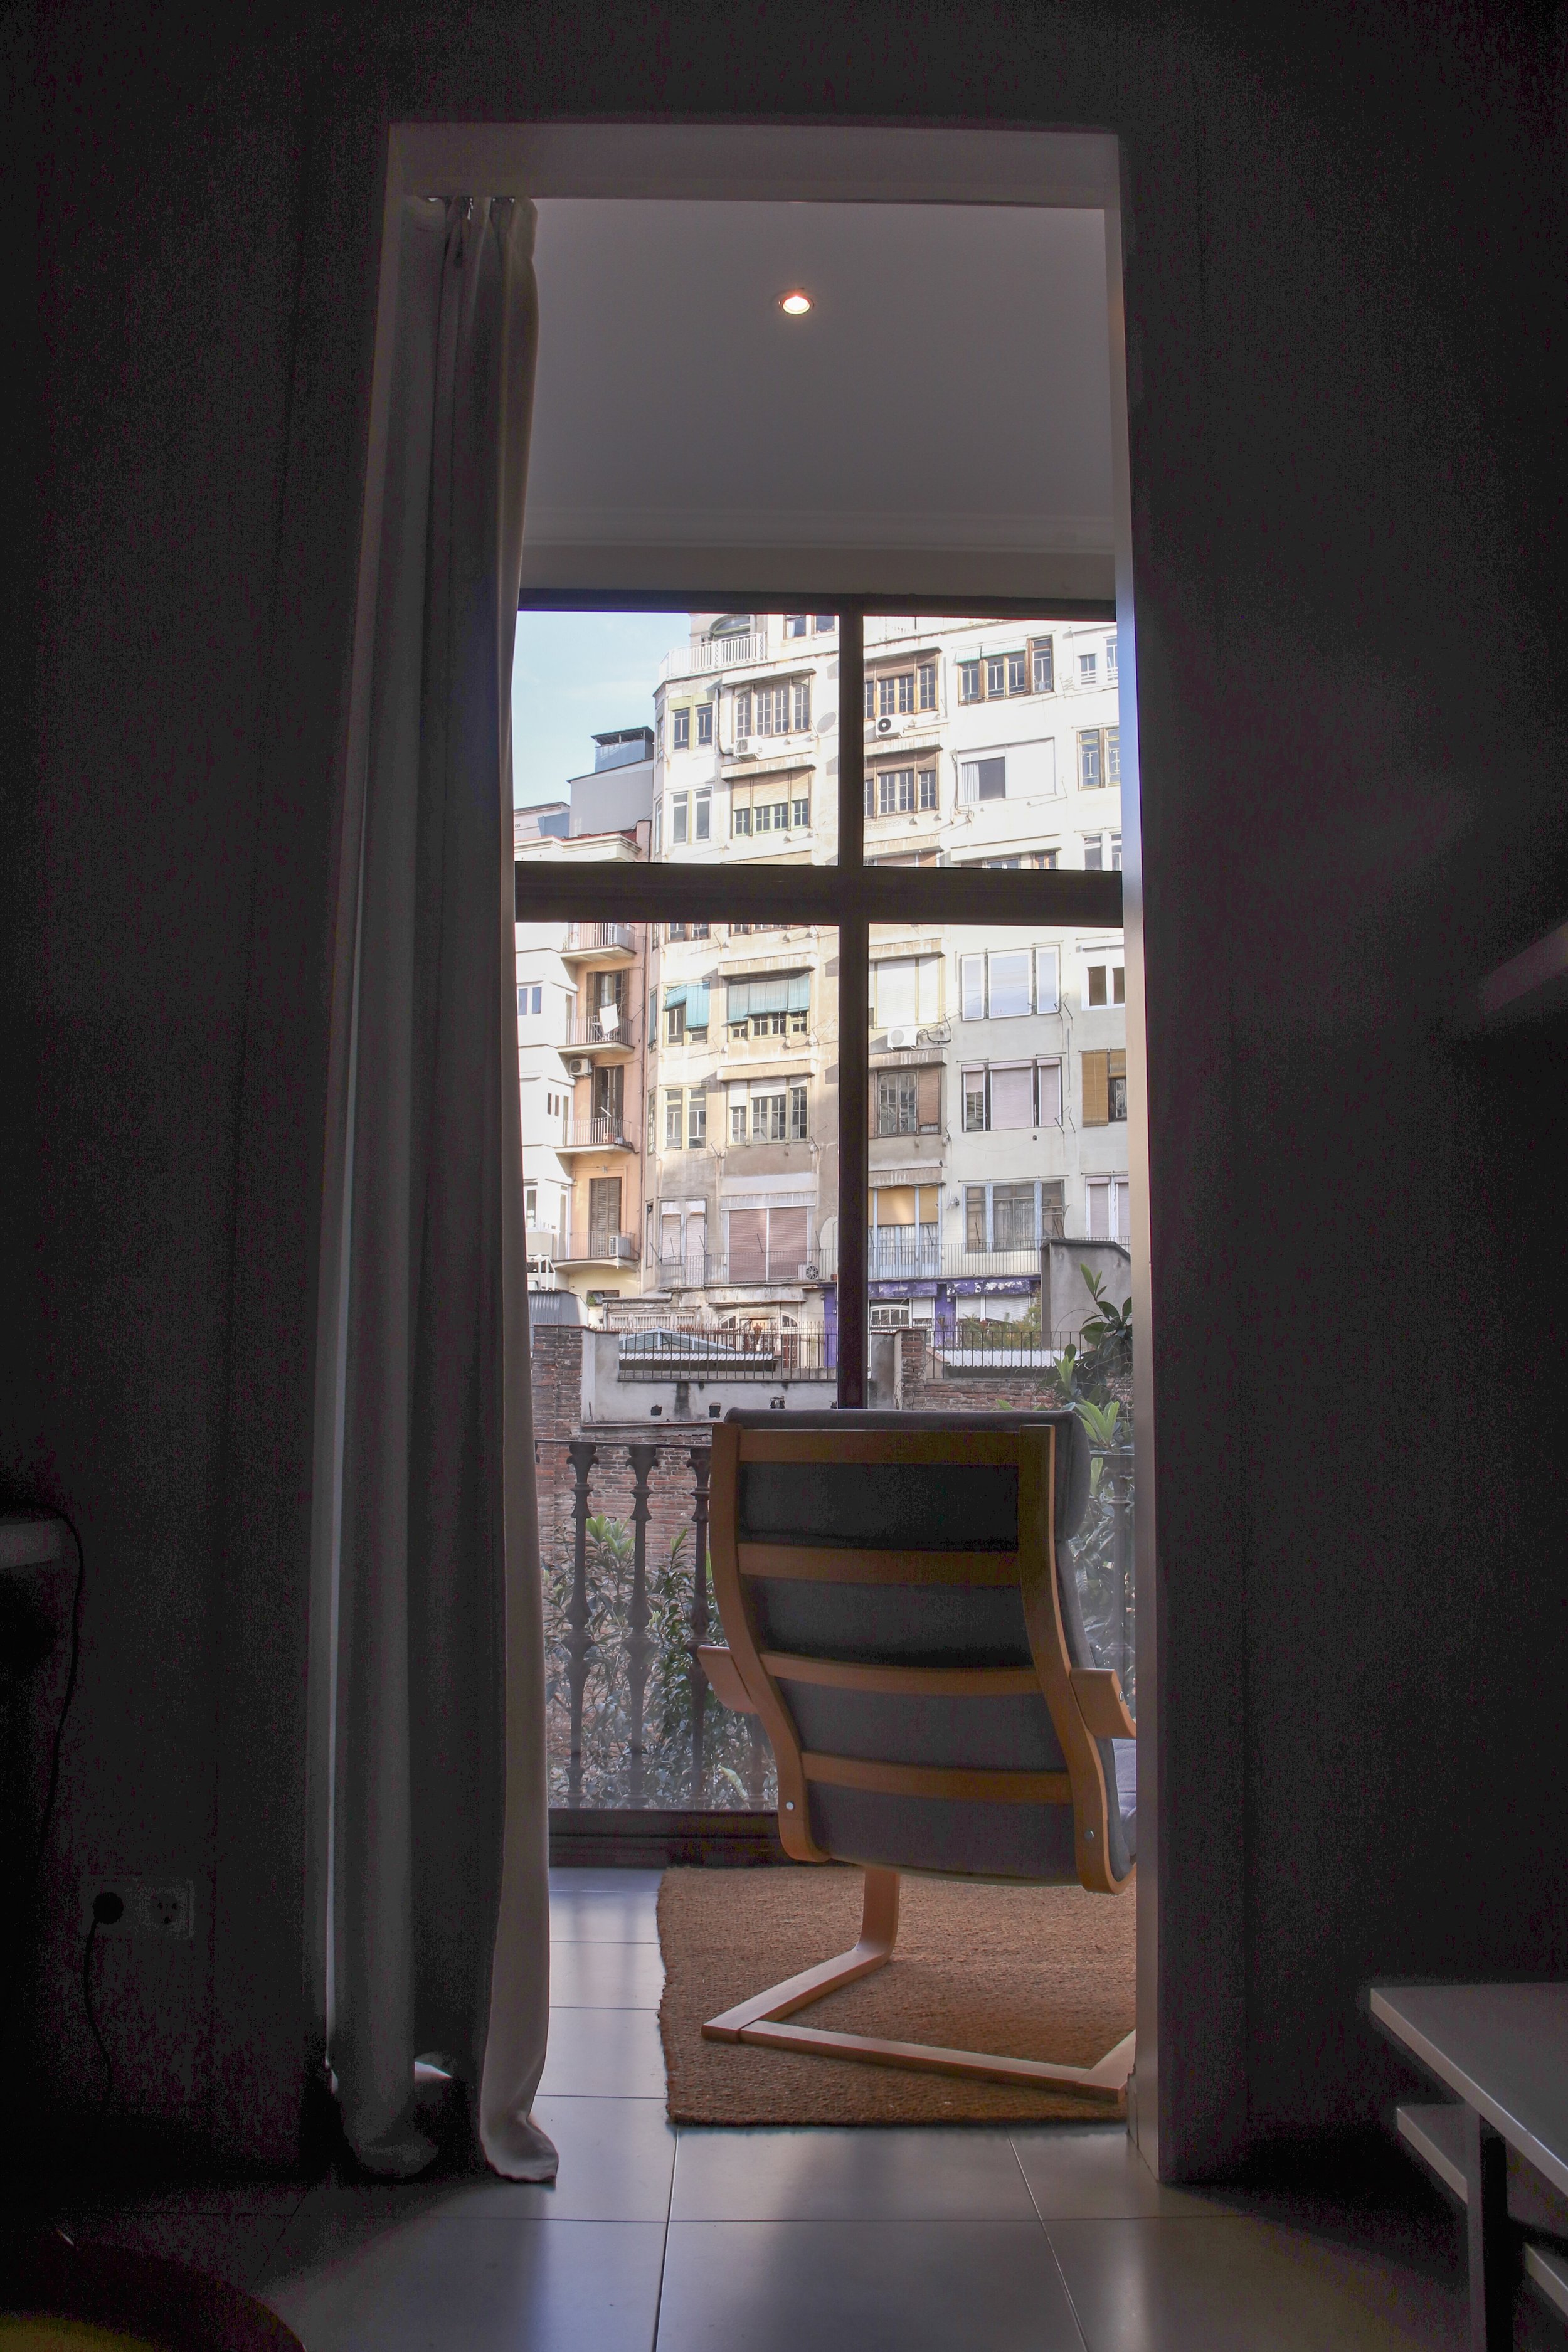
Instead of choosing a standard hotel room or an Airbnb, I decided to try something new this time and stay at an apartment that’s been converted to a hotel room. My favorite part of the apartment was the little nook in the back that led into the building’s courtyard from a set of stairs. Very European.

Where I stayed:

Eat Sleep Gaudi Terrace

Calle Valencia, 347
Barcelona
Eixample neighborhood

Pros: The size and location of the apartment were both perfect. It’s located in the busy Eixample neighborhood and only a 10 minute walk away from La Sagrada Família and Casa Milà. The building is also surrounded by numerous tapas bars and small food markets and pharmacies.

Cons: The walls are thin and it gets pretty noisy at night (it is located in a busy neighborhood, after all, and Spaniards eat dinner late so they probably stay out pretty late too). My check-in process was also not great, given that I arrived on a Sunday and the office was closed. It took me a while to find the instructions they left on how to get inside the apartment.


72 Hours in Barcelona


6:00PM: ARC DE TRIOMF

The hotel room wasn’t very far from the Arc de Triomf (it’s of the same name as the one in Paris, but it’s much smaller). There’s a beautiful pedestrian-only path surrounded by palm trees that leads you to Ciutadella Park.


72 Hours in Barcelona


8:00 PM: TAPAS AT CIUDAD CONDAL

Ciudad Condal was my first meal in Barcelona, and my first tapas experience in Spain. As one of the more popular tapas bars in Barcelona, expect a wait. Come with a group of friends so you can try more items on their huge menu. I was impressed by how fresh the ingredients in every dish were, and how cheap everything was—considering a lot of the items we ordered were seafood-based.

As my first meal in Barcelona, I wanted to get all the essential tapas: fried padron peppers, croquettes, and pan con tomate, which is a simple but delicious toast covered in a light tomato sauce and olive oil (and garlic, maybe…?). Can’t choose a favorite dish if I tried, but I totally fell in love with how fresh the seafood was.


72 Hours in Barcelona


Monday, 8:00 AM: SUNRISE AT PARC GÜELL

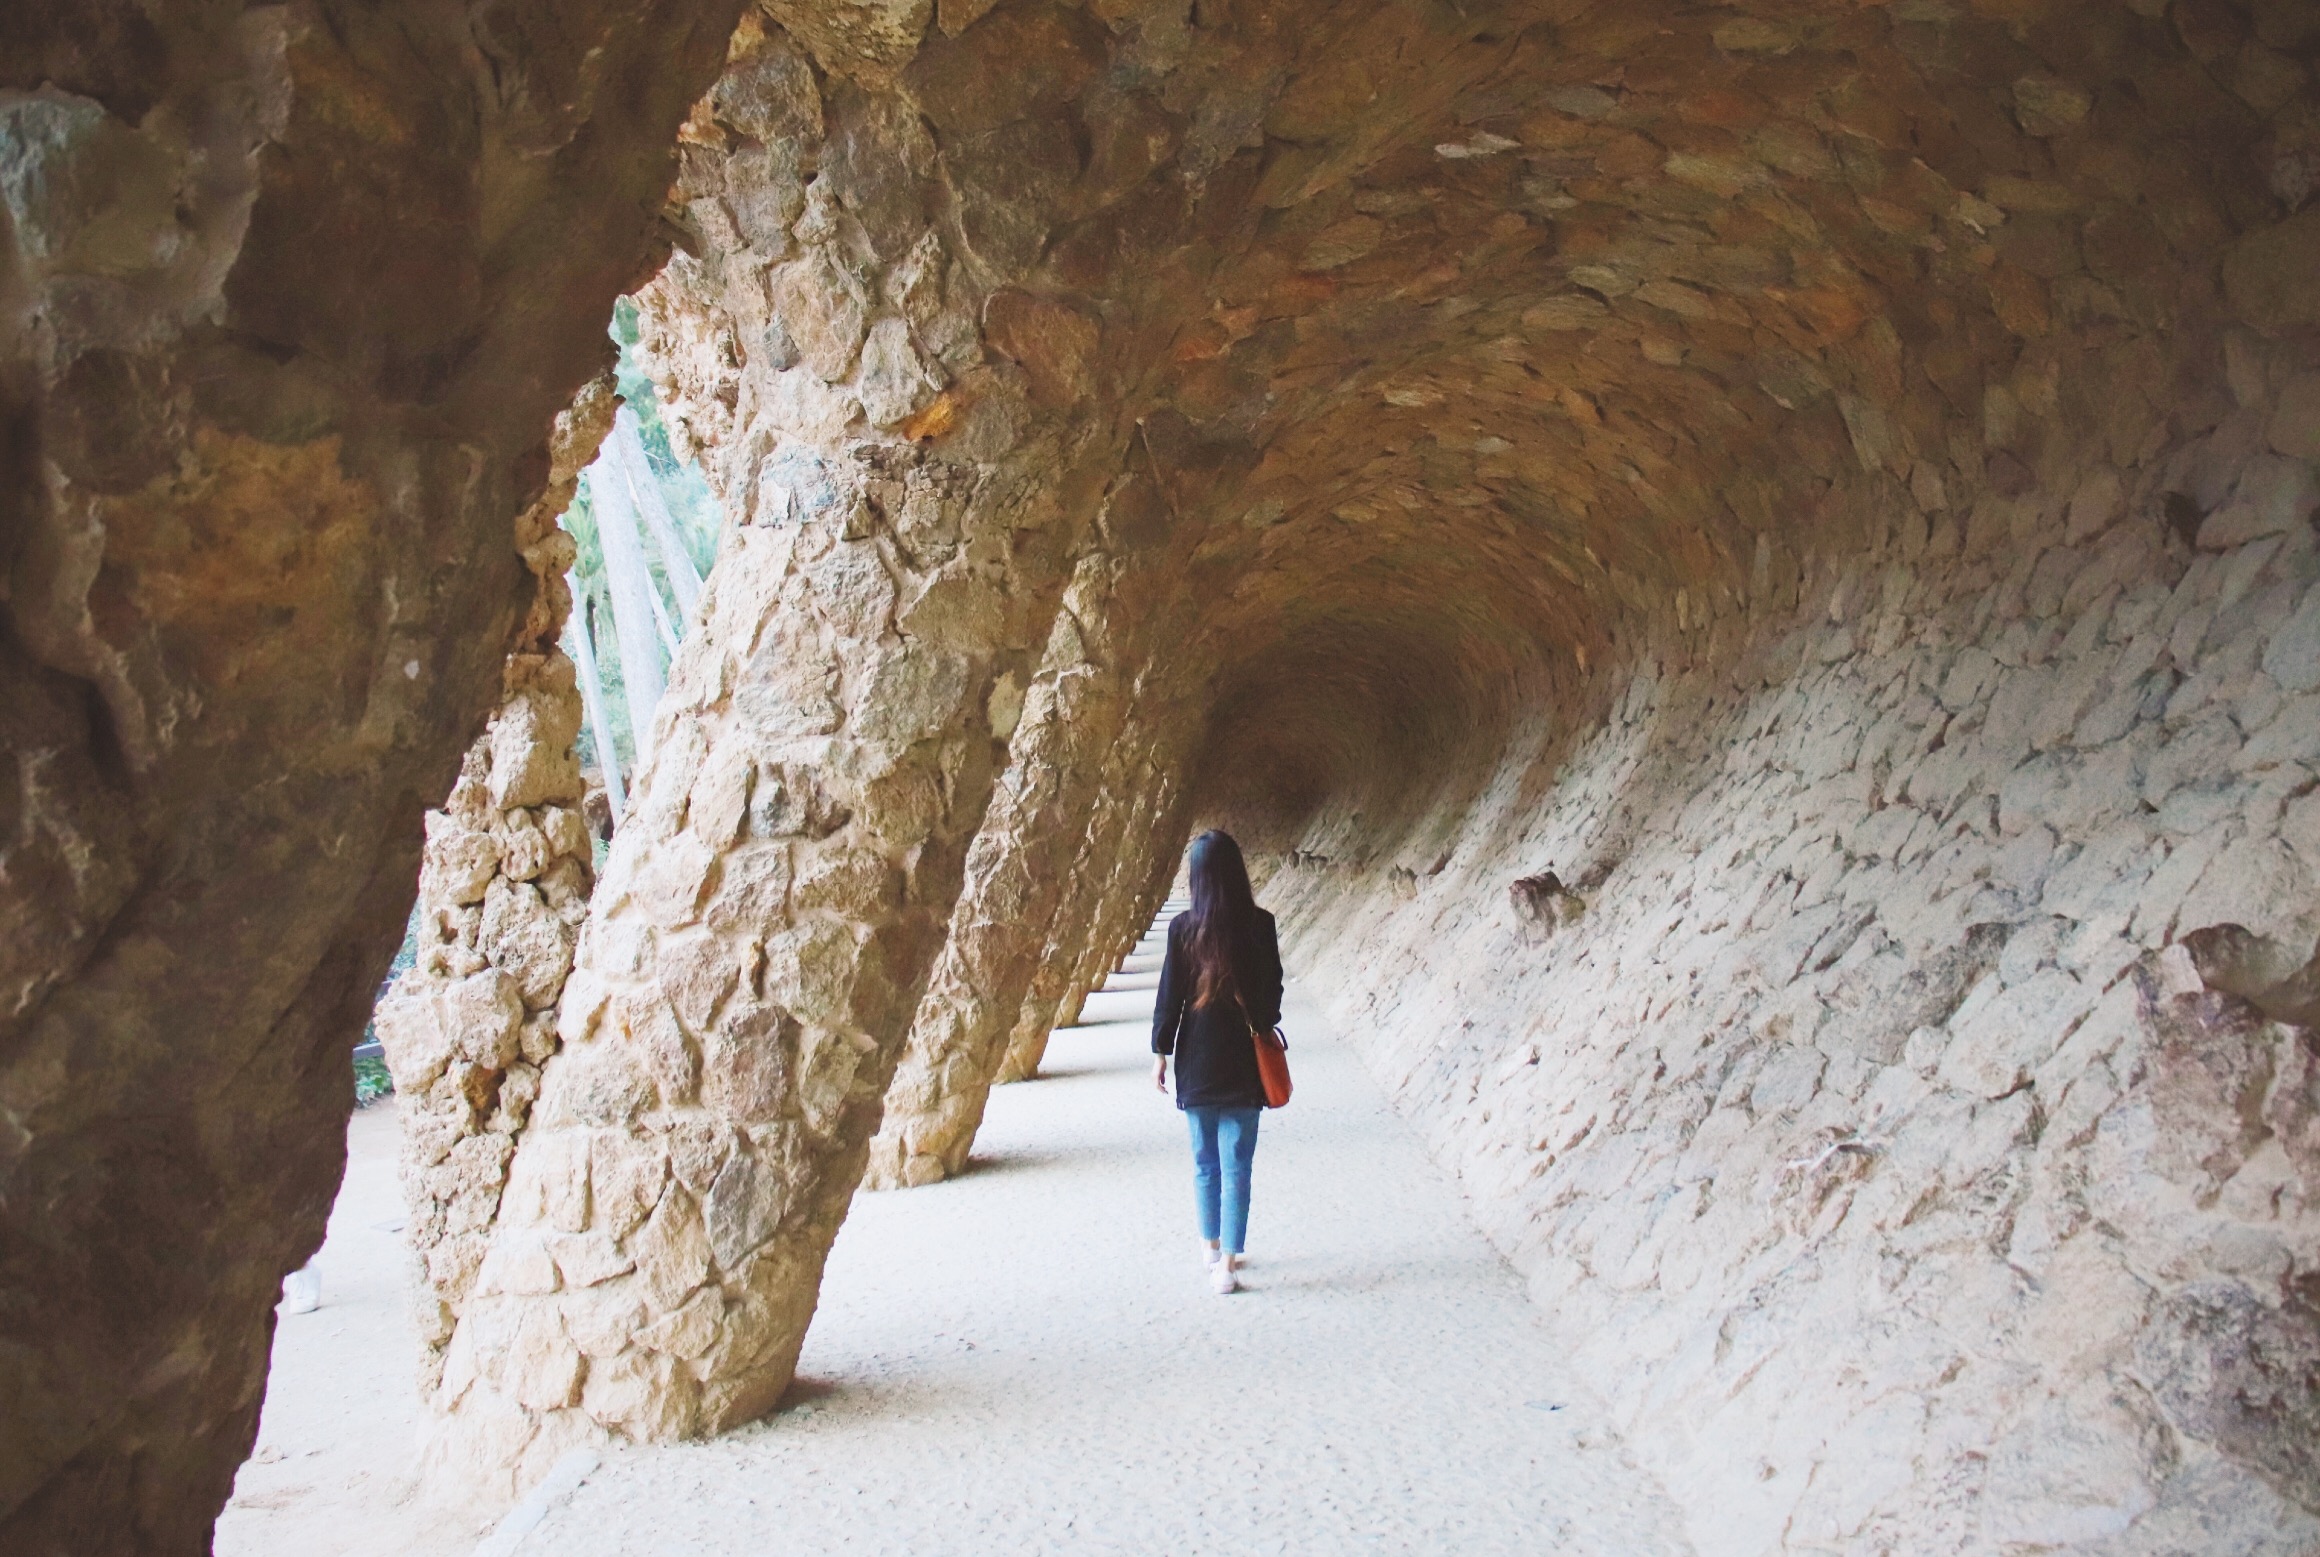
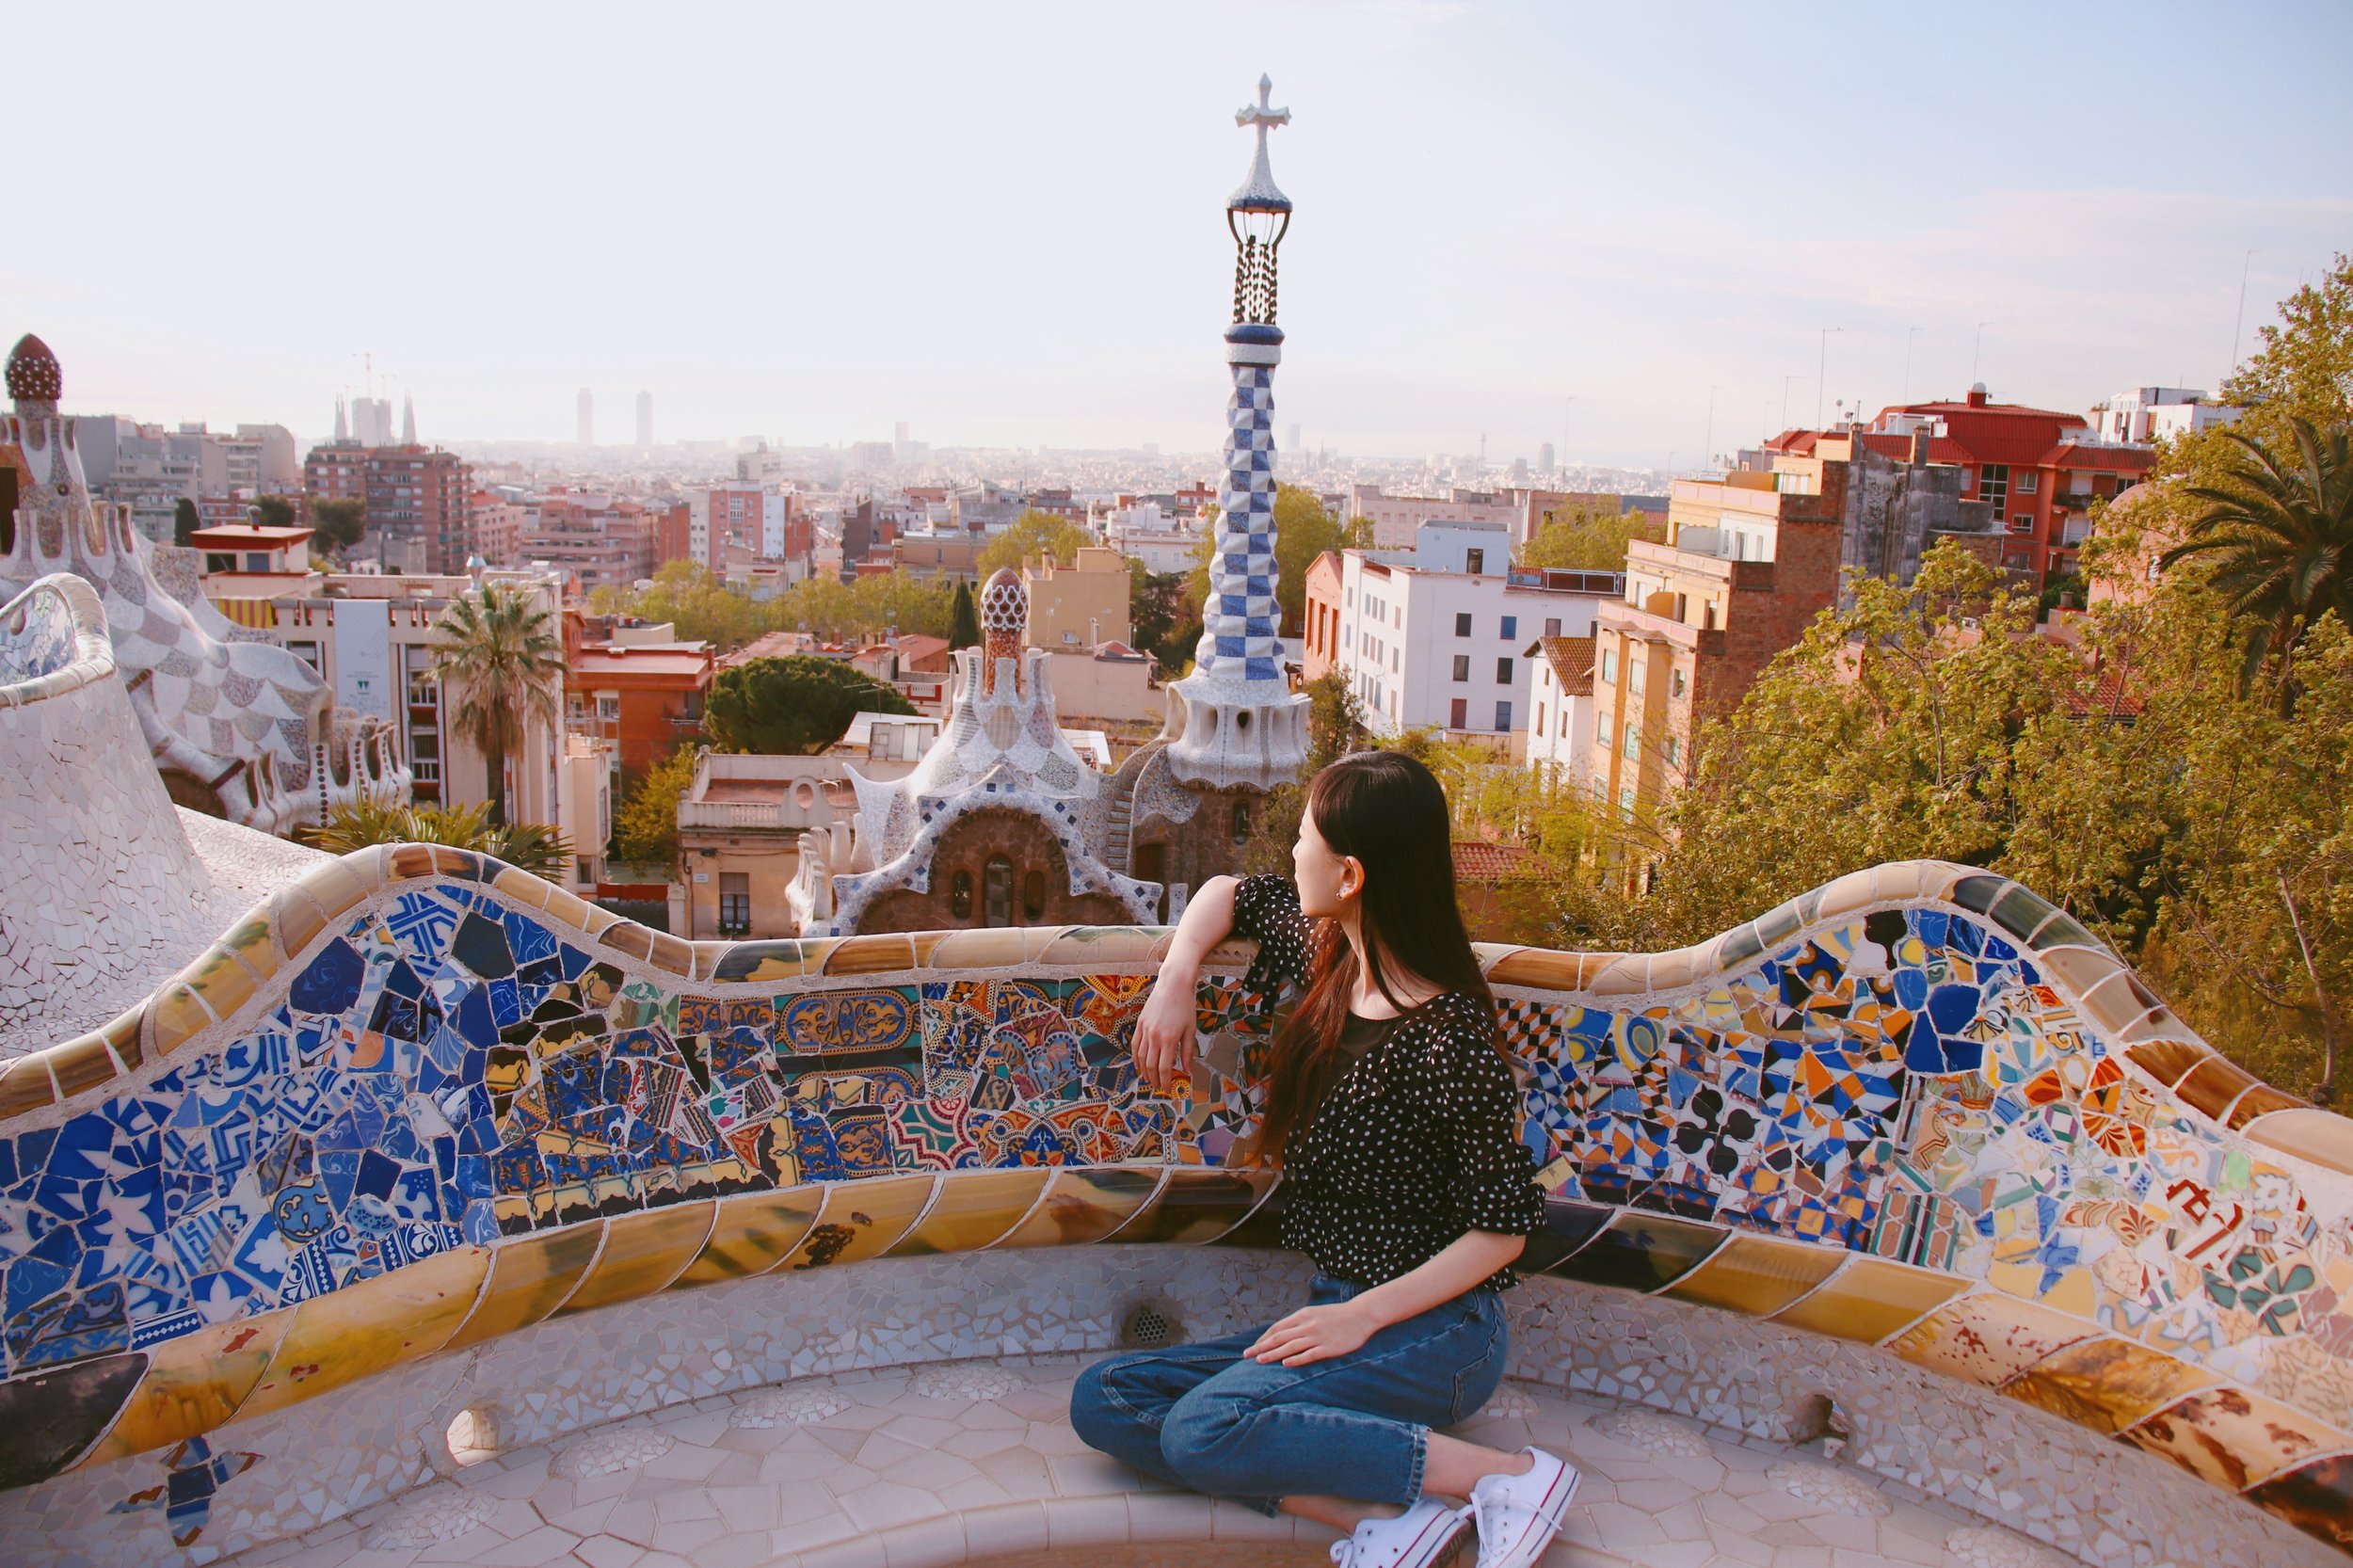
Come to Parc Güell (pronounced park goo-way) when it first opens at 8AM to get a panoramic view of Barcelona. Since the park faces east, it’s the perfect place to catch a sunrise over the city. Designed by the architect Antoni Gaudí—who created many of his works in Barcelona—the park was originally built to be a housing development. Filled with lush gardens and colorful mosaics, it opened as a public park in 1926 and is now a UNESCO World Heritage Site. It’s just contained enough where you don’t have to do a huge amount of walking, but complex enough where you can spend lots of time ogling at the intricacies of the unique structures around the park.


72 Hours in Barcelona


One warning before you go: as of April 2019, parts of the park are under construction, but it doesn’t really affect much of the park. Also, be sure to get tickets to enter the Monumental Core (though they’re pretty lax with checking tickets early in the morning).


72 Hours in Barcelona


11:00 AM: Hiking at Bunkers Del Carmel

Just northeast of Parc Güell is Bunkers Del Carmel, a great vantage point to get a comprehensive view of Barcelona. You can see La Sagrada Família from here, as well as the Montjuïc mountains. It wasn’t a very tough hike up to the top, but the path was filled with some very interesting bugs! In fact, some really skinny and long black bugs that looked like worms. Very terrifying, but also very fun to look at.

I also really enjoyed walking through the Horta-Guinardó neighborhood, which appeared far more residential than the rest of the bustling city. I saw lots of parents dropping their kids off to school, as well as many dogs out on their walks. This area is filled with smaller, discrete homes compared to the large apartment buildings in Eixample.


72 Hours in Barcelona


2:00 PM: BOURDAIN-APPROVED TAPAS AT QUIMET & QUIMET

Okay, I know the idea of cold canned fish doesn’t sound very appealing, but that’s because you’ve probably only ever come across it in the tuna sandwich context. Canned fish is actually a gourmet specialty in Spain and Portugal. Does it make it better when I tell you that caviar comes in a can?

At Quimet y Quiment, you can get some really tasty seafood on top of crispy toast and pickled vegetables, all topped off with a delicious drizzle of olive oil. Some items will even be topped with caviar, and the average price for a tapa was about 3 euros. The wine and beer are super cheap too, and is probably way more worthwhile than drinking water. This is a step higher than Ciudad Condal, which served pretty standard tapas that you could probably get at a hip Spanish restaurant in San Francisco. Quimet y Quimet is, in my opinion, a little more ambitious and not for those who are squeamish about anchovies and pork cheeks and foie gras, etc.

You can easily see why Anthony Bourdain loved this place. It’s a hole in the wall with standing-room only. There is wine on the walls piled all the way to the ceiling. Locals and tourists alike fill up the space. The servers are also super friendly, and are very open to suggesting items off the menu.


72 Hours in Barcelona
72+Hours+in+Barcelona
72 Hours in Barcelona


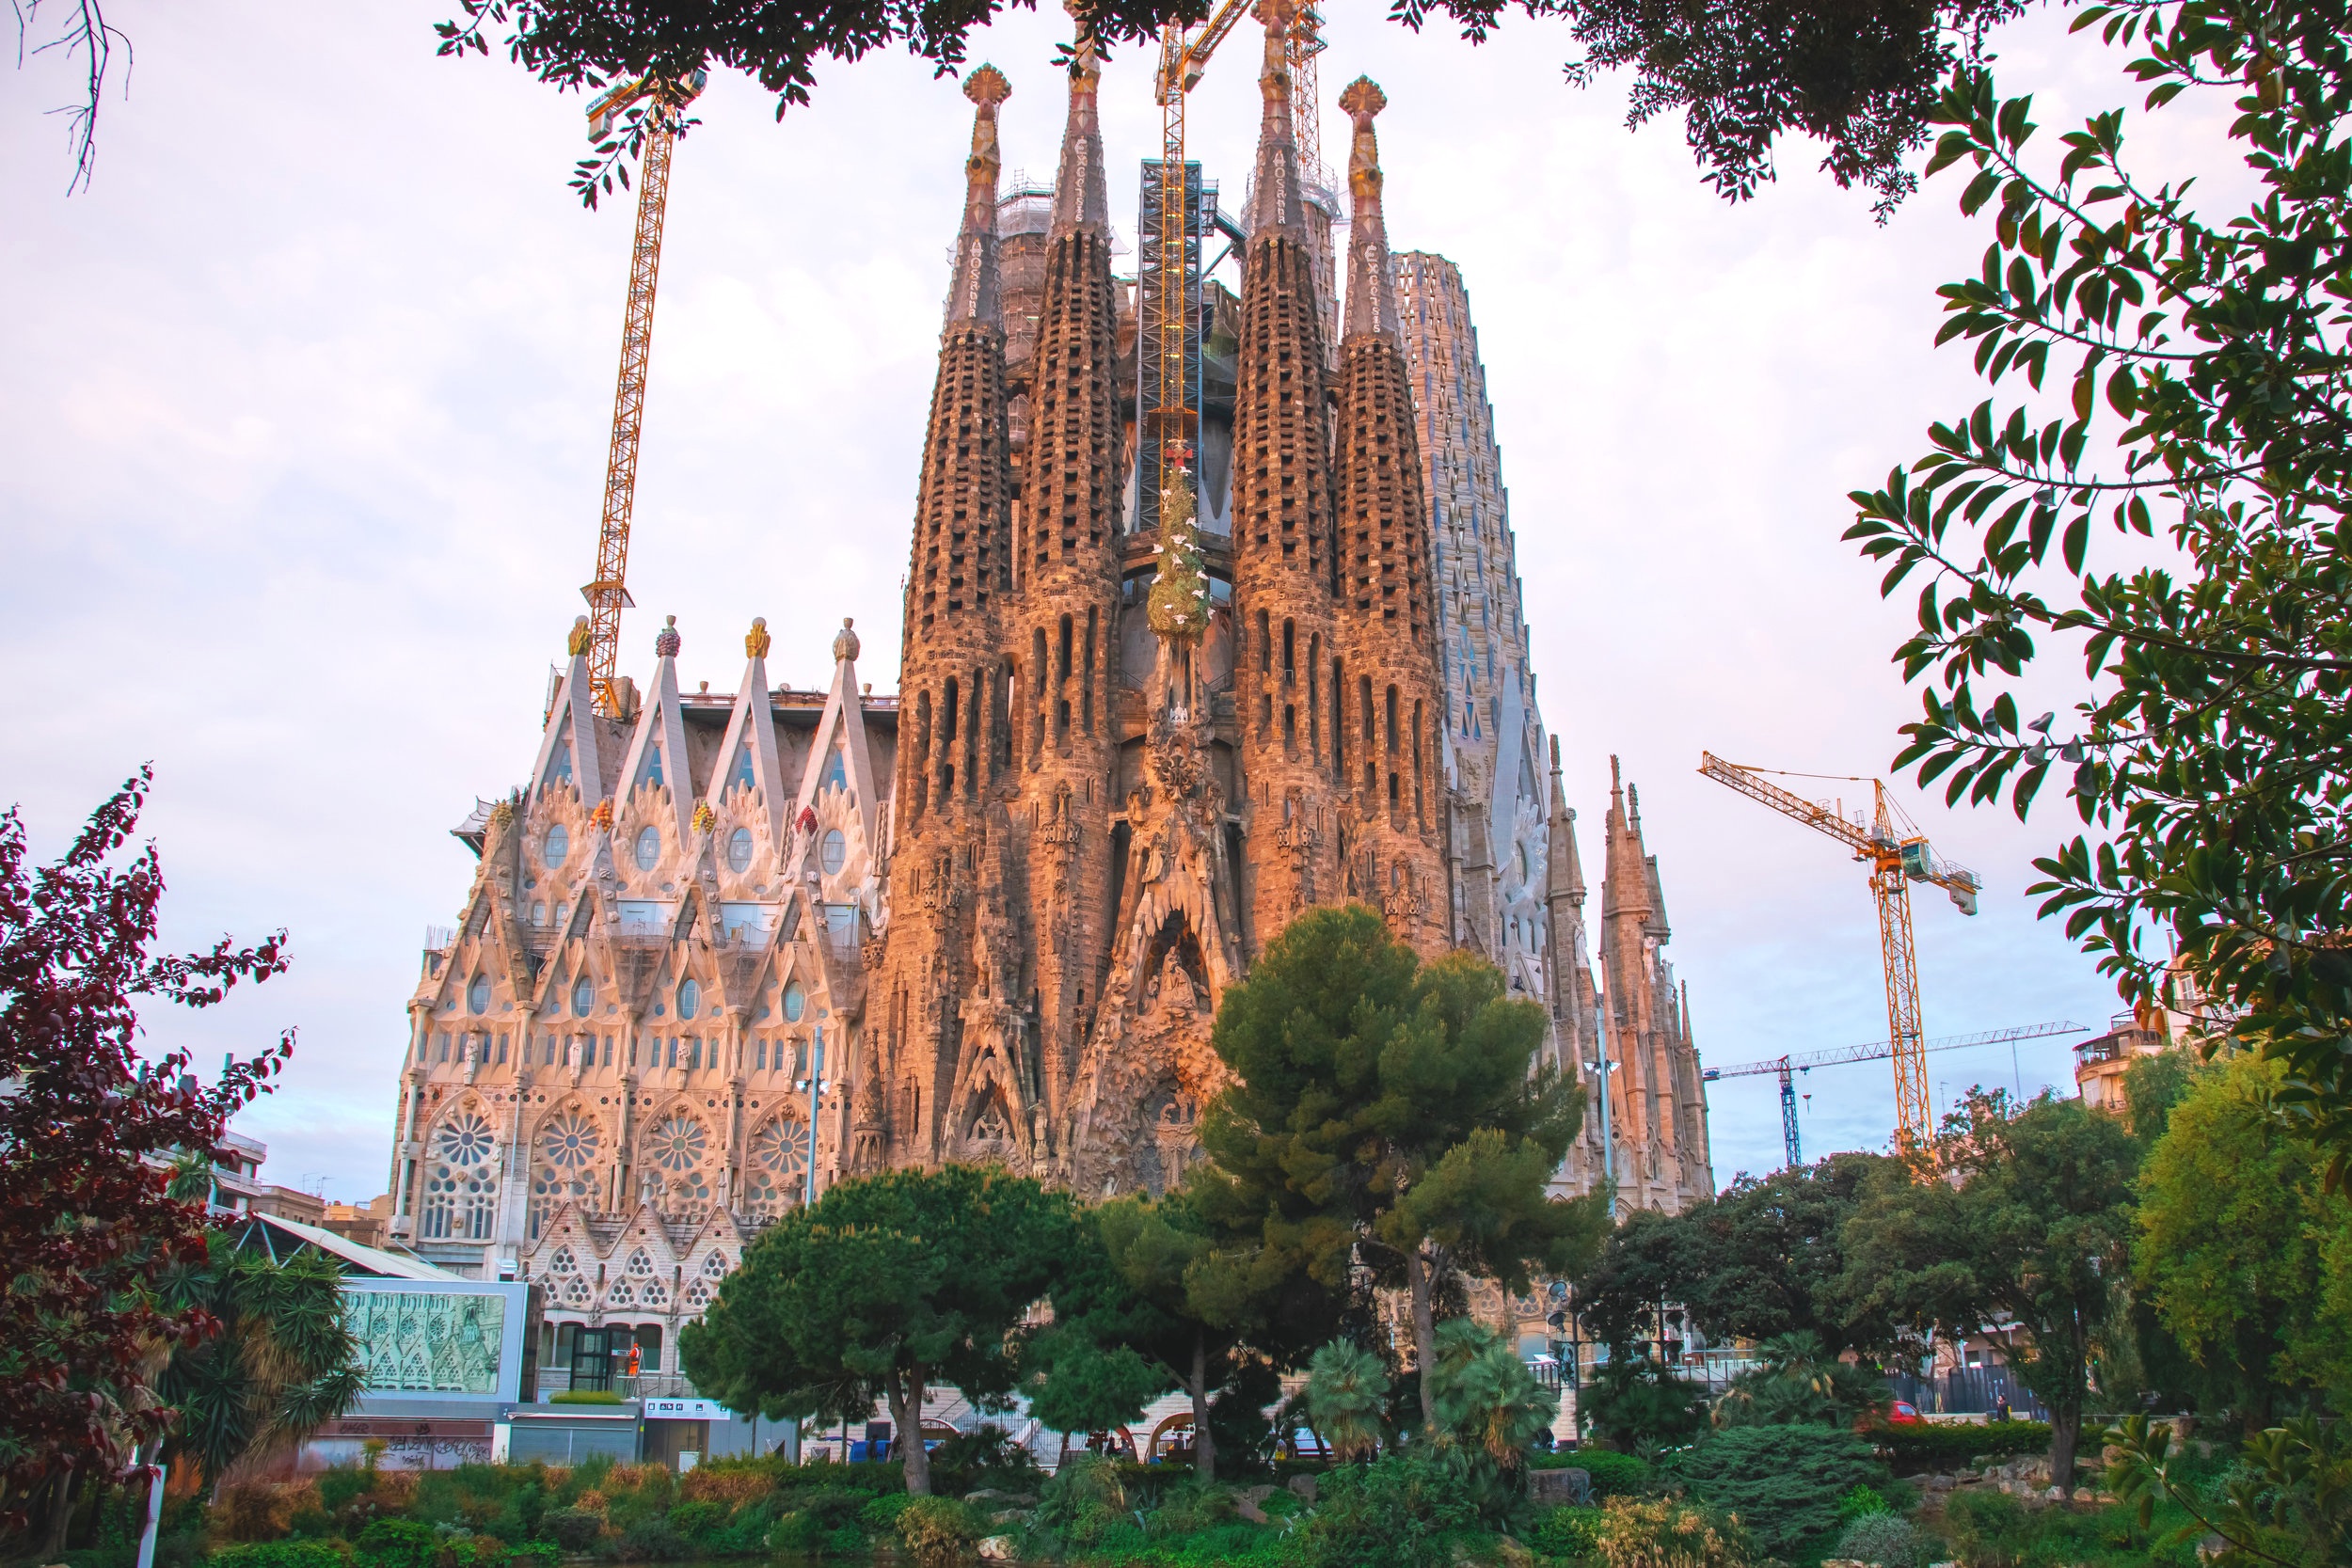
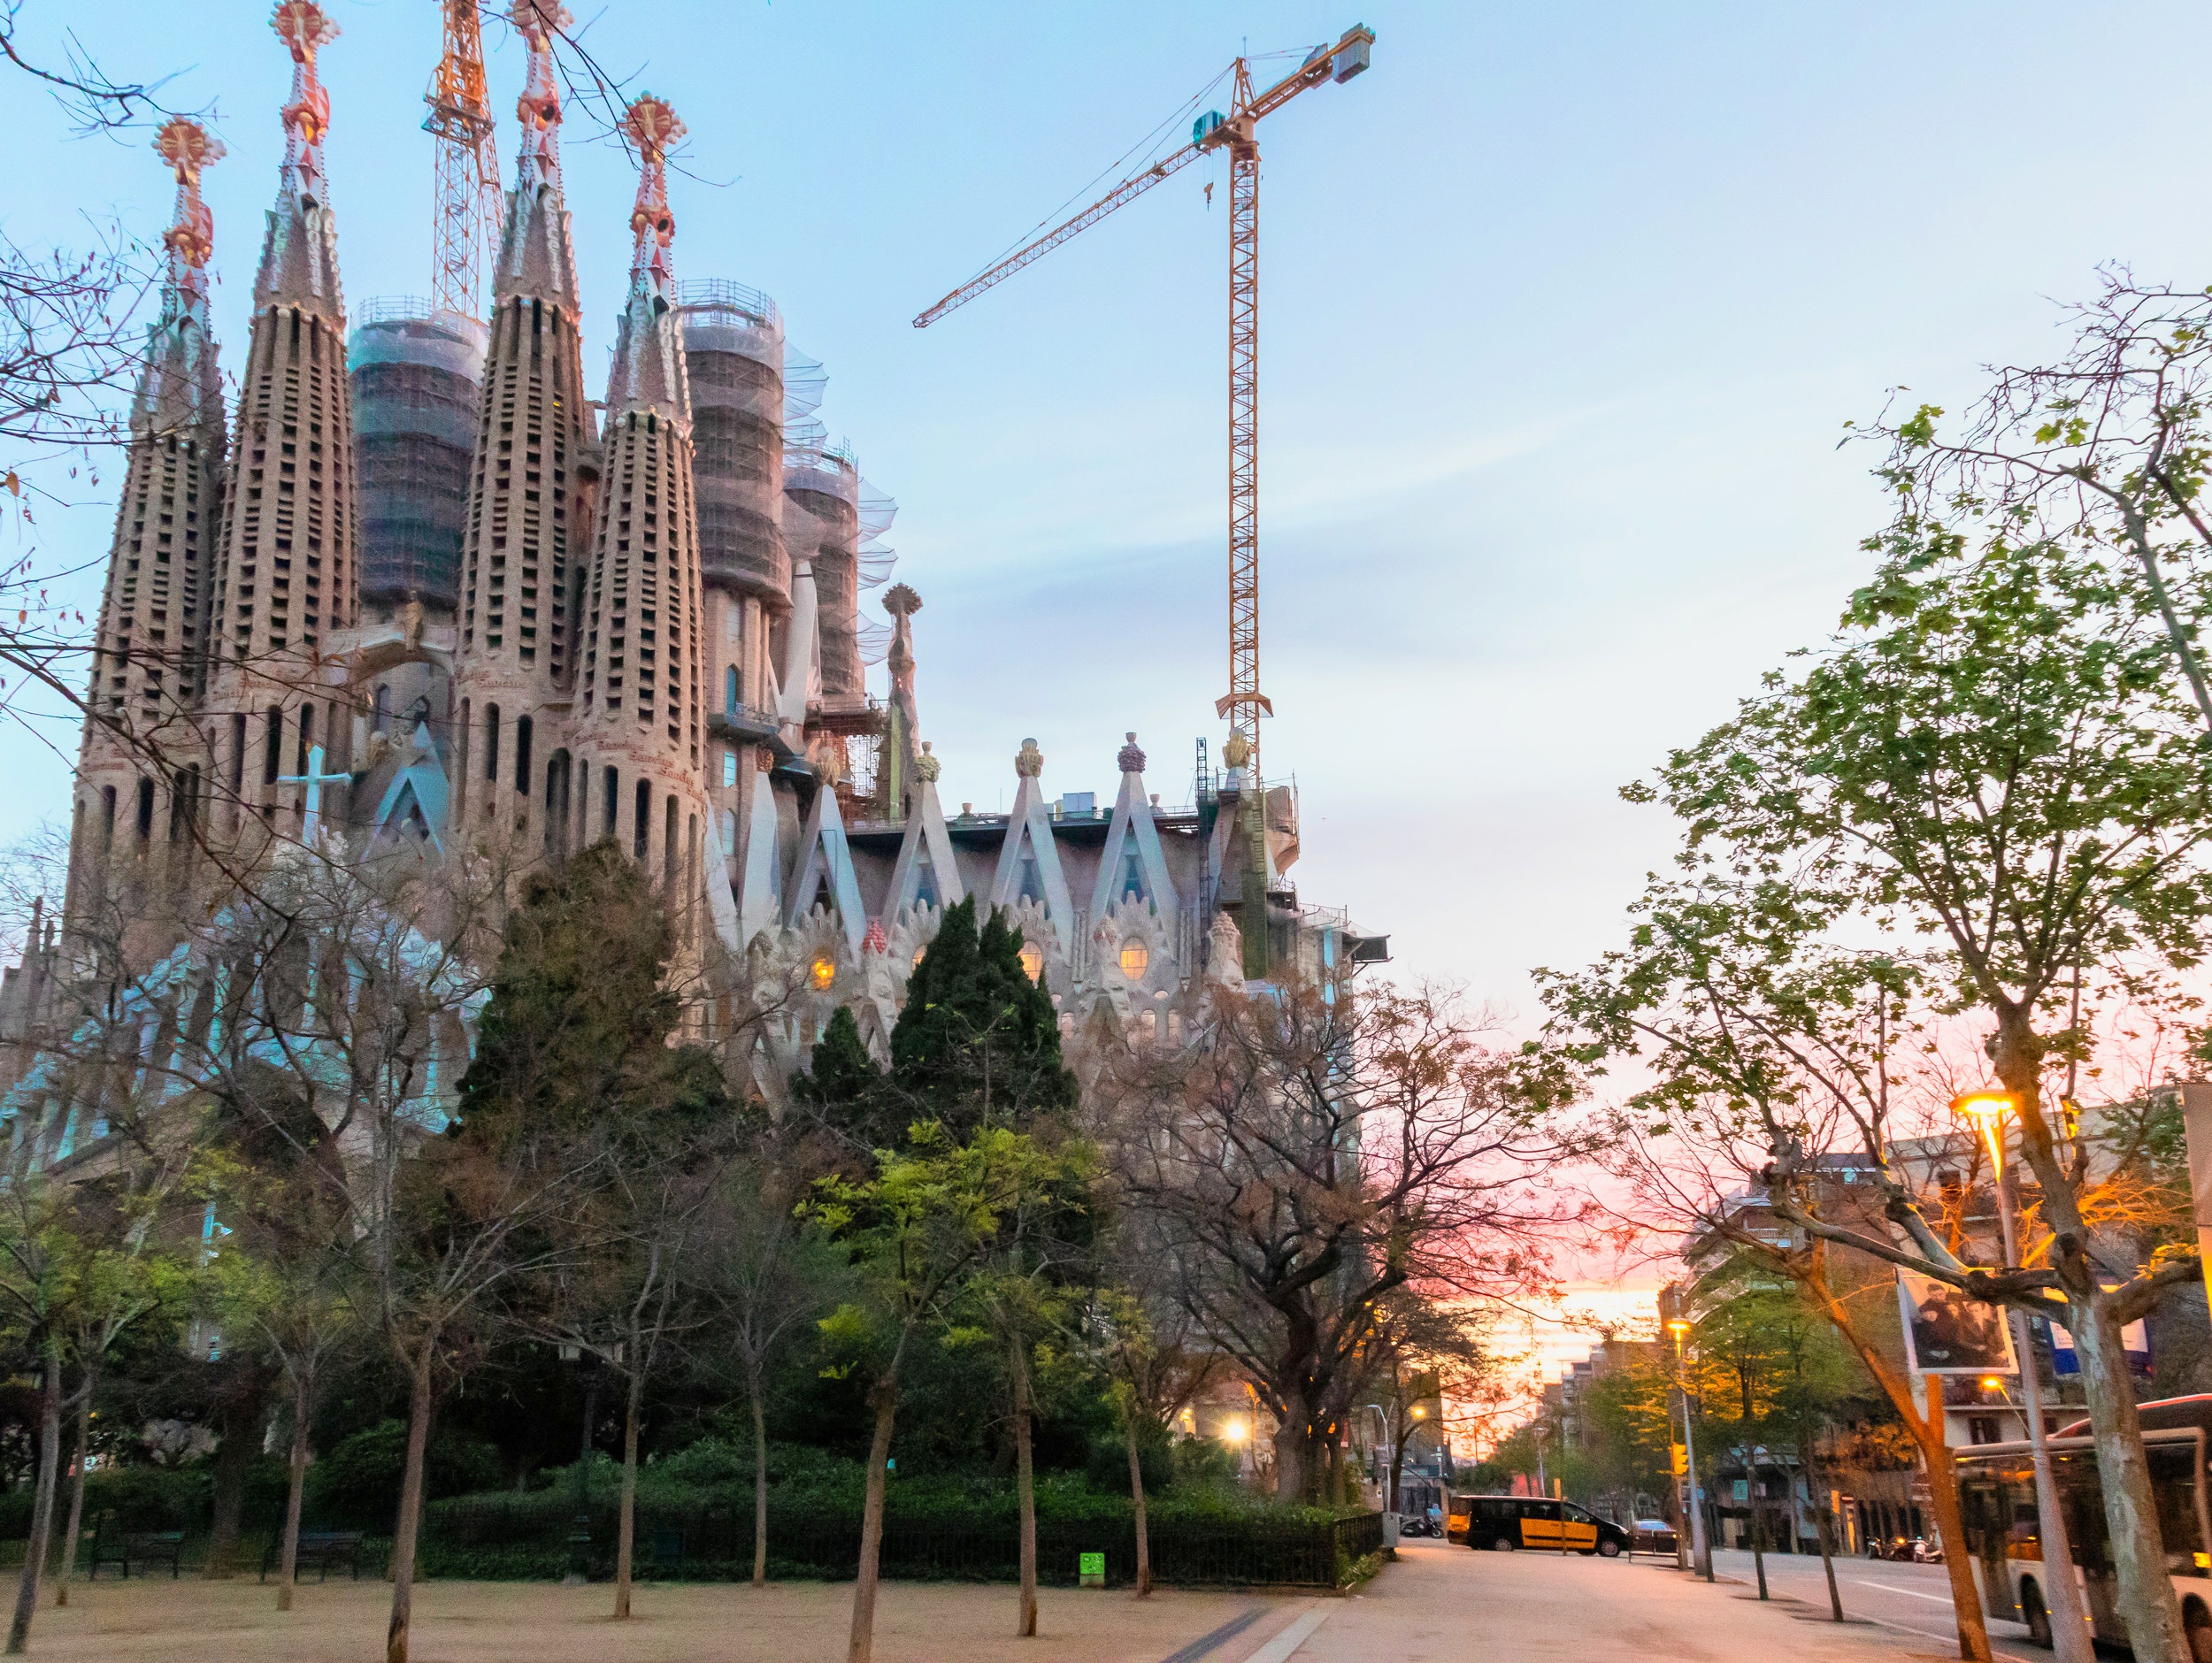
5:00PM: La Sagrada Família

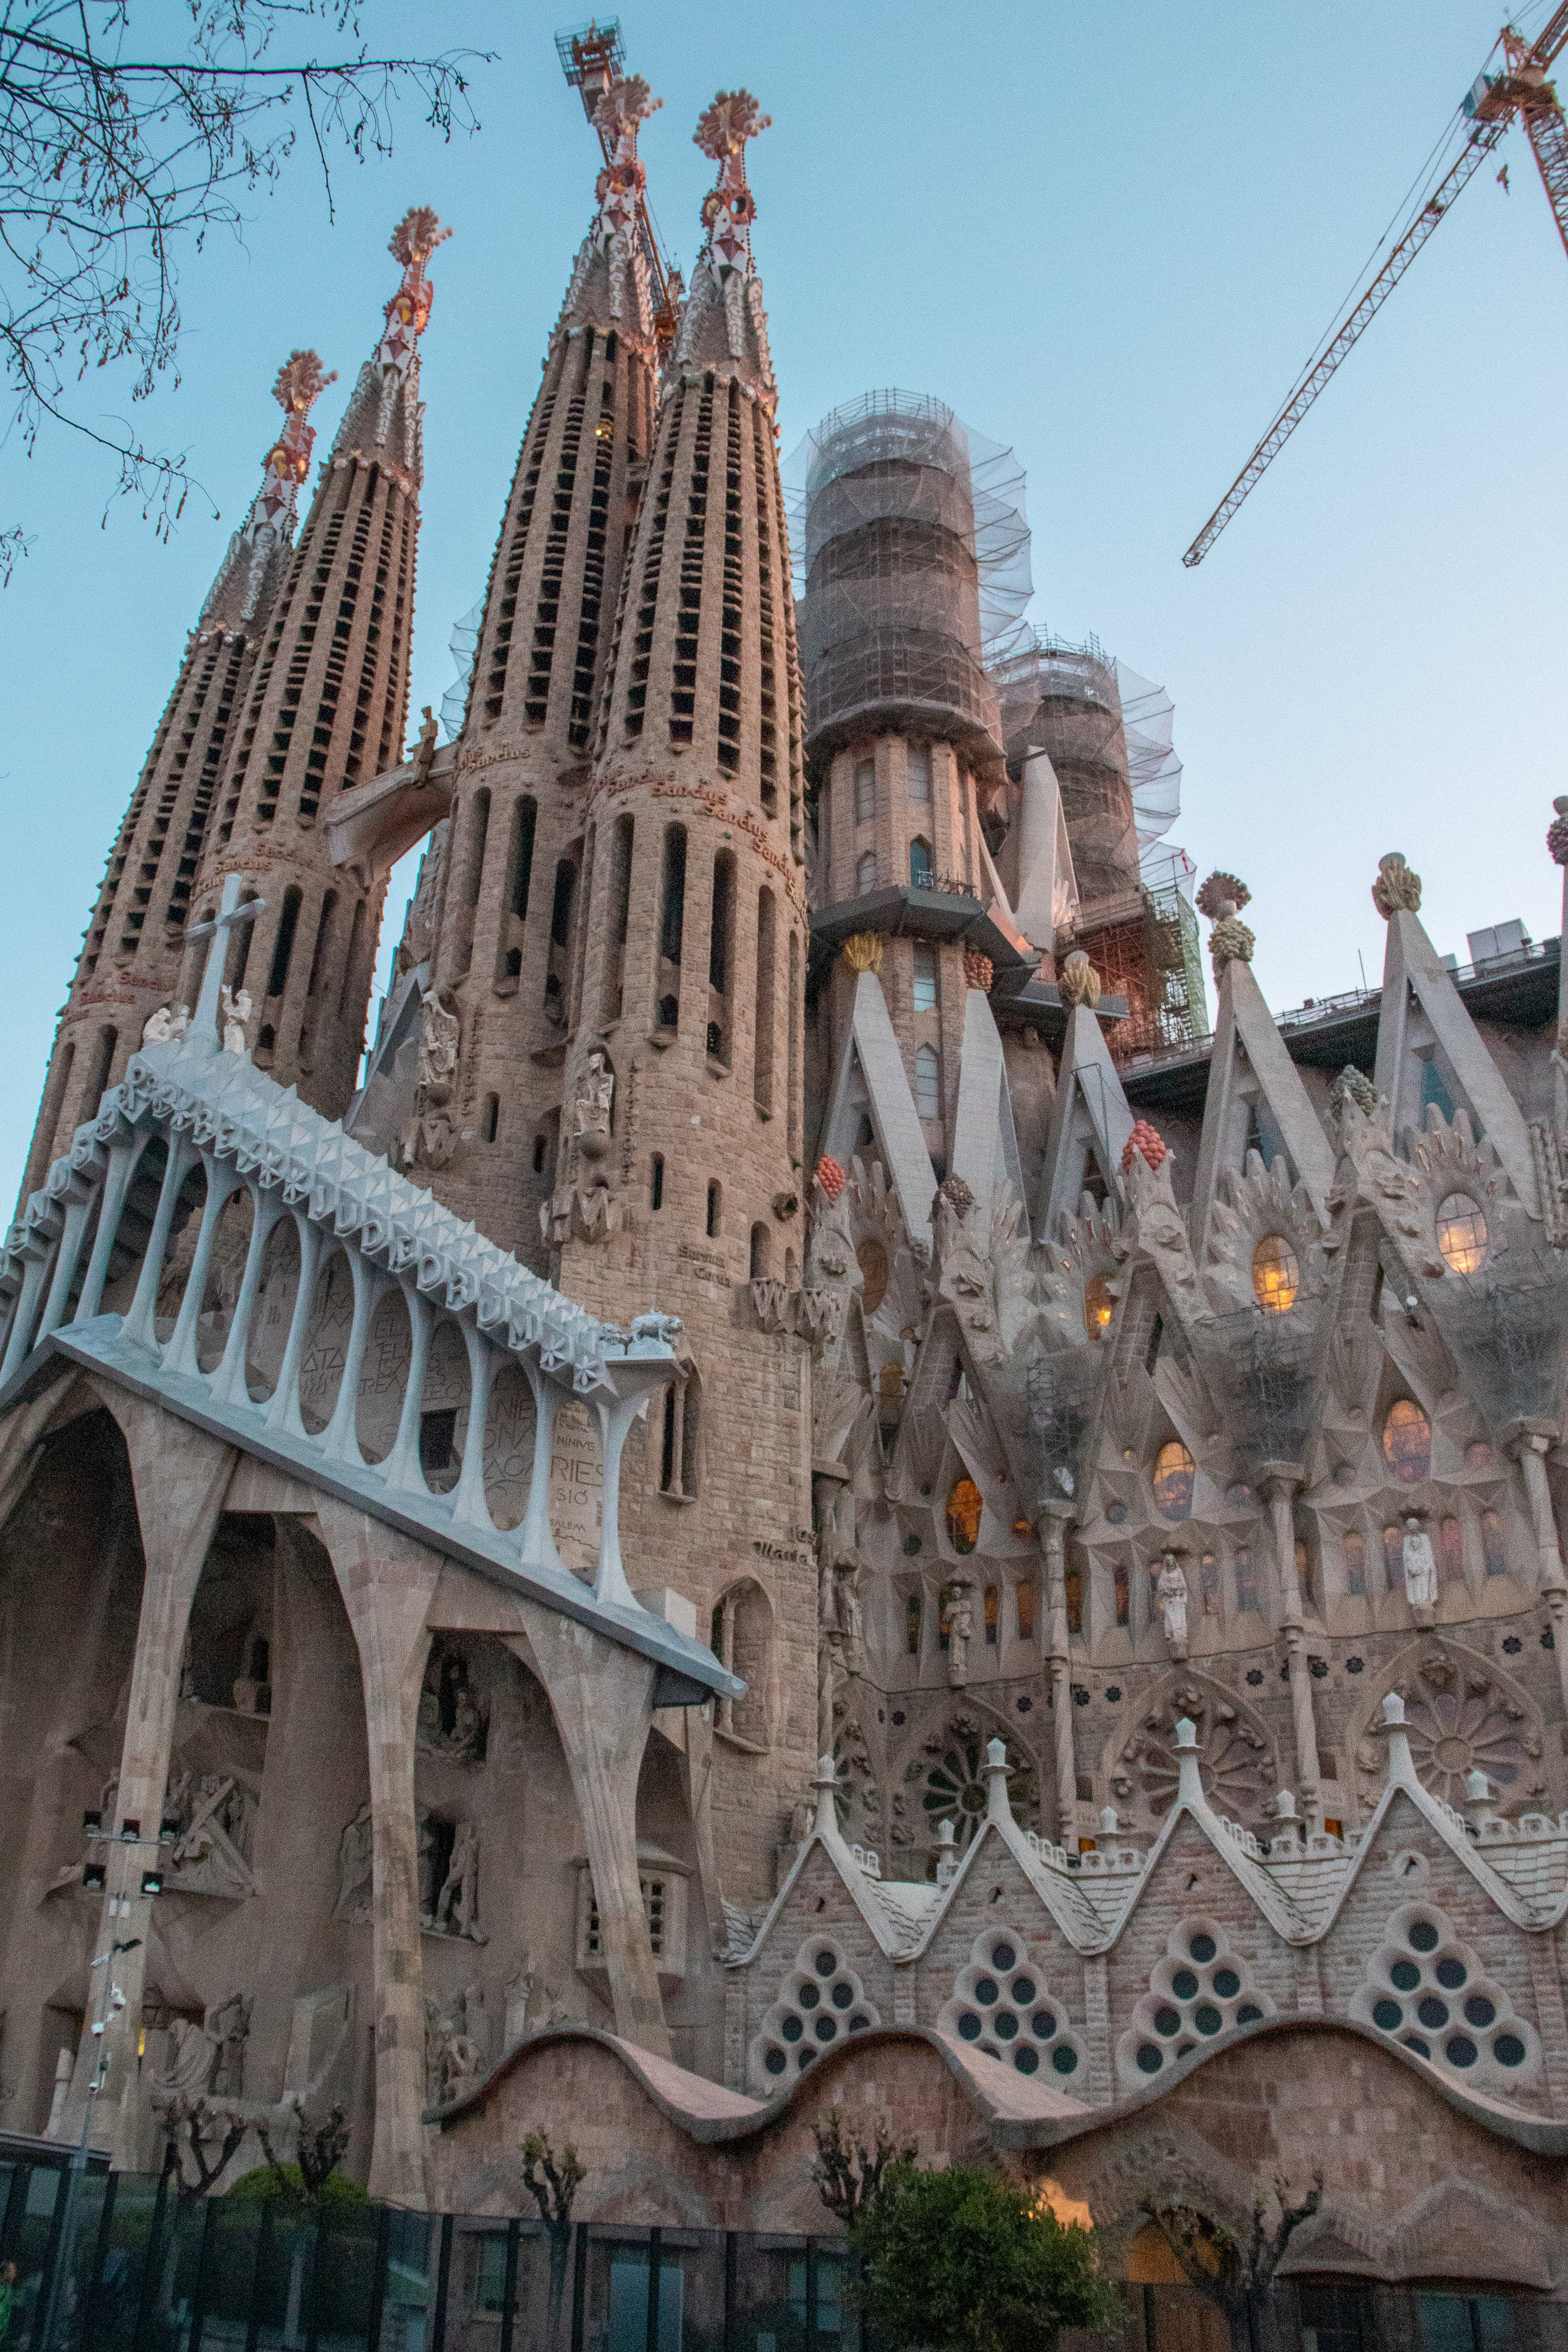
Now, for probably my favorite part of my entire trip of Spain: walking inside La Sagrada Família. I’m upset that I didn’t spend more time inside it. I’ve been to a lot of cathedrals across Europe, and although they were beautiful in their own ways, none of them are as unique as this one. There are intriguing details in every direction you look, large and small. Try to plan your visit in the afternoon, where there will be red light pouring in from the stained glass windows. I’ve heard in the morning, the cathedral will have more of a blueish tint. I found it really difficult to capture its grandeur in photos. I didn’t have a wide angle lens with me, but a 10mm or a fisheye would’ve worked wonders.

Definitely book your tickets ahead for a scheduled time. This is a hugely popular tourist destination so expect a long line for tickets.


72 Hours in Barcelona


Listen to the podcast before you go!

One of my favorite podcasts, 99 Percent Invisible, has an incredible episode on La Sagrada Família. Learning about the cathedral’s story gave me the chills (especially learning that it was partially destroyed in the Spanish Civil War—spoiler alert!). Definitely give it a listen before you go to for some context. There’s also a snippet at the end about how computers and parametric design software is now being used to design the cathedral.


72 Hours in Barcelona


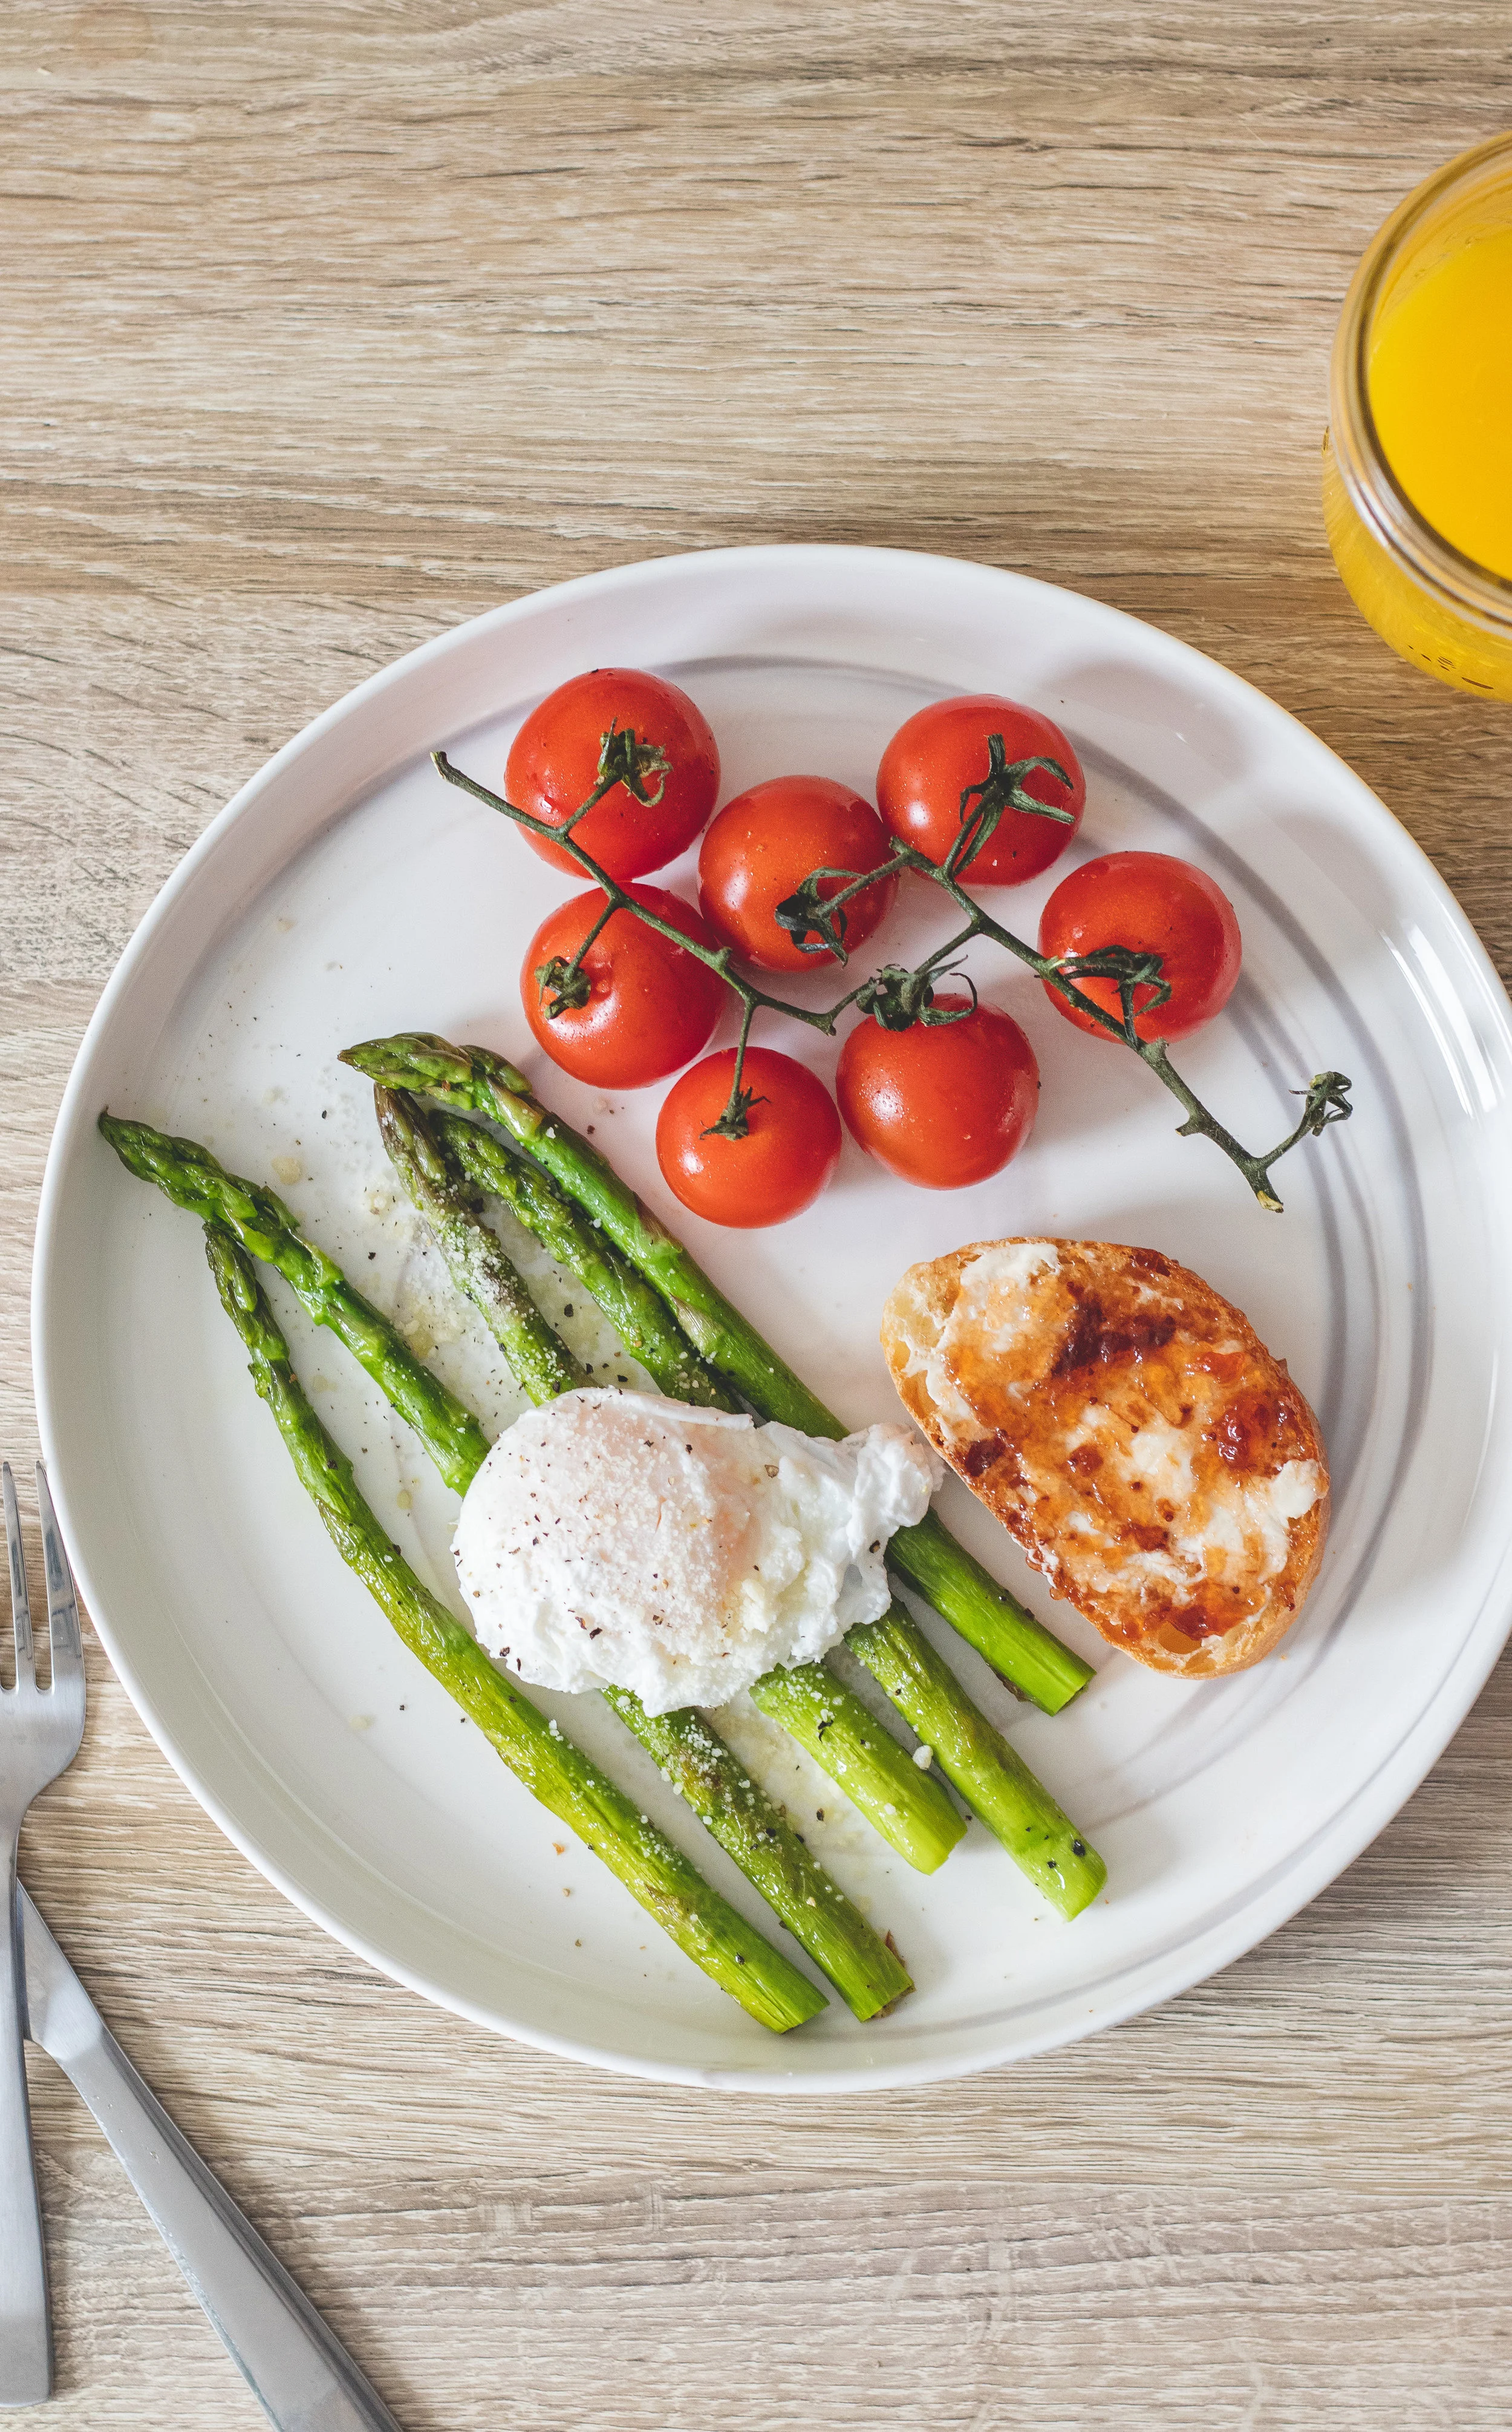
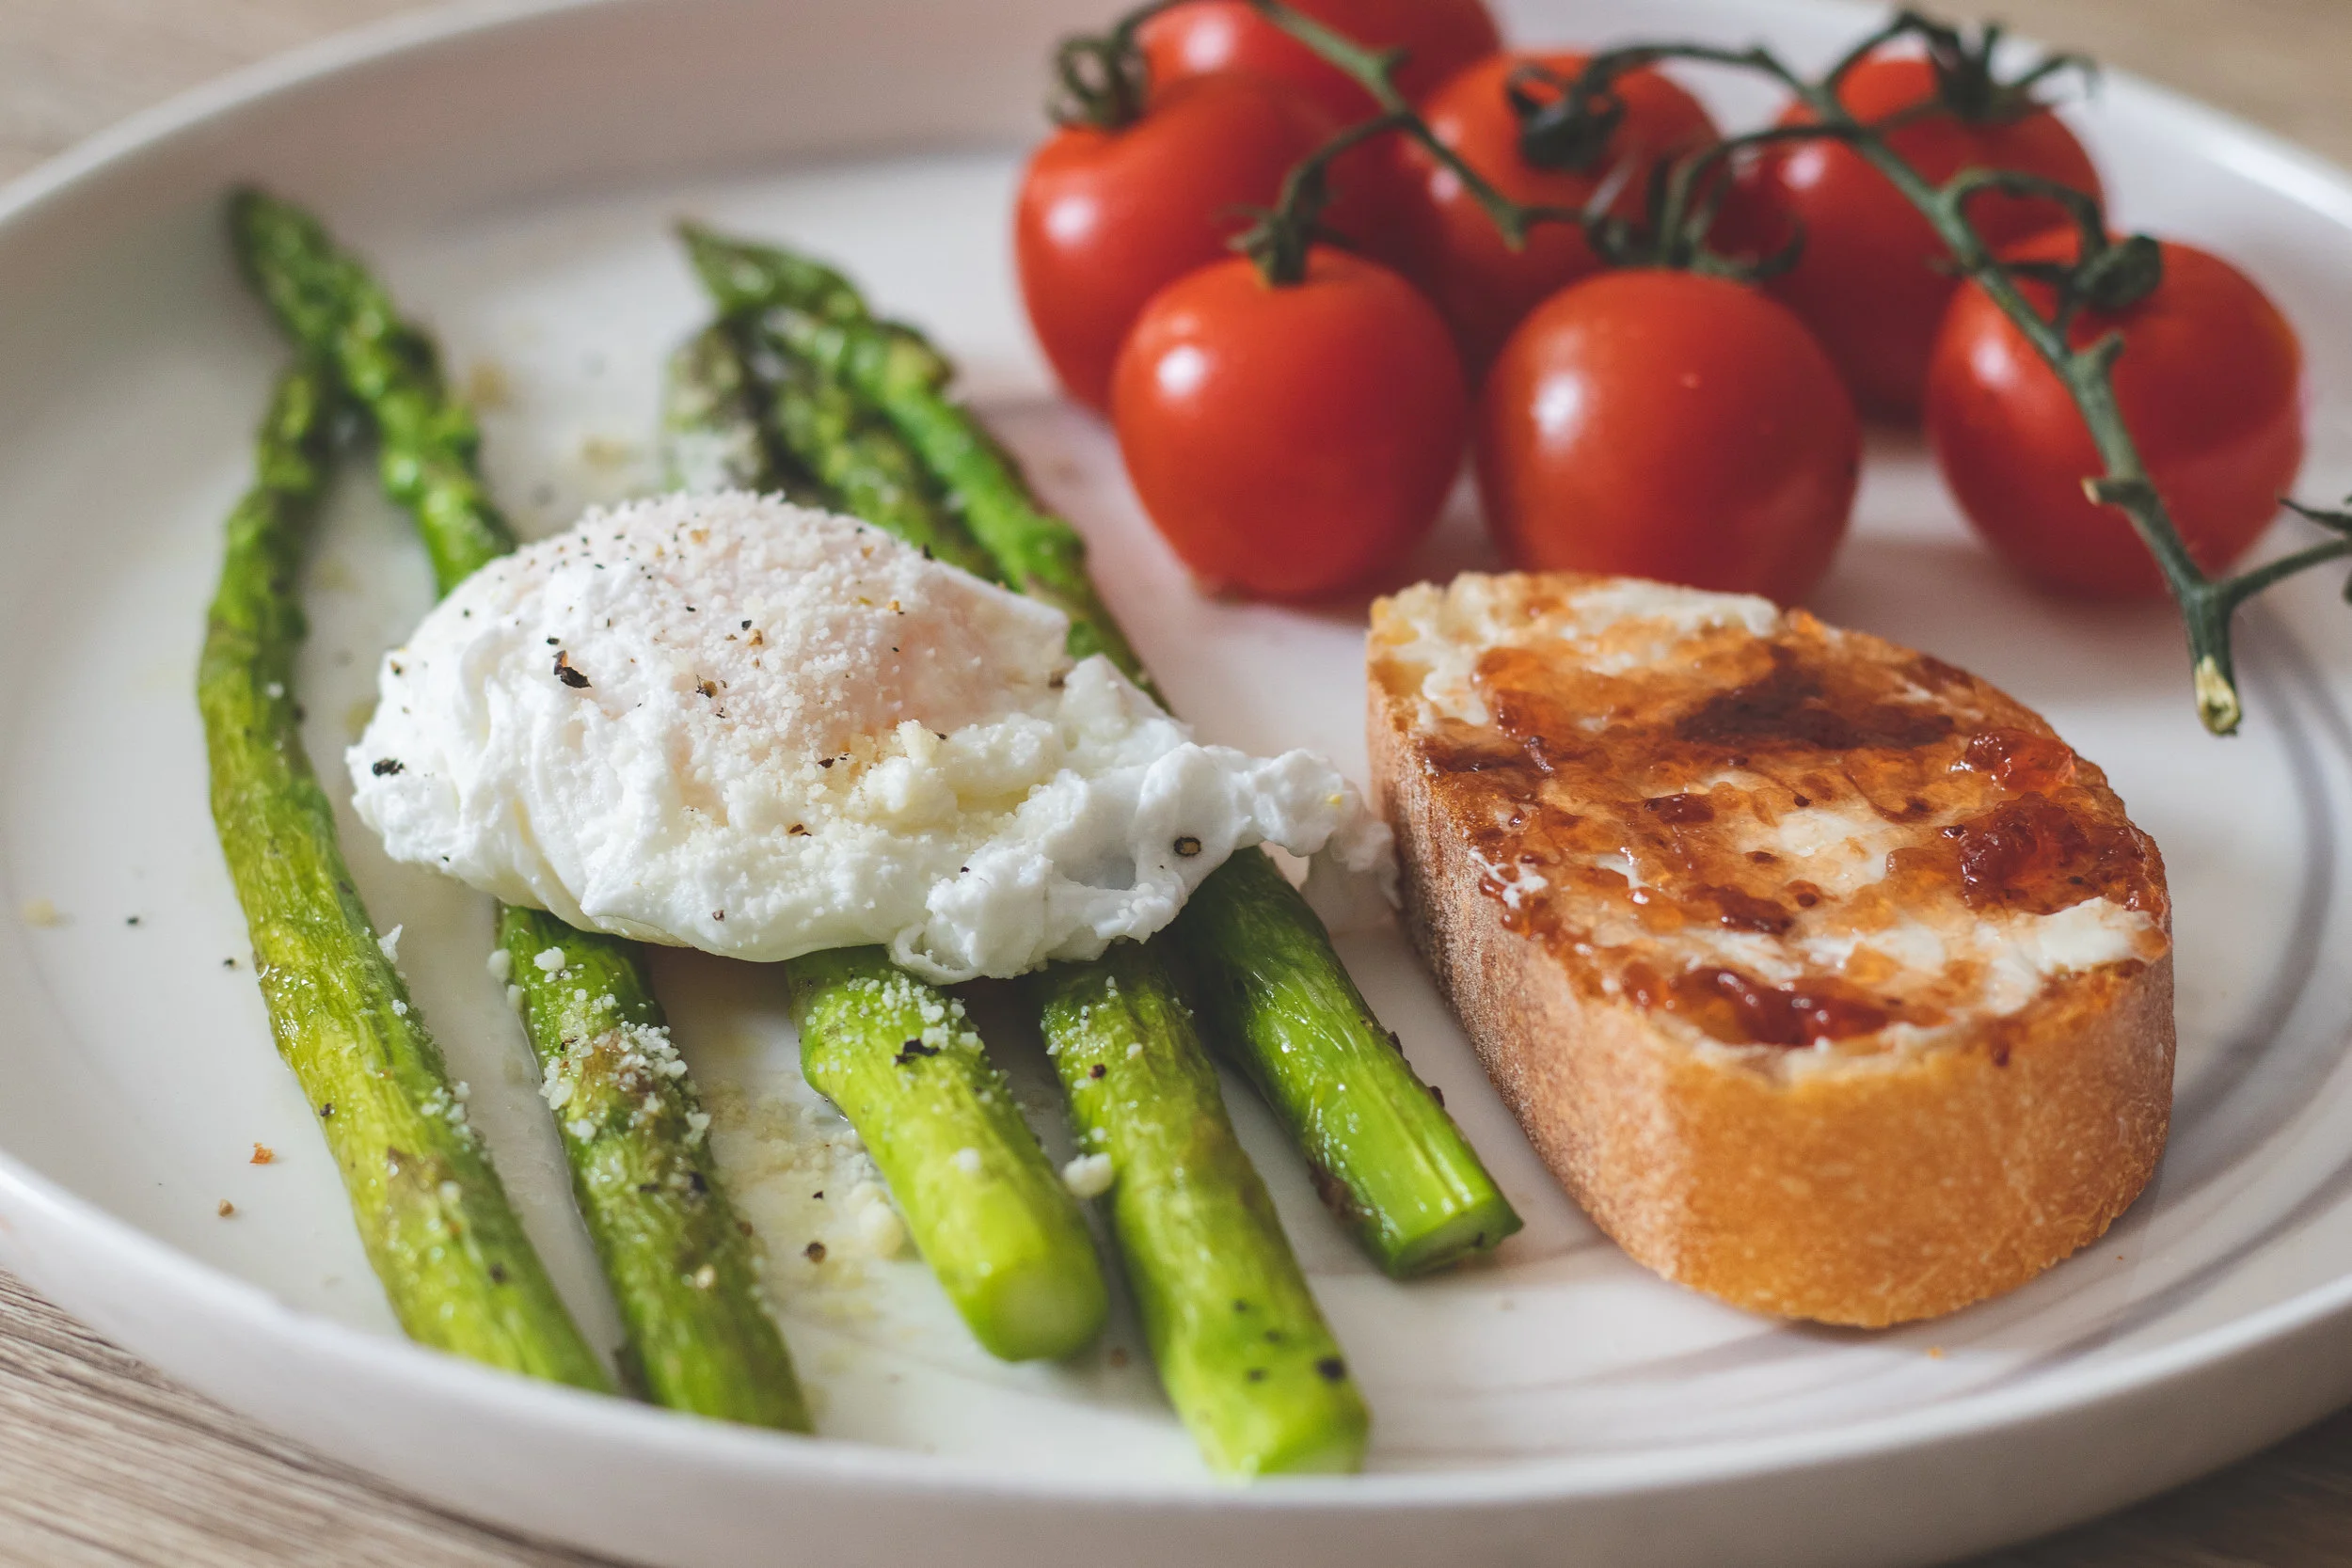
Tuesday, 8:30AM: Baluard Barceloneta for breakfast

Baluard Barceloneta is a bakery that was recommended to me by Airbnb Experiences that’s just minutes away from Casa Milà. They have a huge selection of pastries, tarts, and filled-donuts that will leave you feeling way too indecisive for so early in the morning. So come with a large group of friends so you can try all of them :)


72 Hours in Barcelona
 
72 Hours in Barcelona
 
72 Hours in Barcelona
 
72 Hours in Barcelona
 
72 Hours in Barcelona


9:00AM: Casa Milà

Casa Milà is another one of Gaudi’s works that was initially designed to be a private residence. It’s other name “La Pedrera,” or “stone quarry,” is actually a nickname given by the citizens of Barcelona who disapproved of its rough outer appearance. Although it’s now a UNESCO World Heritage site and visited by people all over the world, it once appeared in many satirical pieces as was a subject of humor for many of Barcelona’s residents.


72 Hours in Barcelona


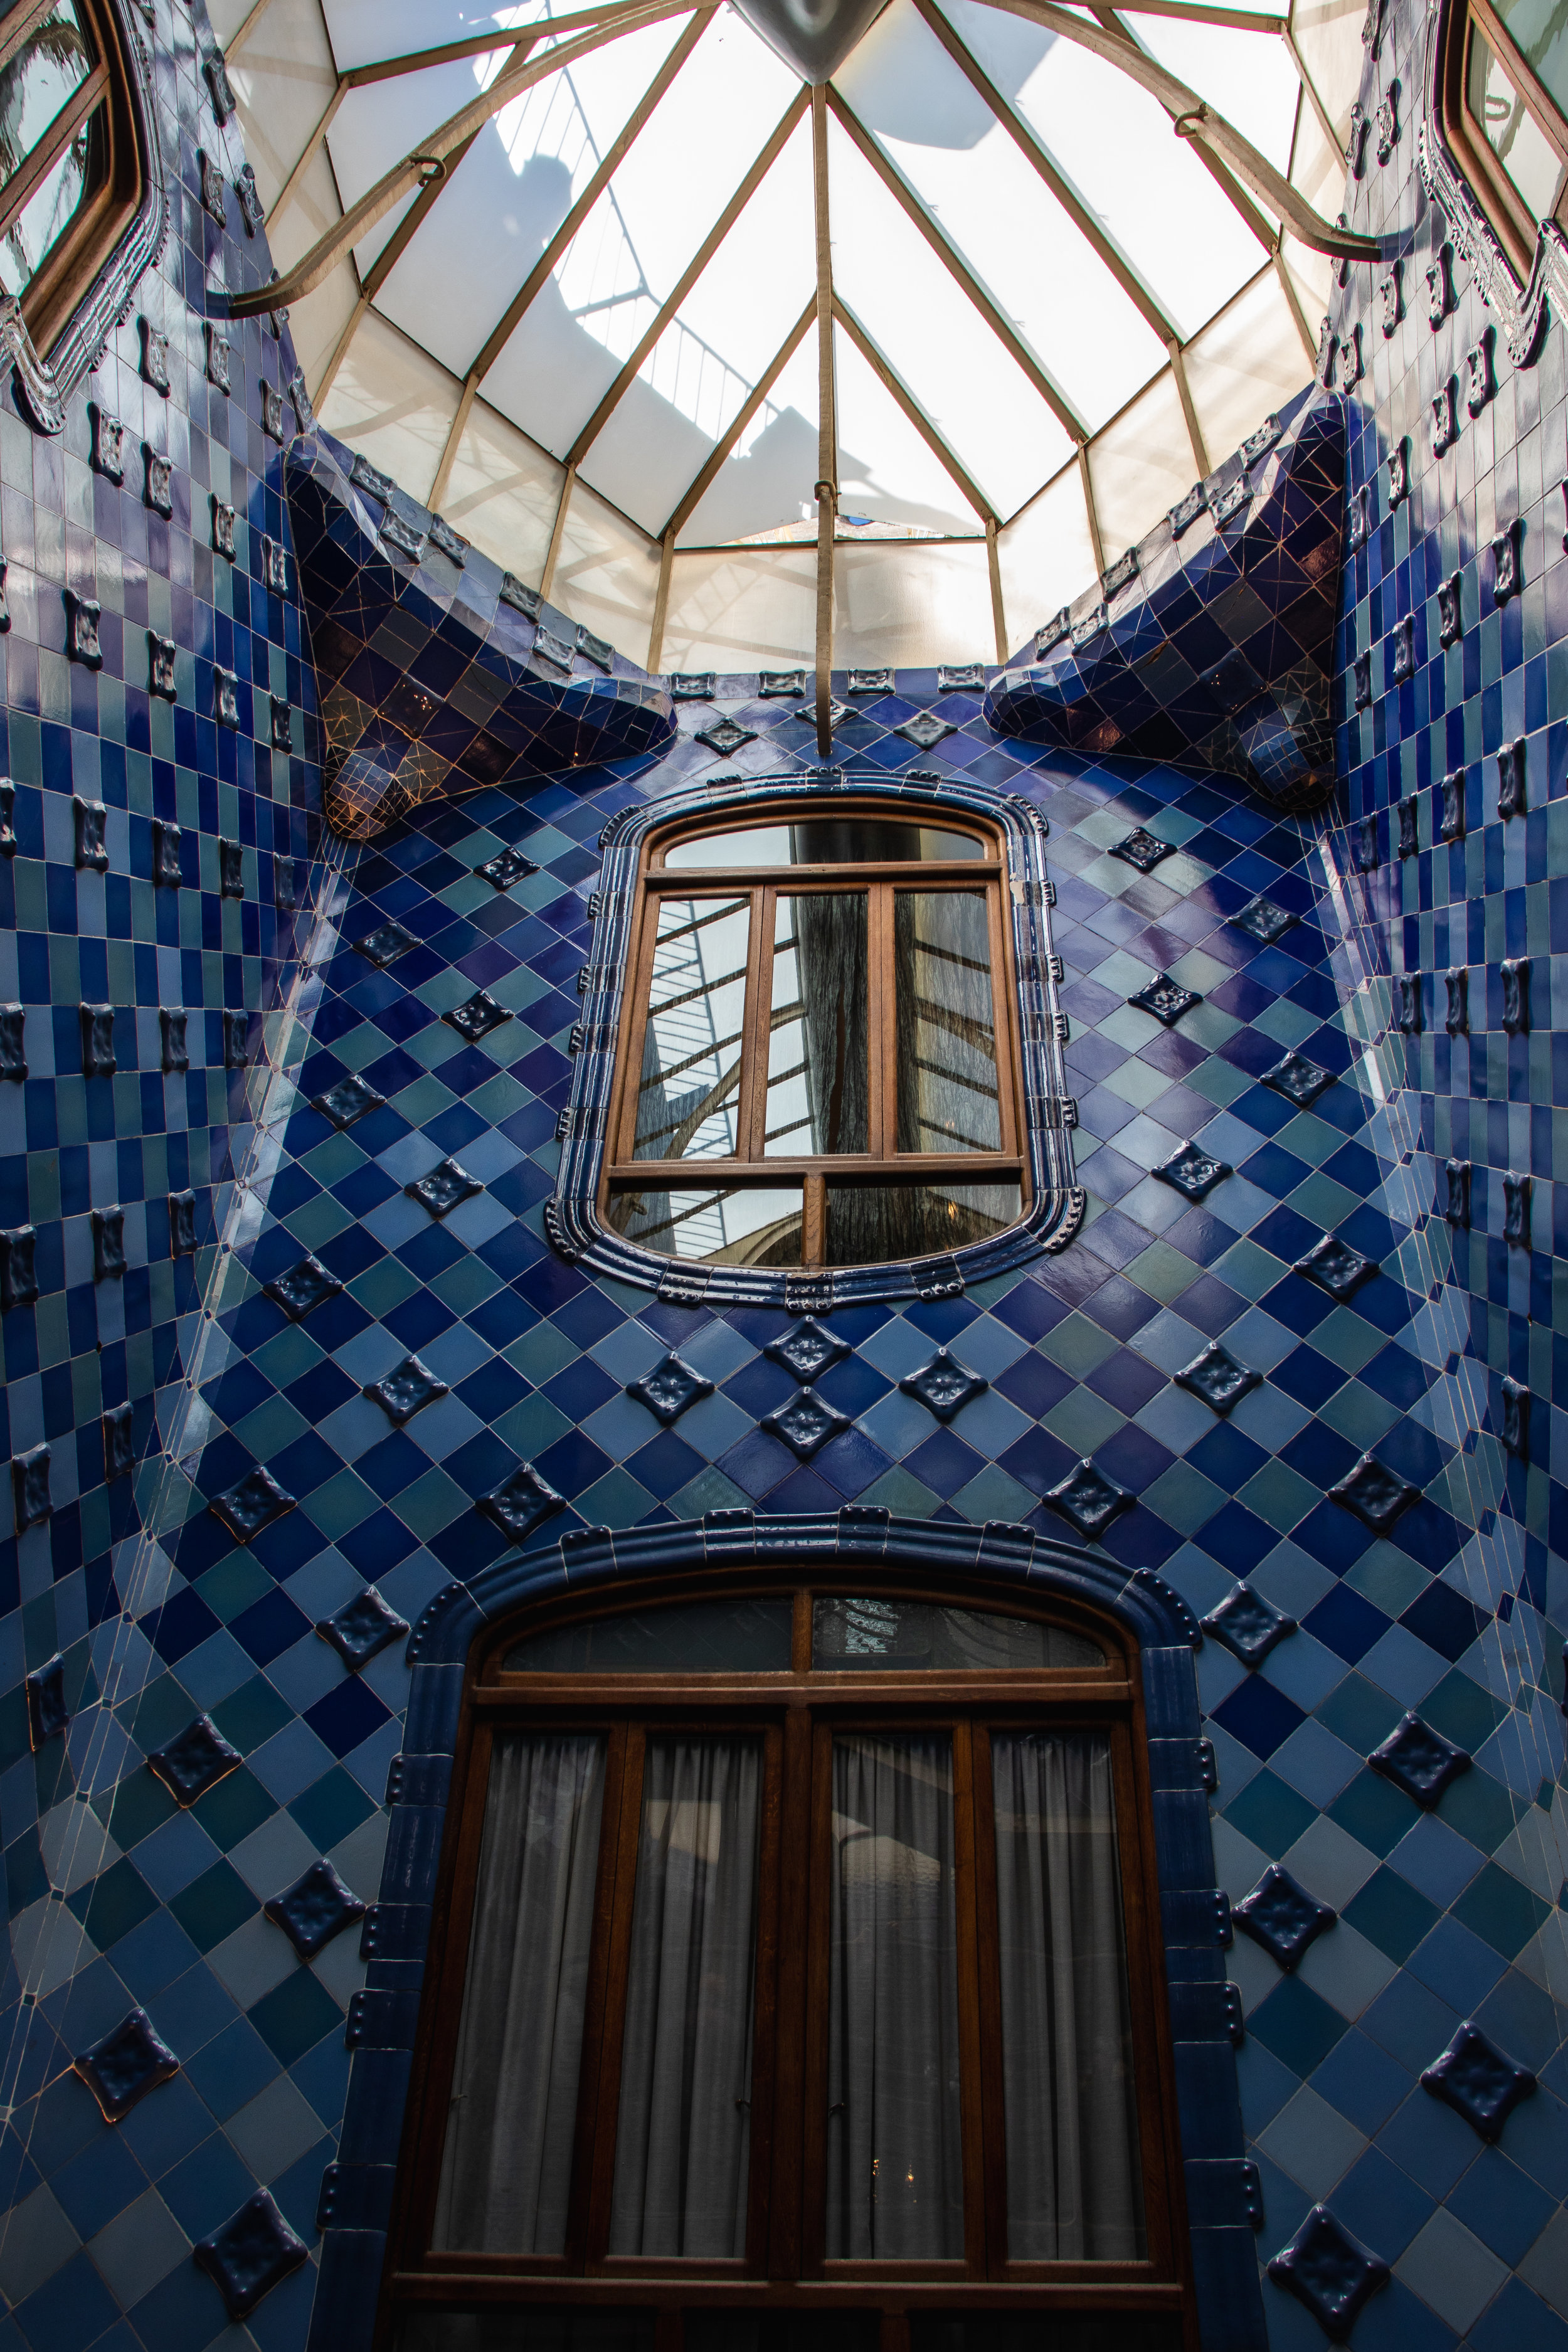
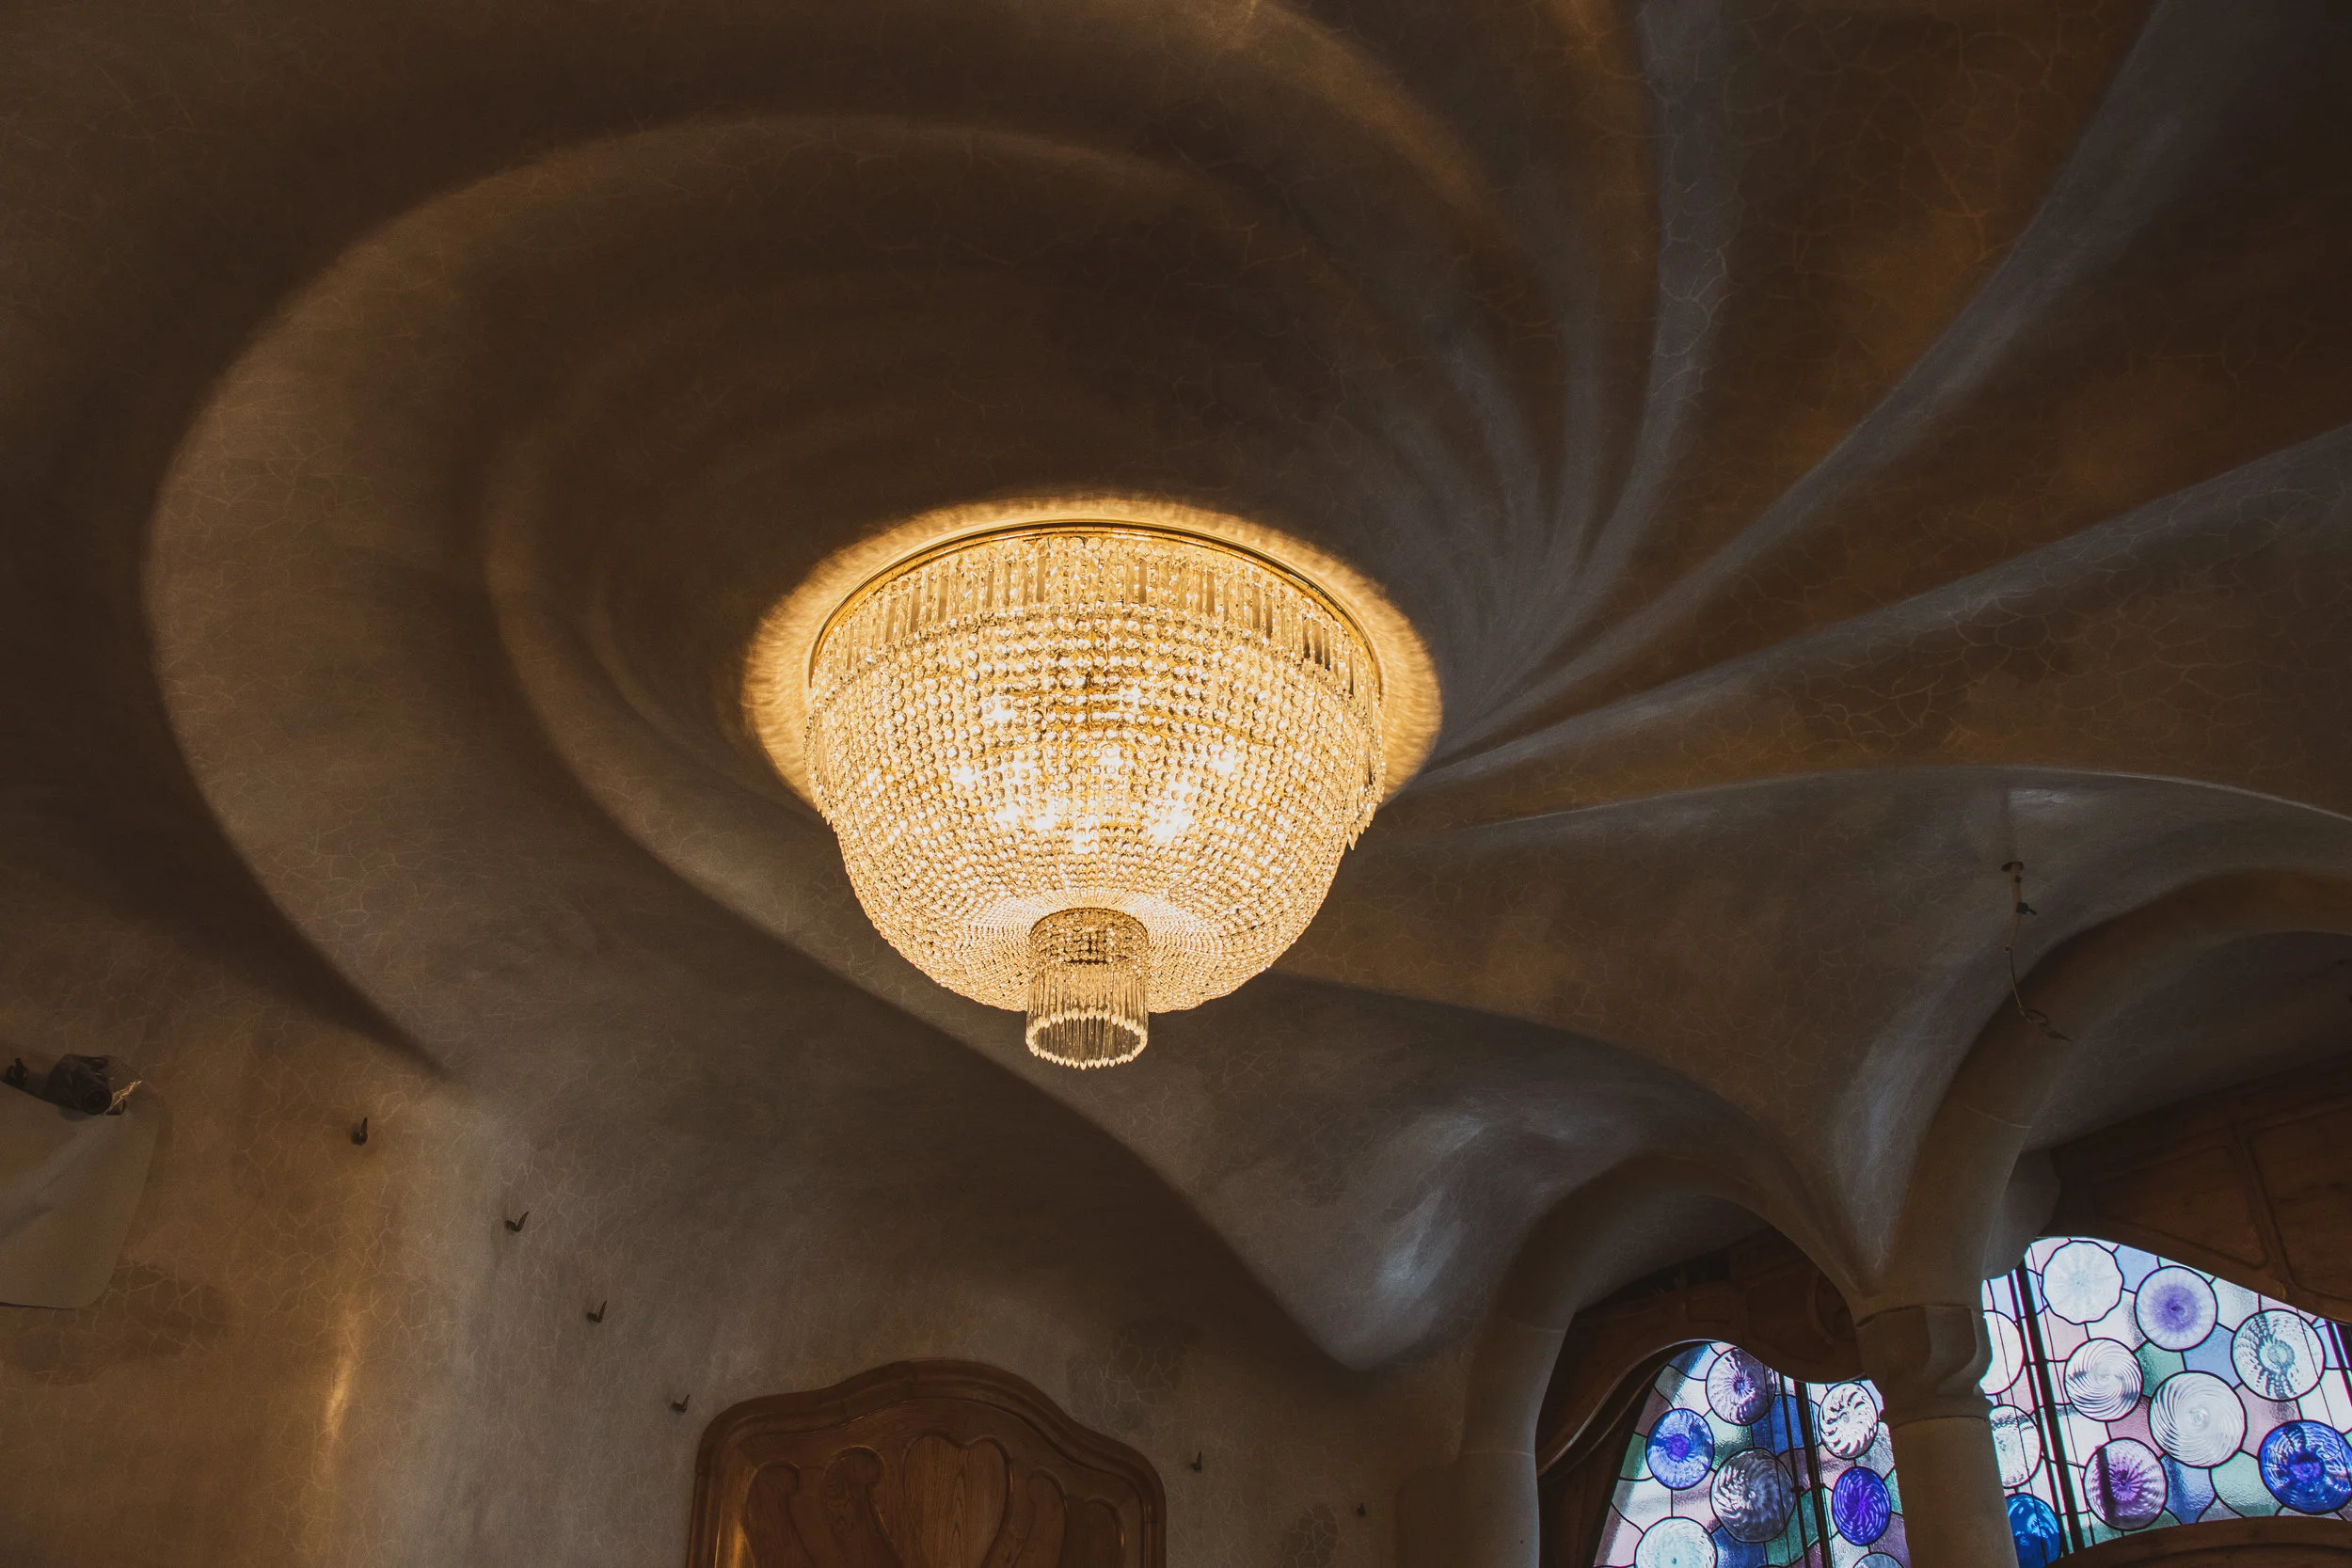
11:00 AM: Casa Batlló

If this is still in construction by the time you visit, consider skipping it.

I was tempted to come visit Casa Batlló after looking at photos on Pinterest of its gorgeous exterior and the building’s lack of straight lines. Unfortunately, while I was in Barcelona (April 2019), the building was going through a large renovation which left the facade completely covered up and many areas of the building inaccessible. Although I had booked tickets ahead of time, I still had to wait around 45 minutes to enter. It was definitely not worth the ticket price and the wait, and I have to say that I enjoyed Casa Milà way more.


72 Hours in Barcelona


12:30 PM: Lunch at La Boqueria

La Boquería is a huge farmers market right next to La Rambla that sells yummy ready-to-eat street foods like empanadas and croquettes as well as a huge selection of produce, fresh seafood, and meats. It’s basically a food heaven. Jamón ibérico and serrano (thinly-sliced cured pork, kind of like prosciutto) are on display everywhere in this market, so definitely try a few pieces as it’s hard to get your hands on jamón outside of Spain. Try out the freshly squeezed or blended fruit juices too—you’ll even find some tropical juices made from guava and coconut, all selling for really low prices (if I recall correctly, I got a cup for 50 cents).

Because the La Rambla area and La Boquería can get very crowded, try to keep an eye on your bags at all times. Barcelona is the pick-pocket capital of the world, and you might become the next victim as you’re strolling through these busy areas.


72 Hours in Barcelona


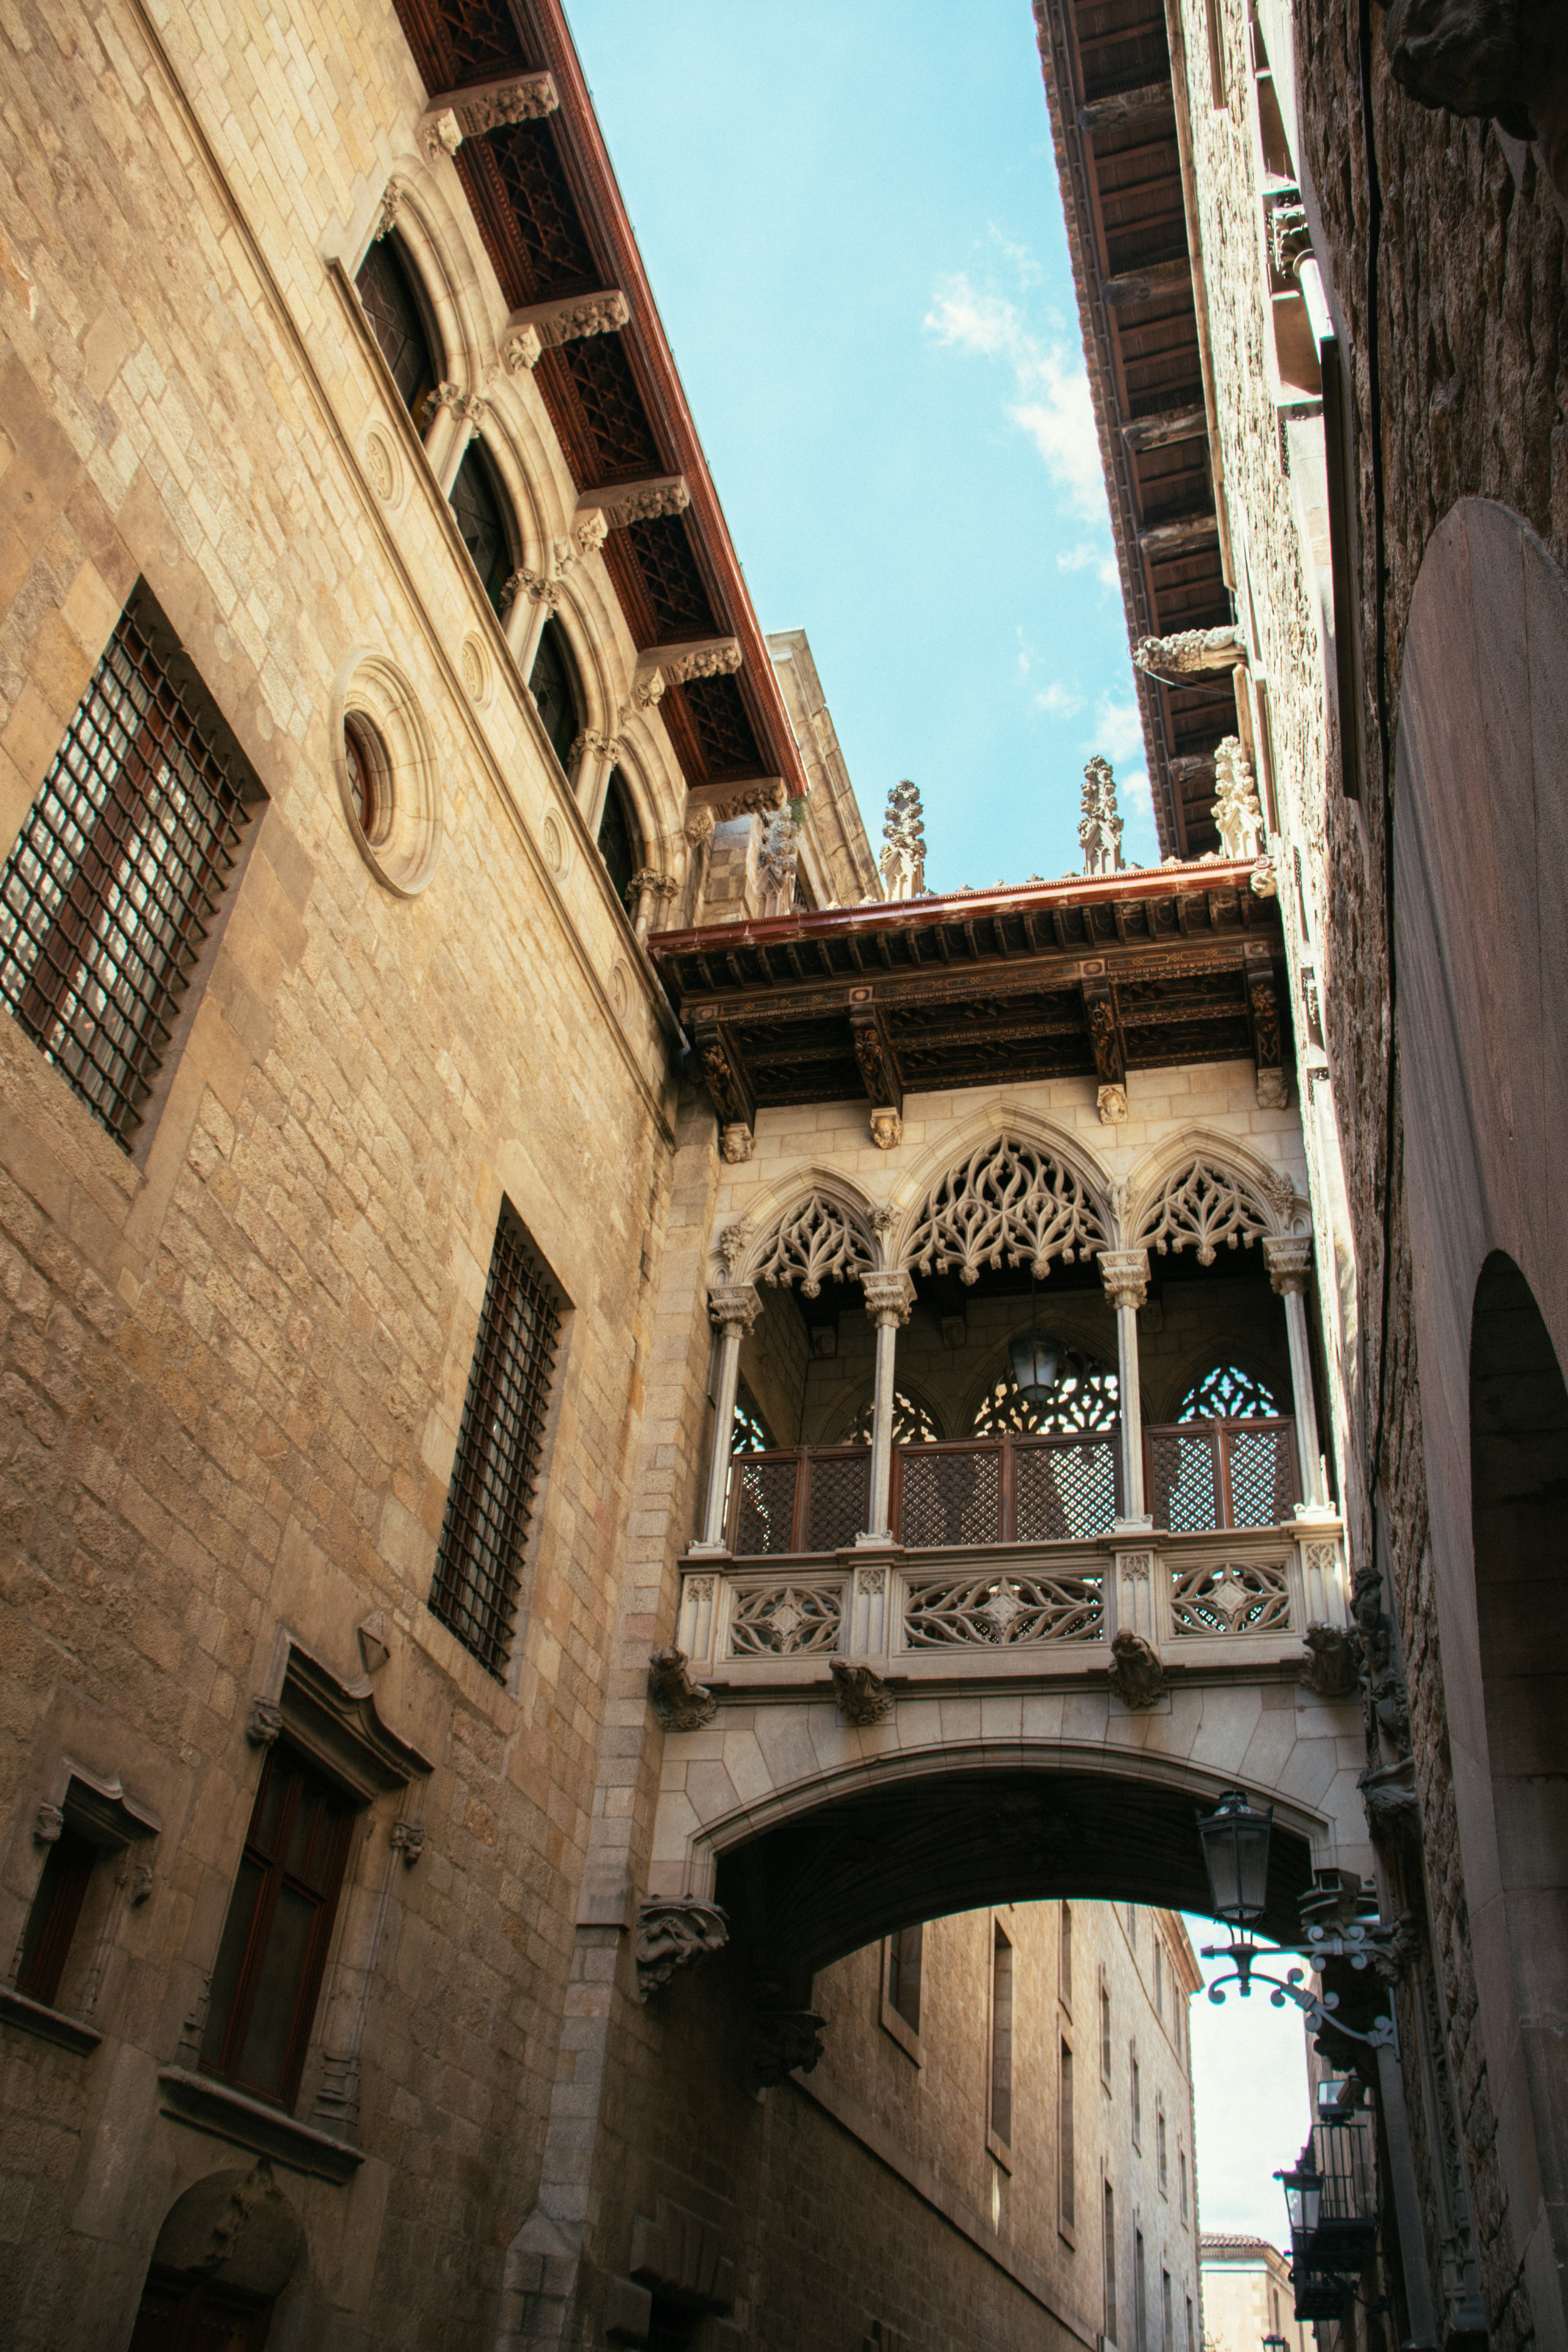
1:30 PM: explore the Gothic Quarter

Just a few blocks away from La Boquería is the Gothic Quarter, a neighborhood filled with tiny streets, medieval architecture, and countless tapas bars and shops. Set aside some time here to visit the Barcelona Cathedral and the Picasso Museum, or just to get lost inside the beautiful narrow streets. You’ll instantly feel like you’ve escaped the busy city after slipping away into a beautiful secluded alleyway.


72 Hours in Barcelona


3:00PM: Tour the Palace of Catalan Music

Located just on the edge of the Gothic Quarter, The Palace of Catalan Music is a beautiful concert hall open for shows at night and tours during the day. I would’ve loved to see a concert here, but didn’t get a chance to plan it into my itinerary. So instead I hopped onto an afternoon tour instead where I learned about the history of the concert hall. The hall sits around 2000 people, and is actually one of the few concert halls in the world that is illuminated by natural lighting.

I also learned that famous composers like Rachmaninov, Ravel, and Stravinsky performed their original works here. Jazz/Bossa Nova musicians like Ella Fitzgerald, Duke Ellington, and Gil Gilberto have also graced the stage. Yeah, no big deal.


72 Hours in Barcelona


4:30PM: Churros & chocolate at Xurreria Laietana

Xurreria Laietana (or Churrería Laietana) is one of the more popular churros spots in Barcelona and is another one of those hole-in-the-wall places that has a line spilling into the street. Here you can get freshly fried churros at a low price as well as a cup of chocolate sauce to dip them into (note that this is a thick chocolate sauce, and not to be mistaken for hot chocolate, even though it comes in a coffee cup). Try to visit when they first open in the morning, or when they reopen in the afternoon (around 4:30 PM) to avoid lines and to find a place to sit.


72 Hours in Barcelona


9:00PM: The best paella of my life at Arume

Okay okay, I know Paella is not from Barcelona and that Valencia is the best place to get it. And it’s probably true that there’s a myriad of tourist traps that will serve you “paella” on every street corner. So after doing extensive research on Yelp and TripAdvisor I decided on Arume, a small, romantic, sit-down place specializing in Galician cuisine. We got a Tortilla Española (Spanish omelette) to start, and then 2 different paellas to share: the seafood paella, and the duck paella.

The duck paella! Oh my goodness. It was probably one of my favorite dishes in Spain. The paella was very rich and flavorful, filled with large chunks of duck, different kinds of mushrooms, and topped with fried peppers and mayonnaise. I’m a big fan of poultry and mushrooms, and the kick from the pepper balanced out the richness of the duck. This dish basically contained all of my favorite ingredients in one hot plate, and I wish I could’ve gone back there a second time to eat it.

Also I want to say that the dining experience here was nothing short of perfect. You can easily make a reservation on their website and not have to wait for a table (we saw a group waiting for a table when we walked in, and still waiting when we left, so I highly recommend booking a reservation). The service is also great, with very friendly waiters and hosts, ready to explain the menu and give you recommendations.


72+Hours+in+Barcelona
72 Hours in Barcelona


Wednesday, 7:30 AM: Early morning photowalk

I wanted to see La Sagrada Familía without all the tourists before I left, so I woke up early in the morning to watch the sun rise behind it. I really loved the lighting at this hour, and how it gave the cathedral’s facade a reddish tint.


72 Hours in Barcelona


9:00 AM: Chocolate Croissants at Forn De Sant Jaume

Forn De Sant Jaume is a cute little bakery and breakfast spot filled with locals. After watching Simon & Martina’s YouTube video on what to eat in Barcelona, I knew I had to come here for their chocolate croissants and bunyols. I loved how creamy and thick the chocolate on the inside of the croissant was. The consistency was so much richer than that of a chocolate croissant you would get here in the states. It was a super simple but decadent last meal in Barcelona.


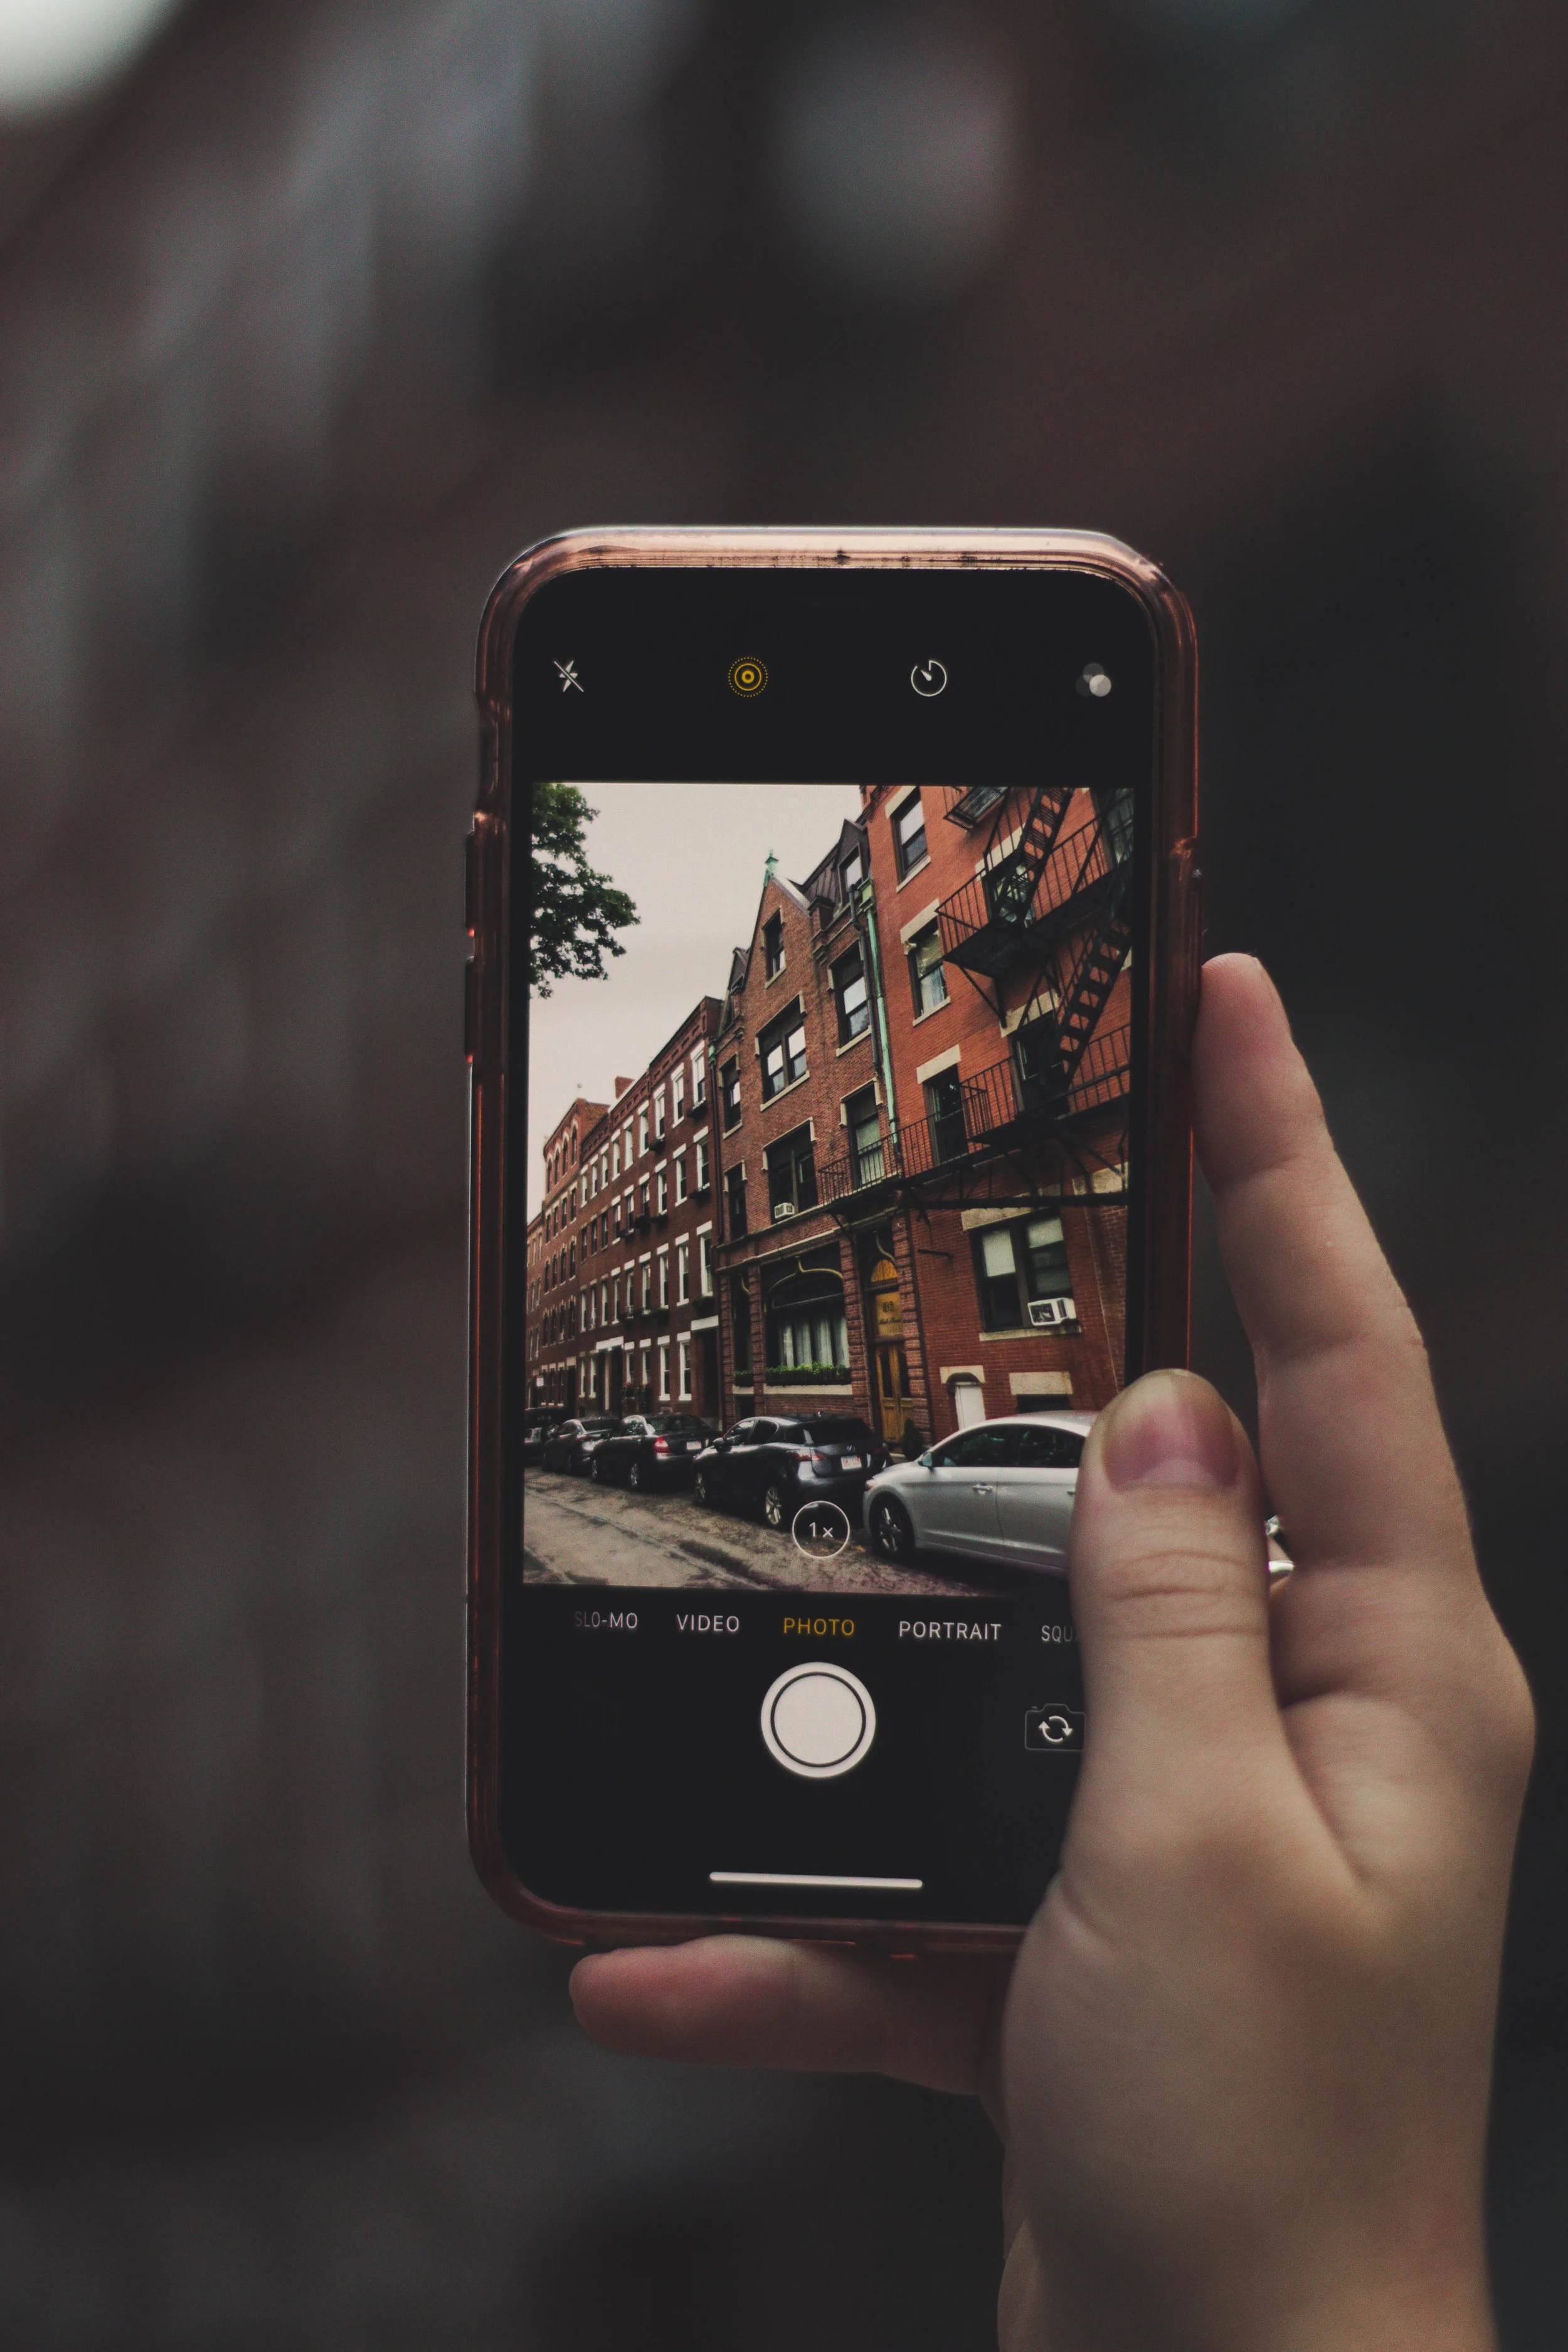
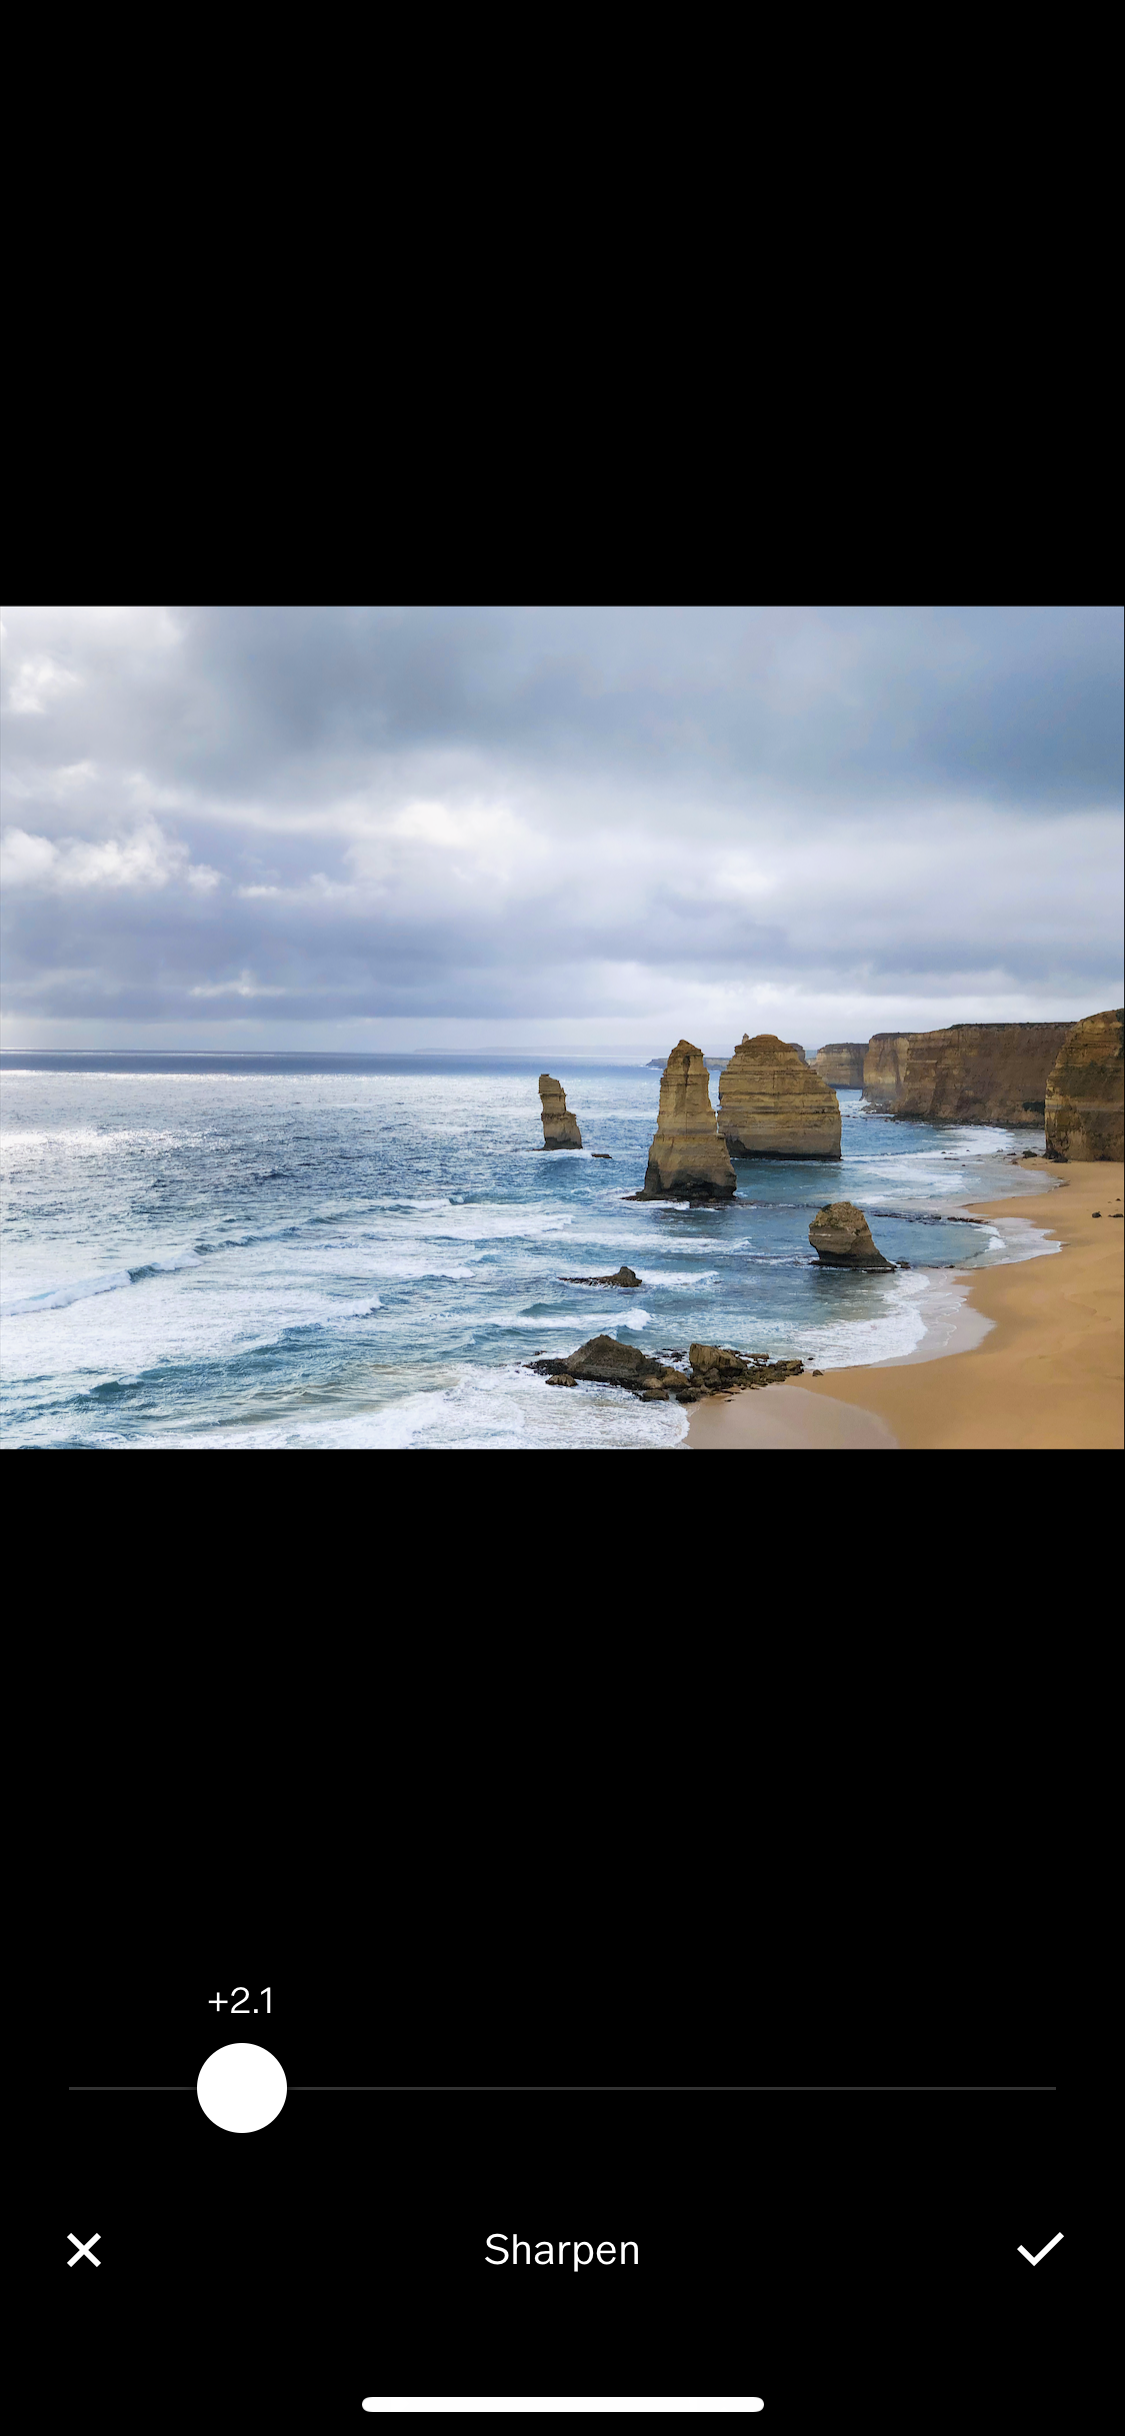
Photos were taken on the Canon T7i and edited in Adobe Lightroom CC, with the exception of a few taken on my iPhone and edited with VSCO.

Though Barcelona is a safe city for the most part, it does have a pick-pocketing problem. When you visit, be sure to keep an eye on your bags at all times, as pick-pockets might appear in the most unexpected places. Don’t let it ruin your trip, but do keep it in the back of your mind at all times.

Hope you found this (rather lengthy) guide to Barcelona helpful. Have fun in Barcelona, and ¡buen viaje!

♥ Cindy

 
Travel, 2Cindy ZhangComment
Gyoza 2 ways: pork & cabbage, chicken & mushrooms


Watch the video for a in-depth tutorial on how to make this dish. If you enjoyed watching, please give me a thumbs up/subscribe to me on YouTube!


How to make Gyoza | potstickers | dumplings | 餃子

 
Gyoza 2 ways: pork & cabbage, chicken & mushrooms


Today we’re making one of my all-time favorite things to eat: potsticker dumplings, otherwise known as gyoza. We’ll be making them with 2 different fillings: pork and napa cabbage (from my mom’s recipe) as well as chicken and dried shiitake mushrooms.


Gyoza 2 ways: pork & cabbage, chicken & shiitake
Gyoza 2 ways: pork & cabbage, chicken & mushrooms


Gyoza might seem pretty intimidating, but they’re actually really easy to make on weekends for meal prep on weekdays. If you don’t want to cook all of your dumplings right away, you can freeze them and eat them throughout the week. Just make sure you arrange them in a flat layer when you’re freezing them so that they don’t stick together.


Gyoza 2 ways: pork & cabbage, chicken & shiitake


You can’t go wrong with the classic pork and napa cabbage filling. I’ll show you my mom’s recipe, which I grew up eating. You’ll need: ground pork, napa (or Chinese) cabbage, scallions, eggs, minced ginger & garlic, vegetable or canola oil, cornstarch, white or black pepper, soy sauce, and salt.

We want to make sure the cabbage doesn’t release too much water into our dumplings. To make the cabbage give up its moisture, sprinkle some salt onto the cabbage and set it aside for 30 minutes. Note that different types of cabbage and different parts of the cabbage itself may release more water than others.


Gyoza 2 ways: pork & cabbage, chicken & mushrooms


Chicken and dried shiitake mushrooms are a classic pairing in Chinese cuisine. For this filling, you’ll need: ground chicken, dried shiitake mushrooms (soaked overnight), water from soaking the mushrooms, carrots, scallions, eggs, minced ginger & garlic, cornstarch, soy sauce, sesame oil, and salt.

Most of the time, store-bought ground chicken is made from chicken breast—which I’m not a big fan of. So, if you’re really finicky about this stuff like me, you can make your own ground chicken by mincing some boneless chicken thigh (which will make a much more tender filling).


Gyoza 2 ways: pork & cabbage, chicken & mushrooms


Rumor has it that you should only mix the filling in one direction to keep the meat tender and juicy. I’m not sure if this is scientifically proven or if it’s just an old Chinese myth, but my mom swears by it. Happy mom = happy life, and happy wife = happy life, so my dad and I just do it for kicks.

One of the hardest things about making dumplings is how finely you have to chop the vegetables. You can easily make a mess in the kitchen (and even hurt your fingers) by chopping all of these vegetables into tiny pieces. Instead, I recommend using a food processor to chop your veggies, if you have one, to make your job 10 times easier.


How to fold dumplings

 
Gyoza 2 ways: pork & cabbage, chicken & mushrooms


1) Put some filling into the center of the wrapper and add some water to the edges. The water will help the sides stick together.

2) Fold it half way and pinch it in the center. Add more water on the edges of the outside layer, specifically on the side where you intend to create the folds.


Gyoza 2 ways: pork & cabbage, chicken & mushrooms

3) Fold in the open flaps, kind of like you’re sealing an envelope. Start with fold that’s closest to the middle, and fold the wrapper in until it aligns with the top of the wrapper.

Gyoza 2 ways: pork & cabbage, chicken & mushrooms

4) Create a second fold with the flap, also aligning it with the top of the wrapper.

Gyoza 2 ways: pork & cabbage, chicken & mushrooms

5) Create two more folds on the other side, symmetrical to the ones you already made.

6) Pinch the top edges to ensure that it’s completely sealed. We wanna make sure the edges really stick together so that the dumpling doesn’t open up when we boil it or fry it.


16 oz of meat will usually make around 40 to 50 dumplings, depending on how much filling you put into each one. If you’re not too confident in your wrapping skills, you can start off by using a smaller amount of filling in your dumplings. It’ll be a lot easier, trust me!


Gyoza 2 ways: pork & cabbage, chicken & mushrooms
 

Voilà! You’re done!

My mom literally makes 5 of these while I make 1.

 
Gyoza 2 ways: pork & cabbage, chicken & mushrooms


Secret to giving your gyoza wings: Nope, not red bull. Cornstarch and water, actually! Most people will just pour water into the pan to steam them, but I like to stir in a little bit of cornstarch or potato starch (or even flour) into my water before I add it to the pan. Another trick to making them super presentable is to arrange the gyoza in a windmill shape in an 8-inch nonstick pan, put a plate over them once they’re done, and flip the pan onto the plate.


Gyoza 2 ways: pork & cabbage, chicken & mushrooms


Not so much into frying these babies? You can make a healthy(ish) version by steaming them or boiling them! Just be sure not to boil them for too long until they’re soggy (you can avoid this by boiling them without the lid for the last few minutes), but also boil them long enough to ensure the meat is cooked. The hardest part is deciding which one tastes better: the pan fried ones, or the boiled ones?

Answer: porque no los dos?


Gyoza 2 ways: pork & cabbage, chicken & mushrooms


Gyoza 2 Ways: Pork & Cabbage, Chicken & Mushroom

Ingredients for Pork & Cabbage gyoza

  • 40-50 store-bought gyoza wrappers
  • 16 oz ground pork
  • 2 eggs
  • ½ cup chopped scallions
  • ½ stalk of Napa (or Chinese) cabbage, around 2 cups after they've been chopped and dehydrated*
  • 1 tsp minced ginger
  • 1 tsp minced garlic
  • 2 tsp soy sauce
  • 1 tbsp oil
  • 2 tsp cornstarch or potato starch
  • 2 tsp salt
  • sprinkle of white or black pepper

* You'll need to dehydrate the cabbage so the dumpling filling isn't watery and soggy


Ingredients for Chicken & Mushroom gyoza

  • 40-50 store-bought gyoza wrappers
  • 16 oz ground chicken
  • 2 eggs
  • ½ cup chopped scallions
  • 1 cup diced carrots
  • 1 cup diced dried shiitake mushrooms that have been soaking in water
  • 1 tsp minced ginger
  • 1 tsp minced garlic
  • 2 tsp soy sauce
  • 2 tsp sesame oil
  • 2 tsp cornstarch or potato starch
  • 2 tsp salt
  • 2 tbsp soy sauce
  • 1 tbsp water that shiitake mushrooms have been soaking in (optional)

Ingredients for the slurry

  • 3 tbsp water
  • 2 tsp cornstarch/potato starch/flour

Takes , Makes 8 servings for each filling, which each person eating around 5 dumplings.


Instructions for the Pork & Napa Cabbage Filling

  1. Finely chop the Napa cabbage. If you have a food processor, use it to do all the chopping for you to avoid the mess :)

  2. We want to make sure the cabbage doesn’t release too much water into our dumplings. Sprinkle some salt onto the cabbage to help it lose some of its moisture and set aside for 30 minutes.

  3. After setting it aside, squeeze out all the water from the cabbage and put it into a strainer. Note that different types of cabbage and different parts of the cabbage itself may release more water than others. After squeezing out all the water, you should be left with about 2 cups of cabbage to balance out 16 oz of ground pork.

  4. Combine the ground pork, cornstarch, soy sauce, eggs, ginger, garlic, white pepper, salt, and cabbage in a large heat-proof bowl. Stir the mixture in one direction to keep the meat tender and juicy. Add the scallions on top of the mixture but don't stir it in yet.

  5. Heat up a tablespoon of oil in a small pan until it reaches its smoking point. Pour the hot oil onto the scallions and your mixture. The hot oil will make the scallions release their natural oils and flavor. Be careful not to burn yourself while pouring in the hot oil. Stir the oil into the mixture, going in one direction.

Instructions for the Chicken & Mushroom Filling

  1. Soak 6 dried shiitake mushrooms in some water and leave them in the fridge overnight or until they're soft. You’ll tell when they’re fully soaked through by checking if the stems are soft enough to cut through. Dry them off on a paper towel and chop them into small pieces.

  2. Combine the ground chicken, cornstarch, soy sauce, sesame oil, eggs, ginger, garlic, salt, shiitake mushrooms, and diced carrots in a large bowl. Stir the mixture in one direction to keep the meat tender and juicy.

Instructions for Pan-frying

  1. Heat some canola or vegetable oil in an 8 to 10 inch frying pan and swirl it around to make sure the bottom is completely covered. Arrange the dumplings in a nice shape, so that it looks pretty when we flip it out of the pan. Fry them for about 30 seconds without water to let the bottom brown up a bit.

  2. Mix 2 tsp of cornstarch with 3 tbsp of water and add it to the pan. The water should cover up about 60-70% of the dumpling. Put a lid on the pan and steam the dumpling for about 5-6 minutes, or until most of the water has evaporated.

  3. After that, cook the dumplings without the lid for 1-2 minutes for a nice brown crust to develop. Keep a close eye on them to make sure the bottoms don’t burn.

  4. When you see the brown edges forming, put a plate over pan and flip it over. This will make sure the potstickers stay together and create a really beautiful presentation

Instructions for boiled dumplings

  1. Bring water to a boil in a wok and add in 10-15 dumplings, stirring them constantly to make sure they don't stick together. Immediately put a lid over them.

  2. When the water comes to a rolling boil, add in about 1 cup of water and put a lid on the pan. Continue stirring them with a ladle if they're sticking together.

  3. Let the water come to a rolling boil again, and add a second cup of water. Cook them for a few minutes without the lid. They should be finished cooking when they float to the surface.


IMG_1315.jpg


This is a super fun food to make with friends! Why not try hosting a dumpling-making party? If you tried these, let me know how it turns out for you by tagging @cinders_zhang on Instagram! Support me by saving this recipe on Pinterest, and subscribing to my Youtube channel :) Good luck in the kitchen!

♥ Cindy

 
Food, 2Cindy ZhangComment
The Local’s Guide to San Francisco (+vlog!)

Shot on Canon T7i and edited with Adobe Premiere. Please subscribe to me if you enjoyed the video :)


I’m lucky to have called San Francisco my home for the last 3 years. It’s a city filled with stunning hikes, parks, streets, and most importantly (lol), some of the most amazing food I’ve ever had. In this post, I’ll share with you some of my favorite spots around the city—including the most photogenic locations and the tastiest restaurants.


San Francisco Photogenic Spots


Let’s start off our tour of San Francisco in North Beach! People will tell you that it’s famous for its Italian food and strippers (weird combination, I know…) but I really love it for its cute residential neighborhoods and steep hills with great views of the city.


San Francisco Photogenic Spots


But first, coffee. At Réveille Coffee Co.

Now that you’re in North Beach, stop for breakfast and coffee at Réveille Coffee Co. to fuel up your day in the city. It’s conveniently located just outside of Chinatown and serves some really delicious breakfast toasts—like this prosciutto and avocado toast with poached egg. They also serve some scrumptious salads and more adventurous brunch items like Shakshuka.

Réveille Coffee Co.

200 Columbus Ave
San Francisco, CA 94133
North Beach

reveillecoffee.com


San Francisco Photogenic Spots


City Lights Bookstore

After breakfast, head across the street to the City Lights, a unique bookstore founded in 1953 and now a historical landmark of San Francisco. It houses three stories of books, and offers titles from major publishers as well as smaller, independent publishers.

I really enjoyed going downstairs to the nonfiction section and flipping through all the jazz biography books and the cookbooks. 

City Lights Bookstore

261 Columbus Ave
San Francisco, CA 94133
North Beach/Chinatown

citylights.com


San Francisco Photogenic Spots


telegraph hill

While in North Beach, hike up the Telegraph Hill area to Coit Tower. It might be a tiring walk, but you’ll be rewarded by loads of great views along the way. 

I’m not a really big fan of Coit Tower itself, since the area can get pretty crowded with tourists during the day. But I do use the tower as a starting point for exploring some pretty gorgeous areas of North Beach. 

You can stop by the intersection of Union and Montgomery—which is actually a pretty quiet and residential area—and get some great views of the Bay Bridge and the Transamerica Pyramid.


San Francisco Photogenic Spots


Filbert Steps

While in the Coit Tower area, walk down the Filbert Steps, which is a set of stairs enclosed in a gorgeous garden. You’ll get some great views of the Bay Bridge, all the while feeling like you’ve escaped the city in this relatively secluded hike.

Filbert Steps

Filbert St & Sansome St
San Francisco, CA 94111
North Beach/Telegraph Hill


San Francisco Photogenic Spots


The Ferry Building

Walk towards the Embarcadero from the Filbert Steps and stop at the Ferry Building Marketplace for lunch or a quick snack. You won’t be disappointed by the food there—more like overwhelmed by the amount of options you’ll have. 


San Francisco Photogenic Spots


Here you’ll find a bunch of SF-local vendors selling snacks and desserts like Dandelion Chocolate and Blue Bottle Coffee. You’ll also find a popup selling the most beautiful plates in the world by Heath Ceramics—which I love but absolutely cannot afford.

You can find anything from gluten-free desserts to empanadas to dim sum in this building… so good luck trying to decide what to eat. 

Ferry Building Marketplace

1 Ferry Bldg
San Francisco, CA 94111

Embarcadero, SoMa

ferrybuildingmarketplace.com


San Francisco Photogenic Spots


Palace of fine arts

In the afternoon, I headed over to the Palace of Fine Arts with a few friends from work. I actually found this area super hard to photograph without a wide angle lens. I guess that’ll be my next big purchase on amazon.

It can get pretty crowded here with tourists during the day, but it’s nice to walk around its lake and check out the few swans that inhabit the area.


Palace of Fine Arts

3601 Lyon St
San Francisco, CA 94123
Marina/Cow Hollow

palaceoffinearts.com


San+Francisco+Photogenic+Spots
San Francisco Photogenic Spots


Catch the Sunrise at Baker Beach

Baker Beach is a great beach to catch a sunrise or sunset, and (in my opinion) one of the best viewing areas for the Golden Gate Bridge. I spontaneously decided to go there around 6AM in the morning on my own. Now that I look back, it did seem pretty dangerous, so I wouldn’t exactly recommend it. At least bring a (few) friend(s) with you! However, it was nice to get photos without all the people who are there during the day.

Danger aside, I have to admit it was pretty relaxing and therapeutic to be at a beach alone so early in the morning.


San Francisco Photogenic Spots


I completely got over my fear after I saw a couple walking their dog there. Maybe I’ll take my dog for a stroll here next time as well!

Baker Beach

1770 Gibson Rd
San Francisco, CA 94129

Presidio


San+Francisco+Photogenic+Spots
San Francisco Photogenic Spots


The 16th Avenue Tiled Steps

Another great place to visit in the morning where there are little to no tourists is the Moraga Steps, located on 16th Avenue and Moraga St. It’s a set of stairs that’s been decorated with hand-made animal, bird, and fish mosaic tiles. It’s definitely a lot more touristy and crowded than the Filbert Steps, so try to get there at 7AM. Am I crazy for telling you to wake up this early? 

The 16th Avenue Tiled Steps
Moraga St. between 15th & 16th Ave
San Francisco, CA 94122

Inner Sunset

16thavenuetiledsteps.com


San Francisco Photogenic Spots


GrandView Park

If the mosaic stairs become too crowded during the day, you can hike up to the top for a breathtaking view of the Inner and Outer Sunset. There’s actually another set of stairs that take you up to Grandview park for a more comprehensive view of the city.

Grandview Park

1705 14th Ave
San Francisco, CA 94122

Inner Sunset


San Francisco Photogenic Spots


Have a cute japanese lunch at Bon, nene

After walking up all of those stairs, head to the Mission District for lunch at a super cute Japanese café called Bon, nene. The decor in this café looks like it came straight out of a Miyazaki movie, and the food… well I guess the food also looks like it came out of a Miyazaki movie. If you’re there early enough for brunch, try out their traditional Japanese breakfast!

Bon, nene

2850 21st St
San Francisco, CA 94110

Mission

bonnene.com


San Francisco Photogenic Spots


Bernal Heights park

San Francisco is full of hills and great views, and another park for both is Bernal Heights Park. You might know it for its famous swing, but I love coming here to relax on the grass to listen to music or have a nice picnic. If you’re a dog lover, this is a fantastic place to bring your dog to mingle with other furry friends.

Bernal Heights Park

10 Bernal Heights Blvd
San Francisco, CA 94110

Bernal Heights


The Local's Guide to San Francisco


Grab a Pastry from Tartine Bakery

If you’re in the Mission District, be sure to grab a pastry from San Francisco’s (arguably) most-renowned bakery: Tartine. You’ll find hordes of people lining up to get their hands on one of their pastries, so try to go pretty early in the morning. You need try the almond croissant. Or the frangipane tart (pictured above). They do frangipane damn well here.

It seems like there’s a trend on this post where I’m constantly telling you to go to places at unbelievably early hours. For that I apologize… but trust me, great food and great hikes are worth waking up for 🙃

Tartine Bakery & Cafe

600 Guerrero St
San Francisco, CA 94110
Mission

tartinebakery.com


The Local's Guide to San Francisco


Clarion Alley

While you’re in the Mission, stop by Clarion Alley to check out some beautifully-drawn murals. It’s located between Valencia St and Mission St, at the halfway point between 18th and 17th St.

Clarion Alley

Between Valencia St/Mission St and 17th/18th st
Mission

clarionalleymuralproject.org


The Local's Guide to San Francisco


Have an asian-inspired brunch at Samovar Tea Lounge

San Francisco is the land of the brunches, but if you’re looking for something a bit more out of the box—and trying to expand your horizons beyond Eggs Benedict and waffles—try out Samovar Tea Lounge. They serve an array of Asian-inspired brunch items, like this Smoked-duck jook with poached egg, and a huge selection of teas. I found most of their items to be slightly healthier than those of most brunch places. Moreover, they’re located in the beautiful Yerba Buena Gardens, which you can ogle at through their huge glass windows.


The Local's Guide to San Francisco


The Smoked-duck jook was so yummy! Their butternut squash potstickers are also super tasty.

Samovar Tea - Yerba Buena Gardens
730 Howard St
Yerba Buena Gardens
San Francisco, CA 94103

SoMa

samovartea.com


The Local's Guide to San Francisco


But wait, there’s more! (for brunch)

I’m not gonna let you off the hook with just one brunch place in this post. If you’re looking for somewhere hassle-free without a 1-2 hour wait (which is pretty common for brunch places in SF) but also a place that serves some amazing food, try a small neighborhood-restaurant called Cassava in the Outer Richmond. They serve a traditional Japanese-style breakfast as well as more common American-style breakfast plates. Their plating game is also off the charts. But the best part is: I’ve been there multiple times and never did I have to wait for a table.

Cassava

3519 Balboa St
San Francisco, CA 94121
Outer Richmond

cassavasf.com


The Local's Guide to San Francisco


Lands end trail

For a beautiful morning hike that’s not super intense, walk the Lands End trail for beautiful views of the ocean. End your hike at Mile Rock Beach, where you’ll see the Lands End Labyrinth and a breathtaking view of the Golden Gate Bridge.

Lands End Trail

680 Point Lobos Ave
Golden Gate National Recreation Area
San Francisco, CA 94121

b/t El Camino Del Mar & Merrie Way
Sea Cliff

parksconservancy.org/parks/lands-end


The Local's Guide to San Francisco


All photos were taken on the Canon T7i and edited in Adobe Lightroom CC.

Hope you enjoyed this photo-heavy post and are inspired to pay San Francisco a visit! San Francisco has so much to offer in terms of hikes, views, shopping, and food that this post barely scratches its surface. But I hope that this at least gives you a good starting point :)

What are your favorite places in San Francisco? Let me know in the comments!

♥ Cindy

 
Poached Eggs and Asparagus (Healthy vegetarian breakfast)


As always, atch the video for a in-depth tutorial on how to make this dish. If you enjoyed watching, please give me a thumbs up/subscribe to me on YouTube!


Poached Eggs and Asparagus (Healthy vegetarian breakfast)


I’ve been on the constant lookout for veggie breakfast options lately. Unfortunately, most meat options for breakfast are not the healthiest. While having breakfast at work one day, I came across some grilled asparagus with hollandaise sauce. After flipping through Pinterest, I realized that having asparagus at breakfast is actually a pretty common thing. So I got inspired to create this super-duper—is this even cooking—easy recipe of sautéed asparagus with poached egg.


Poached Eggs and Asparagus (Healthy vegetarian breakfast)


To make the dish a bit healthier and easier, I swapped out the hollandaise sauce for a sprinkle of parmesan cheese.


Poached Eggs and Asparagus (Healthy vegetarian breakfast)


I love eating tomatoes for breakfast. I was convinced that they were a breakfast staple after having them in a traditional English breakfast. They also go really well with eggs (Chinese stir-fried tomatoes with eggs, anyone?) and provide a nice acidic element to break up the greasiness that a lot of breakfast items tend to have.


Poached Eggs and Asparagus (Healthy vegetarian breakfast)


Make sure to sauté your asparagus for a few more minutes longer than the tomatoes since they’re quite fibrous and will take longer to soften. No one wants to bite into a piece of asparagus that takes forever to chew first thing in the morning.


Poached Eggs and Asparagus (Healthy vegetarian breakfast)


I’m not really one to count calories (I used to be, but those were dark times). But I ended up doing a breakdown of the calories in this dish to convince you—and maybe myself as well—that this is actually a pretty healthy dish.


Poached Eggs and Asparagus (Healthy vegetarian breakfast)

Nutritional Value

Disclaimer: I’m by no means a nutritionist, and this is just based off googling the calories for approximately the amount that I used. (Just want to give out this warning since a reader in the past was quite finicky about this -_-)

5 sprigs of asparagus = 15 calories

1 egg = 70 calories

1 cup cherry tomatoes = 30 calories

1 tbsp of olive oil to sauté the veggies is about 120 calories, but realistically you’re only having half of that—or less (I had a bunch of oil left over in my pan) = 60 calories

1/2 tbsp parmesan cheese = 10 calories

1 slice of baguette = less than 100 calories

less than 1/4 tbsp butter = 25 calories

less than 1/4 tbsp jam = 25 calories

which comes out to be about 335 calories total… which is actually pretty good considering those 5 sprigs of asparagus will fill you up pretty well :)


Poached Eggs and Asparagus

Healthy vegetarian breakfast under ~350 calories/serving

Ingredients (serves 2 people)

  • 10 sprigs of asparagus, with ends discarded
  • 10-12 cherry tomatoes
  • 2 eggs
  • 1 tbsp olive oil
  • salt and pepper
  • white vinegar (for poaching the egg, if desired)
  • baguette or any other toast
  • butter and jam (or anything else you like to spread on top of bread)

Takes , Makes enough for 2 people (romantic brunch here we go!).


Instructions

  1. Slice up the bread and toast in a 350°F oven for about 10 minutes. You can use your toaster as well, but I find the oven is better for toasting a large number of baguette slices.

  2. While the bread is in the oven, heat olive oil in a skillet and sauté the asparagus and tomatoes. Start with the asparagus since they take much longer than the tomatoes. Asparagus: around 10 minutes, tomatoes: around 1-2 minutes. Add salt and pepper to taste.

  3. For the poached egg: Crack the egg into a small bowl to avoid egg shells when you add it into the water. Make a "tornado" in the water with a spoon before adding the egg. This will allow the egg to spiral onto itself and prevent it from falling apart in the water.

  4. Should you add vinegar? It’s totally optional. A little bit of white vinegar can help the egg stay firm, but I’ve made plenty of poached eggs without it.

  5. Poach the egg for 3-4 minutes, and let it drain on a paper towel before serving it.

  6. Spread butter and jam onto the baguette slices and assemble the tomatoes and asparagus onto a plate. Then top the asparagus (very carefully) with the poached egg. Sprinkle on some parmesan cheese at the very end and complete the dish with freshly cracked pepper.


Super duper easy, right? I also want to point out that the photos and video was taken on my new Canon Rebel T7i, which I’ve been in love with. It definitely takes a lot more thinking to take one photo than on the iPhone, but I’m pretty impressed with the results.

♥ Cindy

 
Food, 2Cindy ZhangComment
Editing Photos on your iPhone — Part 2: Removing distracting objects in travel photos
 
Editing photos on your iPhone — Part 2: Removing distracting objects in travel photos


Backstory for this “Editing Photos on your iPhone” series:

People often ask me what camera I use to take the photos for this blog. And most of the time, they’re surprised to find out that many of the photos were taken and edited on my iPhone. The iPhone camera is no joke, especially with features like Portrait mode. It’s also super convenient for taking photos while traveling or cooking (the idea of having an expensive DSLR by your stove kinda turns me off). You can also find some amazing apps on the app store that will work just as well as Photoshop and prevent you from airdropping photos back and forth between your phone and your computer.

Did you learn some basic color correcting tools in Part 1 yet?

Part 2 TL;DR:

“I took a crappy photo in a nice place. But it has so many distractions in the background that I wish I could get rid of! What should I do?”

The unedited photo:

 
Editing photos on your iPhone — Part 2: Removing distracting objects in travel photos


Goodness gracious! There are so many things wrong with this photo. It’s so hard not to just delete it. But what I do like about this photo is that it’s pretty candid. I really like the movement of the walking, and it really conveys the feeling of being on a trip.

Let’s identify what’s wrong with the photo:

  1. It’s too dark, and most of the photo is in the shadows

  2. There’s trash everywhere on the floor! (For reference, this was shot in the Monti neighborhood of Rome in the morning—so after a wild night out drinking for a lot of Romans)

  3. There’s a trash can taking up a lot of space on the left side of the photo

  4. The photo is lopsided (the walls of the buildings are tilted)

The apps that I’m going to use to fix these issues are:

 
Editing photos on your iPhone — Part 2: Removing distracting objects in travel photos

Step 1: Make the trash disappear

The trash in this photo really doesn’t contribute to the “traveling” vibe of this photo at all and is only a distraction. Let’s remove it by following these steps in TouchRetouch:

  1. Go to the object removal tab

  2. Tap on the brush tool

  3. Brush away the trash by adjusting the brush size and zooming in for precision

  4. Compare before and after by tapping the second icon from the right in the top toolbar


Editing photos on your iPhone — Part 2: Removing distracting objects in travel photos

Step 2: Straighten and crop the photo

To fix the tilt of the photo, lets open it up in the Lightroom app:

  1. Select the crop & rotate tool

  2. Crop parts of the image that are uninteresting—like the trash can on the left. This will also make the composition of the photo better and place the subject of interest on the lower left third of the photo (which is more interesting than in the center)

  3. Rotate the image until the lines of the buildings line up with the grid lines of the image.


Editing photos on your iPhone — Part 2: Removing distracting objects in travel photos

Step 3: Color correction

Let’s also do some color adjustment in the Lightroom app as well.

In the Light tab:

  1. Bump the exposure to brighten the image

  2. Bump the contrast to make the image pop a bit more

  3. Increasing the exposure may have caused the buildings in the distance to become too washed out. Because of this, I reduced the highlights so we can see more of the building’s details.

  4. Reduce the shadows that was overwhelming most of the image before

In the Color tab:

  1. Make the image warmer to give it a more summery vibe (the warm tones of the building really go well with my dress!)

  2. Increase the saturation to make the image more colorful


Editing photos on your iPhone — Part 2: Removing distracting objects in travel photos

Step 4: Creative last tweaks:

In VSCO:

  1. Choose a filter that compliments your photo. In my case, I chose the “Fuji Provia 400x” filter, which gives my photo a film-like vibe. You can also adjust the warmth of this filter.

  2. Final adjustments:

    • Increase the exposure

    • Make the shadows weaker

    • Sharpen the image

    • Bump the contrast a bit more


original photo vs Final photo with edits:

Editing photos on your iPhone — Part 2: Removing distracting objects in travel photos


And voilà! A disastrous photo turned into one that you can actually post on Instagram! The edited photo gives off so much more of a summer vibe, and is free of distractions like the trash on the floor. The composition has improved as well: having the subject offset from the center of the image puts more emphasis on where she’s going rather than on her. (Why am I speaking of myself in the third person…?)

For more iPhone photo help, please check out part 1 of this series!

♥ Cindy

 
Lifestyle, 2Cindy ZhangComment
Editing Photos on your iPhone — Part 1: Basic color correction
 
Editing photos on your iPhone — Part 1: Basic color correction


Backstory for this “Editing Photos on your iPhone” series:

People often ask me what camera I use to take the photos for this blog. And most of the time, they’re surprised to find out that many of the photos were taken and edited on my iPhone. The iPhone camera is no joke, especially with features like Portrait mode. It’s also super convenient for taking photos while traveling or cooking (the idea of having an expensive DSLR by your stove kinda turns me off). You can also find some amazing apps on the app store that will work just as well as Photoshop and prevent you from airdropping photos back and forth between your phone and your computer.

Part 1 TL;DR:

“I went to a beautiful place on a gloomy day. All my photos look depressing af.”


The unedited photo:

How to edit your photos to look amazing on an iPhone
 

Ah yes, we chose to go to one of the most beautiful destinations in Australia on a gloomy day and as a result, snapped some depressing-looking photos. But let’s not delete it yet. We can do a lot of post-processing of this photo (all on our phones!) to make it look gorgeous.

First, let’s identify what’s wrong with the photo:

  1. It’s dark and depressing. Lots of shadows

  2. Waters are greenish. That’s kinda weird… and kinda gross.

  3. Left side of photo is really bright from the sun while the right side is super dark

 
How to edit your photos to look amazing on an iPhone
 
IMG_7788.PNGHow to edit your photos to look amazing on an iPhone

First of all, let’s do our most basic editing to ensure the photo’s lighting is corrected before we start doing more of the creative stuff. I like to start off with the Adobe Lightroom CC app to do these initial edits. I can save this edited photo as a “baseline” to start with. Then, I can go into more creative apps like VSCO to do some extras at the end.

  • Exposure (+0.78)—making the image brighter overall

  • Contrast (+4)—making the image more vibrant, and colors pop out more

 
Editing photos on your iPhone — Part 1: Color Correction
How to edit photos on your phone — Part 1: Color Correction
 

A lot of the “depressing-ness” of this photo also comes from the fact that there is a huge amount of shadow on the rocks, making you barely able to see their details. We can solve that by doing the following:

  • Shadows (+15)—Increasing this field will make the shadows less prominent, while decreasing it will make them heavier

We can also amp up the colors to make the photo look more exciting and less depressing. YAY COLOR.

  • Vibrance (+26)

  • Saturation (+25)

 
Editing photos on your iPhone — Part 1: Color Correction
 

K, cool. So now our photos is bright and colorful and less depressing. But did it get a little too bright in the process? Maybe. It looks like the sky got a little overexposed on the left side of the image.

We can solve this by using the handy-dandy selective edits tool that Lightroom offers as one of its paid features (around a dollar per month). This step is totally unnecessary. But if you’re a little OCD like me, here are the steps you should take to get rid of that brighter area:

  • In Selective Edits, use the circle tool to select the area you want to edit. You can also adjust the location and size of your circle. Everything in this circle will be adjusted to your liking without affecting the rest of the photo

  • Bring down the exposure in the “light” panel.

Note that this trick isn’t just for exposure edits. You can take advantage of this selective editing tool to give more color to parts of images that need it (this especially works well for food photos).


Edits after using the Lightroom app:

Editing photos on your iPhone — Part 1: Basic color correction
 

Pretty nice eh? The photo’s still not perfect, but it’s definitely a lot better than the original! People will start questioning you at this point: what camera did you use to take this?

One negative thing that stands out about this photo is how green the waters look. Not the most appealing, right? Let’s fix that by opening this photo up in our second app: VSCO.

 
Editing photos on your iPhone — Part 1: Color Correction
 

To make the greens in the water less prominent, and to make the oceans look more blue, go to the “HSL” tab at the very right side of the edits carousel. Note that this feature is also for members only. But I find a lot of VSCO’s member-only features super helpful, especially if you don’t want to import this photo into photoshop on your computer. Plus, you get to edit videos on VSCO too. And a bunch of film filters.

More about the HSL tool from VSCO: “It gives you control to adjust the Hue, Saturation and Lightness of a specific color in the image.  It gives you fine-tuned control over 6 hue regions— red, orange, yellow, green, blue, and purple. By selecting one color at a time, you can isolate adjustments for that particular color without affecting other color present in the image.”

In my case, I wanted less green and more blue.

So, in the greens tab:

  • Saturation (-3.3)—makes the color green less saturated overall

In the blues tab:

  • Saturation (+2.1)—makes the blues more saturated

  • Hue (+2.1)—makes the blues have more of a magenta hue rather than a green hue

 
Editing photos on your iPhone — Part 1: Basic Color Correction
Editing photos on your iPhone — Part 1: Color Correction
 

After you’ve done most of your basic edits to the photo, you can get into the fun part: choosing a filter! I absolutely love the wide range of filters that VSCO provides, and the emotions that they convey. But sometimes, a filter may be a little too vibrant, and you may need to dial it down, just allowing it affect your photo by a teeny-tiny bit. Remember, you don’t want to let your photo speak for the filter, you want your filter to speak for the photo.

  • Decided on the filter, L6.

  • Dialed it down to only +2.2, because it was a little too blue and orange in its full capacity.

  • Dialed down the hue and saturation for blues in HSL, because the filter was making the photo look too blue.

 
Editing photos on your iPhone — Part 1: Basic Color Correction
Editing photos on your iPhone — Part 1: Color Correction
 

Last but not least, let’s sharpen our photo a little and bring up the saturation just a tiny bit. Don’t go overboard with the sharpening though—it will end up making your photo look hand-drawn rather than like a real photo.


Final photo with Lightroom app + VSCO edits

What do you think? Here’s the original photo and the edited one side by side:

 
Editing photos on your iPhone — Part 1: Color Correction


Thought this was helpful? Go on to part 2 to learn more about how you can make unwanted stuff magically disappear in your photos!

♥ Cindy

 
Lifestyle, 2Cindy Zhang Comment